This post may contain affiliate links. Please see our disclosure policy for more details.
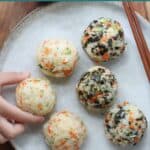
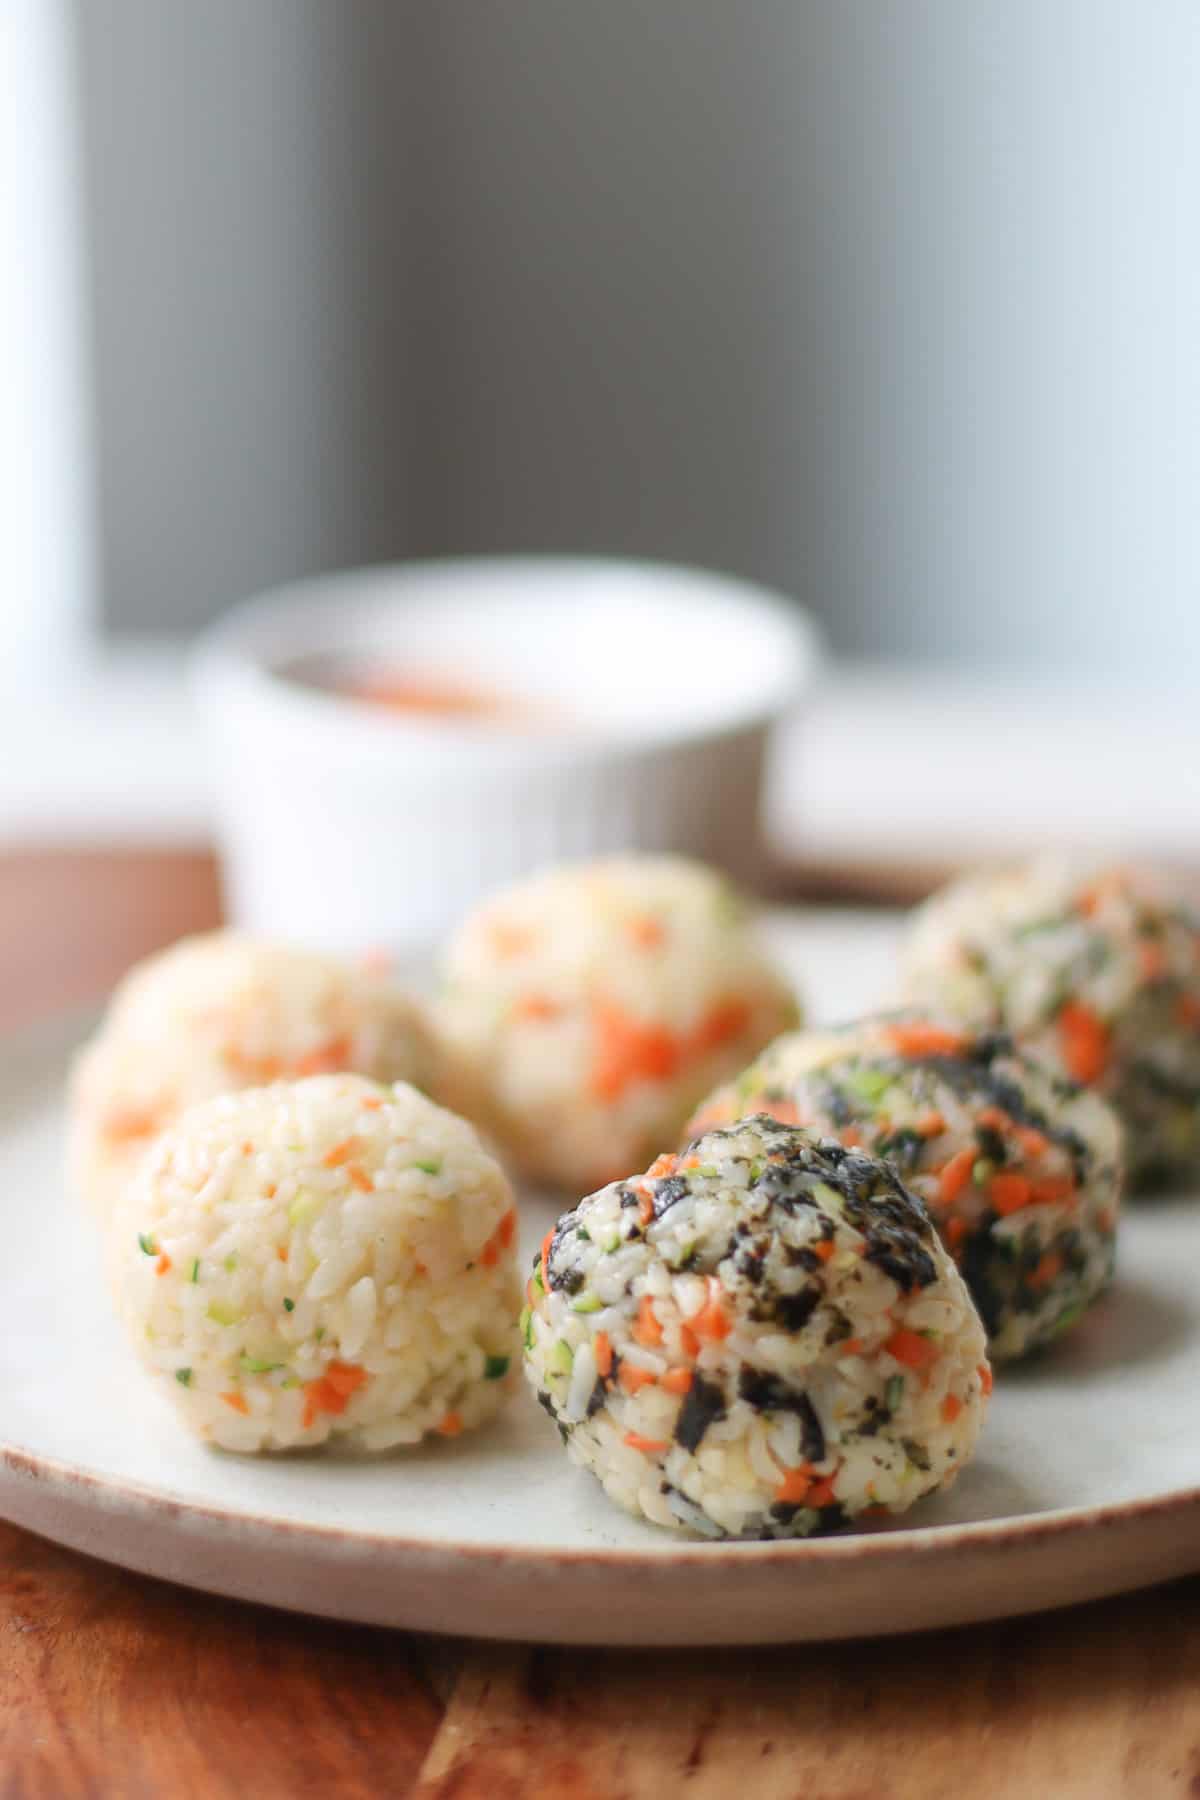
These jumeokbap, or Korean rice balls, turn warm, seasoned rice into a simple yet satisfying snack or light meal. Traditionally shaped by hand and packed into lunchboxes, they’re easy to customize with classic Korean flavors or savory additions like bulgogi or salmon.
Why You’ll Love This Recipe
- Simple and flexible – start with seasoned rice and customize from there
- Naturally gluten-free
- Great for meal prep – easy to make ahead and pack
- Authentic base with modern, practical variations
What is jumeokbap?
Jumeokbap literally translates to “fist rice,” referring to rice that’s gently shaped by hand into small balls or rounds. Unlike kimbap, which is rolled in sheets of seaweed with structured fillings, jumeokbap is mixed and formed more casually.
At its most basic, jumeokbap is made with:
- Warm short- or medium-grain rice
- Sesame oil
- Salt
- Roasted seaweed
From there, ingredients like vegetables, proteins, or sauces can be mixed directly into the rice or tucked into the center.
Jumeokbap is often enjoyed as a convenient on-the-go snack or packed into bento-style lunches (check out these easy bento box lunch ideas).
Over time, these Korean rice balls have evolved to include a wide variety of ingredients, making them a flexible and satisfying option for quick meals or travel, like these healthy road trip snacks for babies and kids.
Here, I’m sharing two delicious variations, but jumeokbap are easy to customize. Feel free to use what you have on hand or create your own family-favorite combinations, like these tasty chicken rice balls.
Table of Contents
Key Ingredients
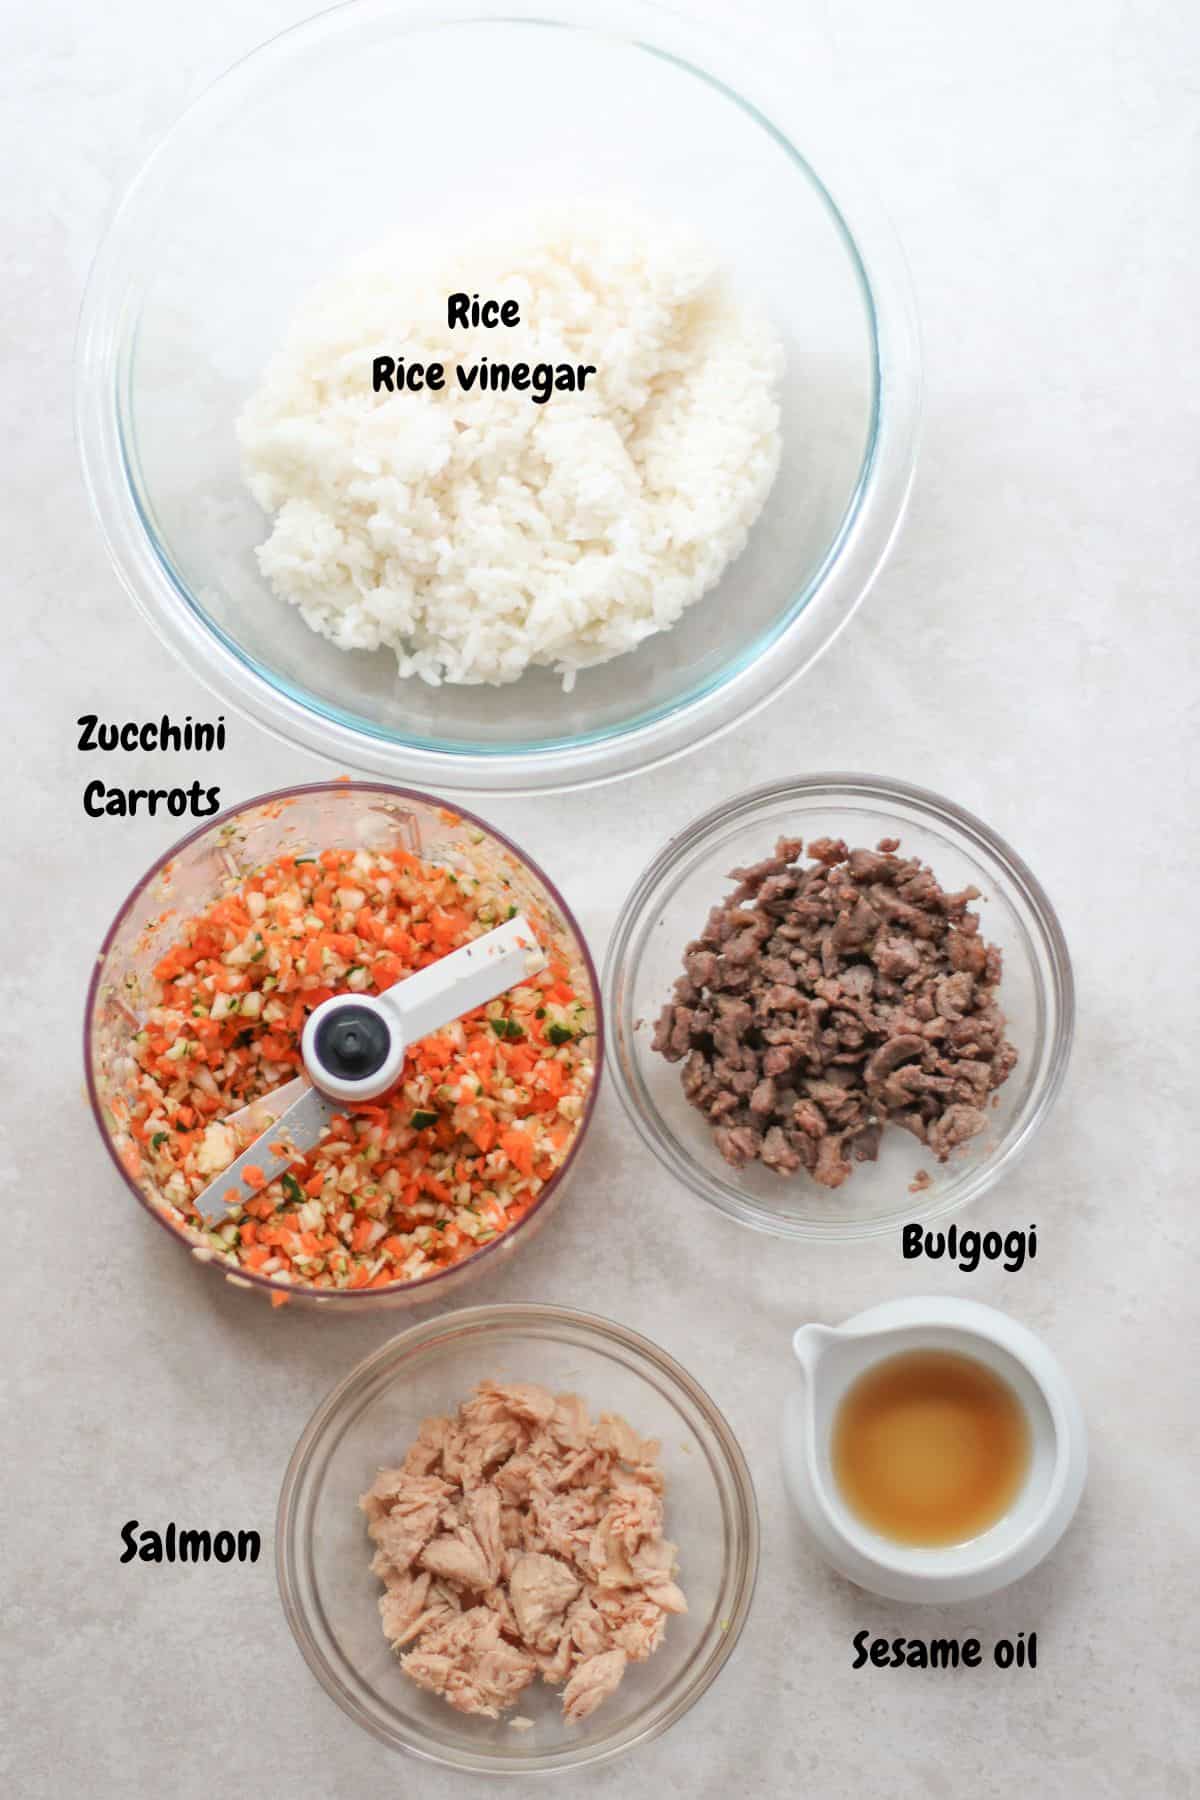
- Warm rice – you will need to use short grain or medium grain rice, which has more starch than long grain rice, like jasmine or basmati rice that are best for fried rice.
- Vegetables – you can use whatever you have on hand. Here I am using zucchini and carrots. Just be sure to cook them prior to combining with rice.
- Toasted sesame oil – I say 1 tablespoon but honestly, I am quite heavy handed with it. It adds SO much flavor and smells heavenly.
- Seaweed – You can use crushed seaweed sheets, seaweed snacks, or furikake seasoning (seasoned seaweed flakes)
- Filling – bulgogi (like this baby-friendly Korean Bulgogi) is a classic addition but my kids especially love the salmon mayo filling with kewpie mayonnaise (or Korean mayo). Unlike regular mayonnaise, these are made with egg yolks resulting in creamier and richer flavor. For more filling suggestions, be sure to check out the “variations”section below.
How to Make Jumeokbap
You’ll find the full recipe card with all the exact measurements at the bottom of this post.
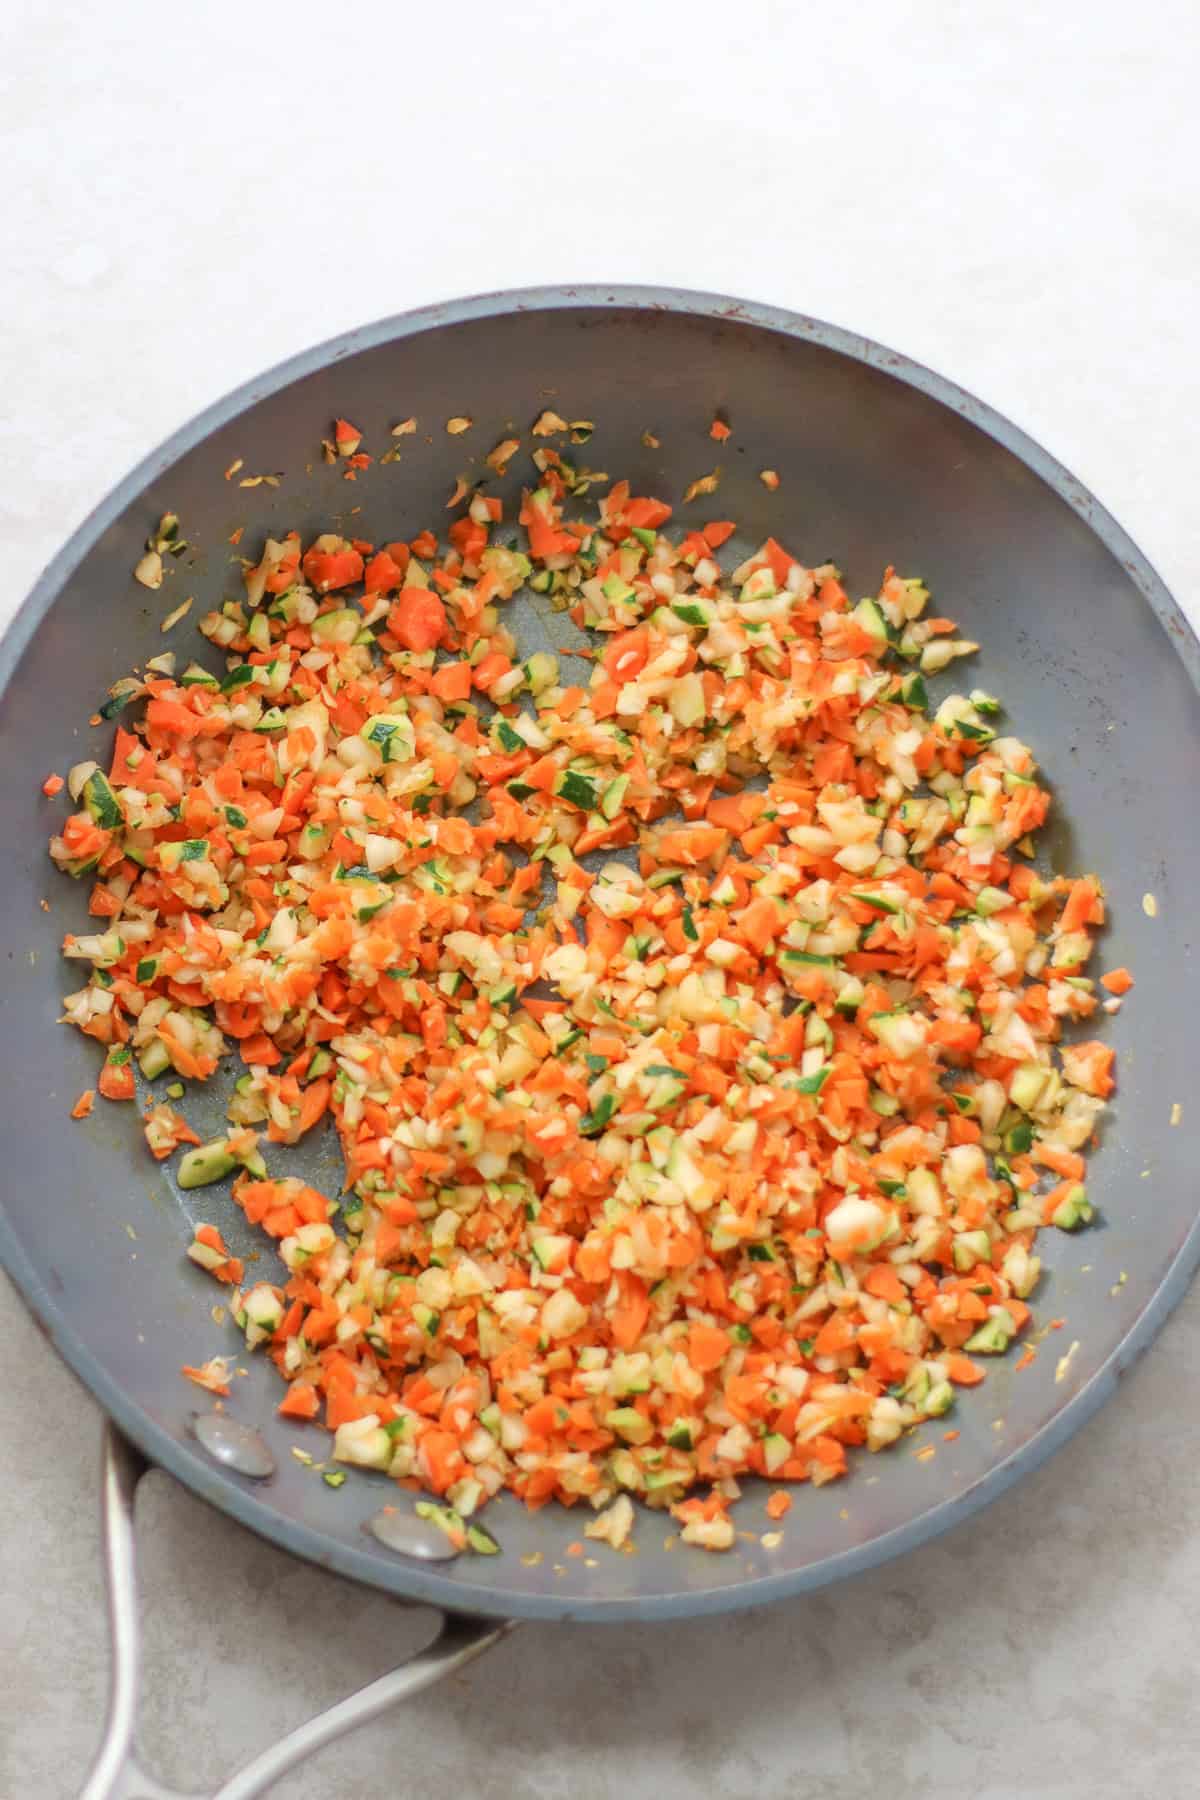
Step 1: Heat skillet over medium high heat. Add 1 teaspoon of sesame oil and all the vegetables. Cook until softened, about 3-4 minutes.
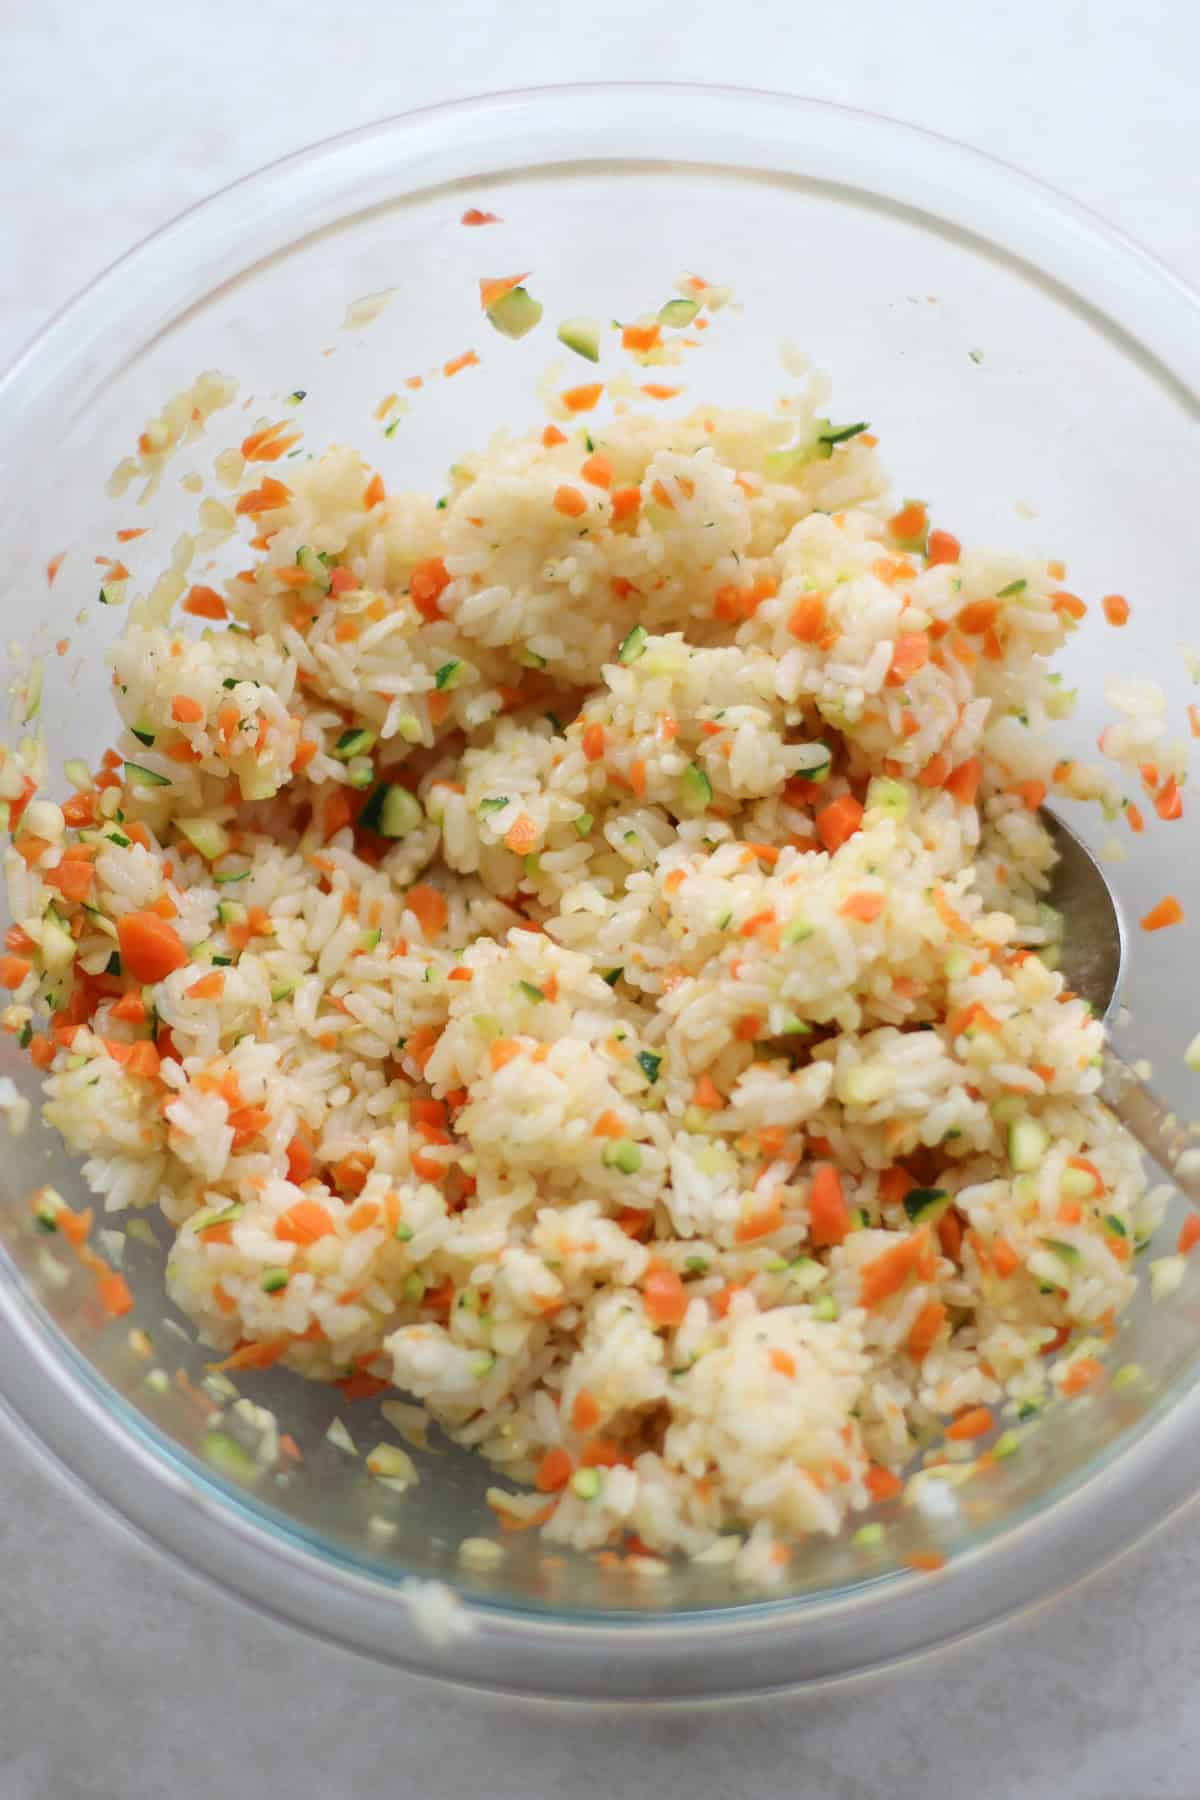
Step 2: In a large bowl, combine rice with the cooked vegetables, additional sesame oil, and rice vinegar.
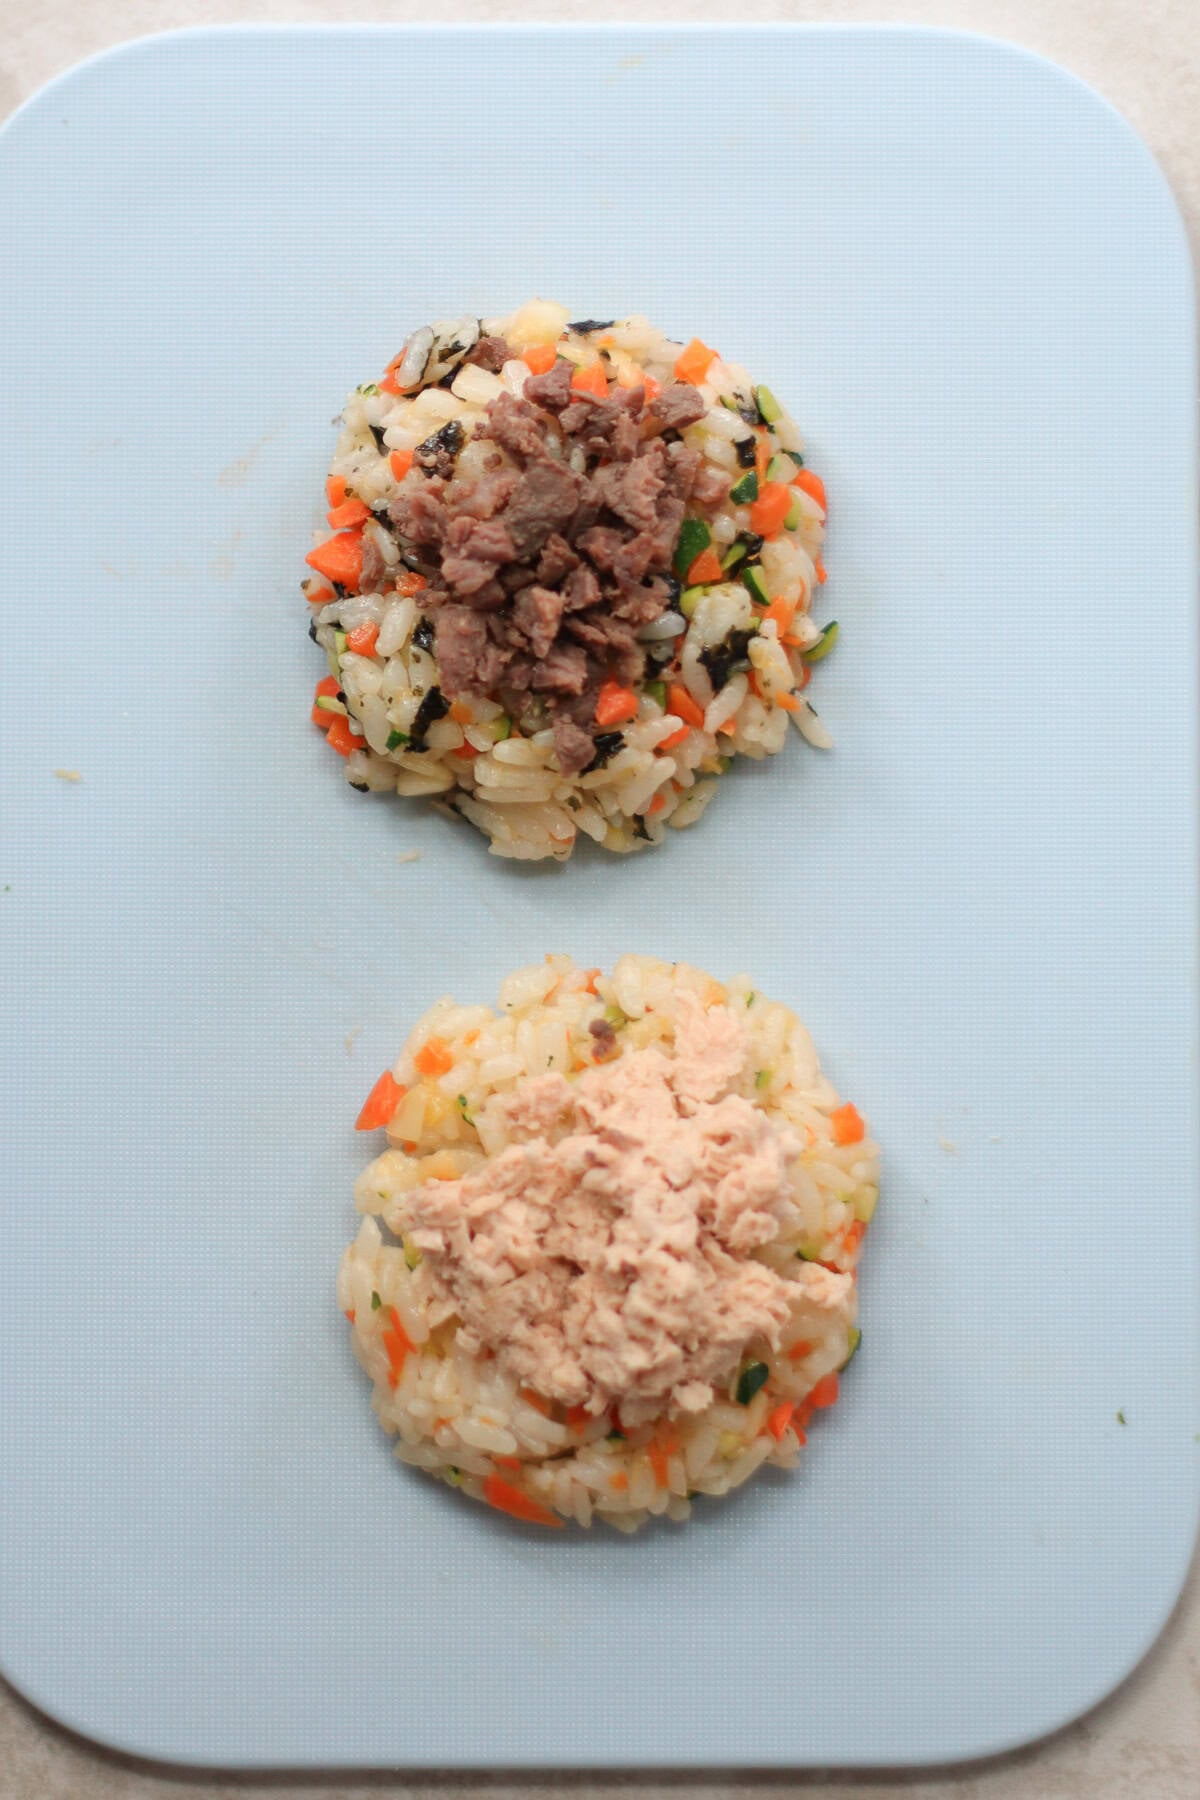
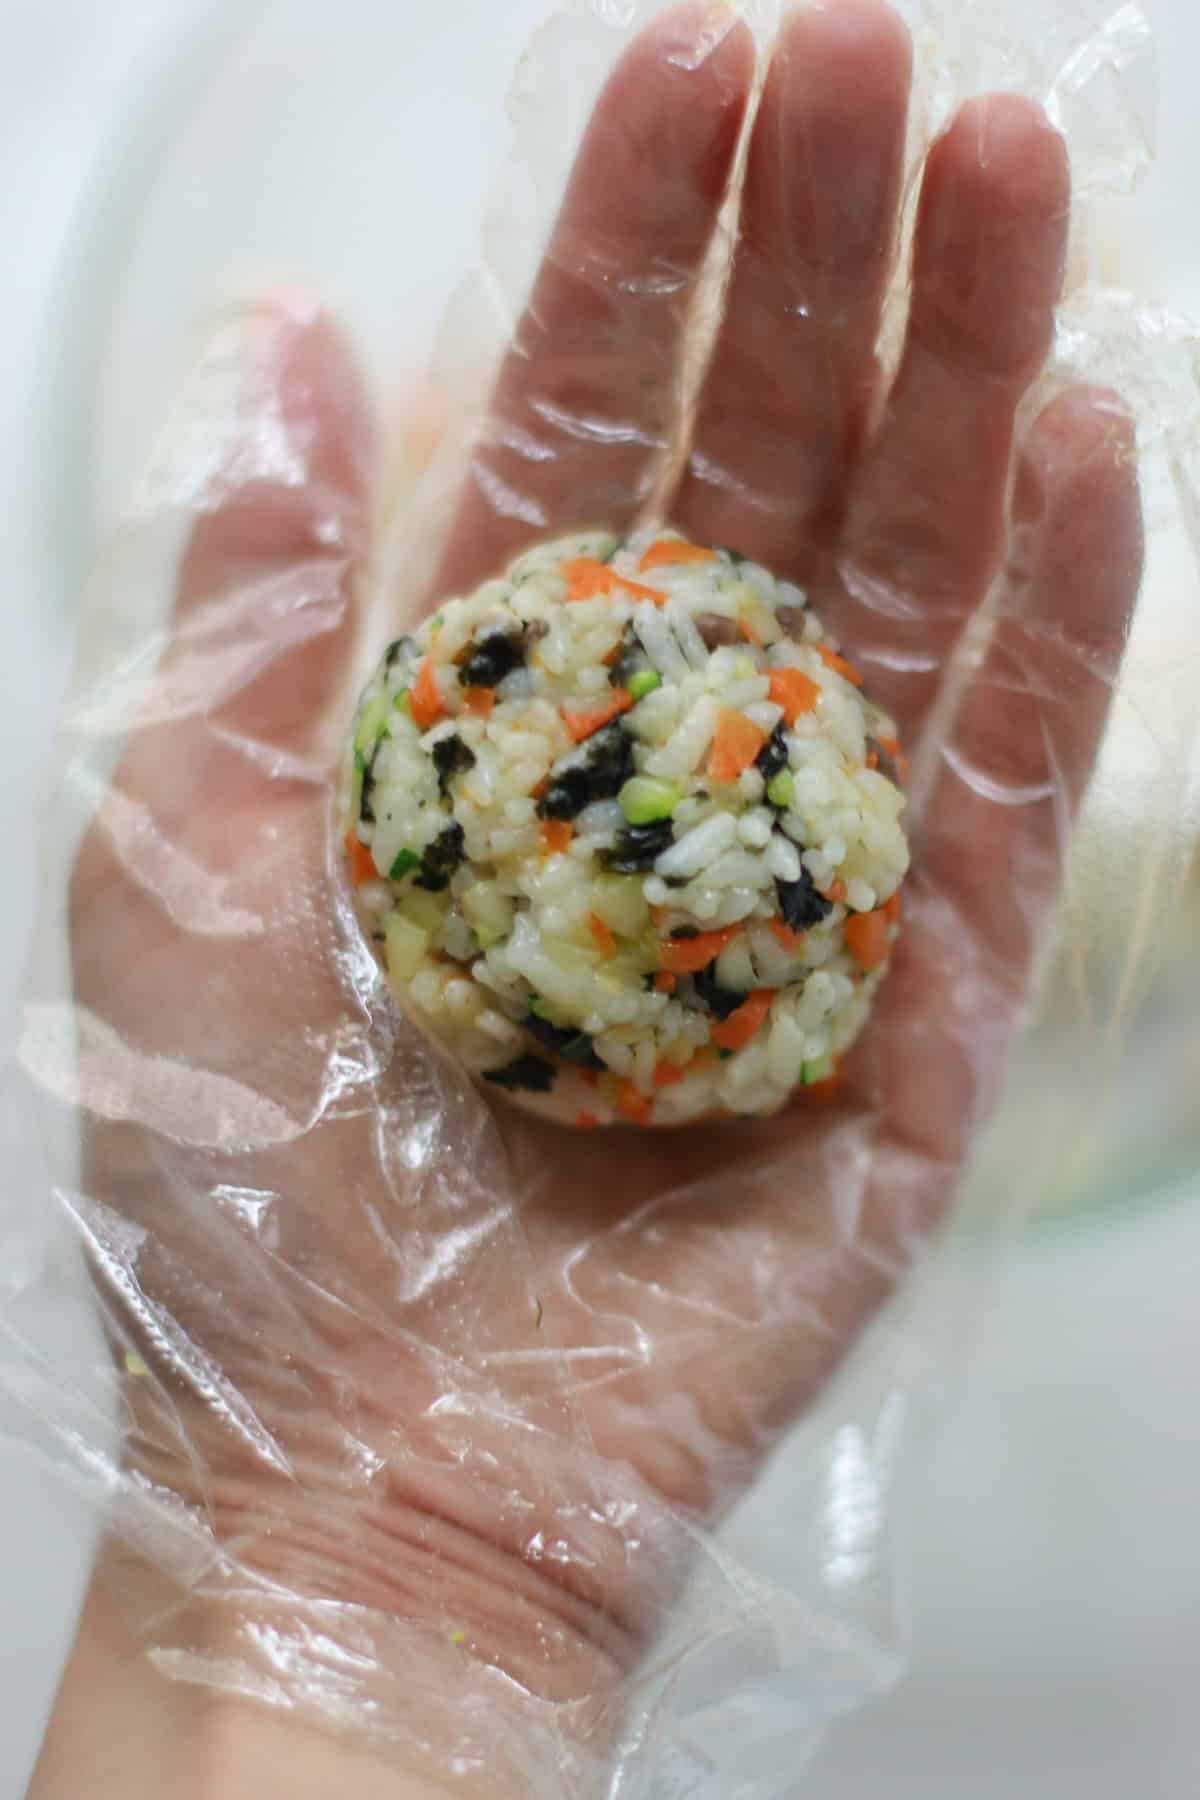
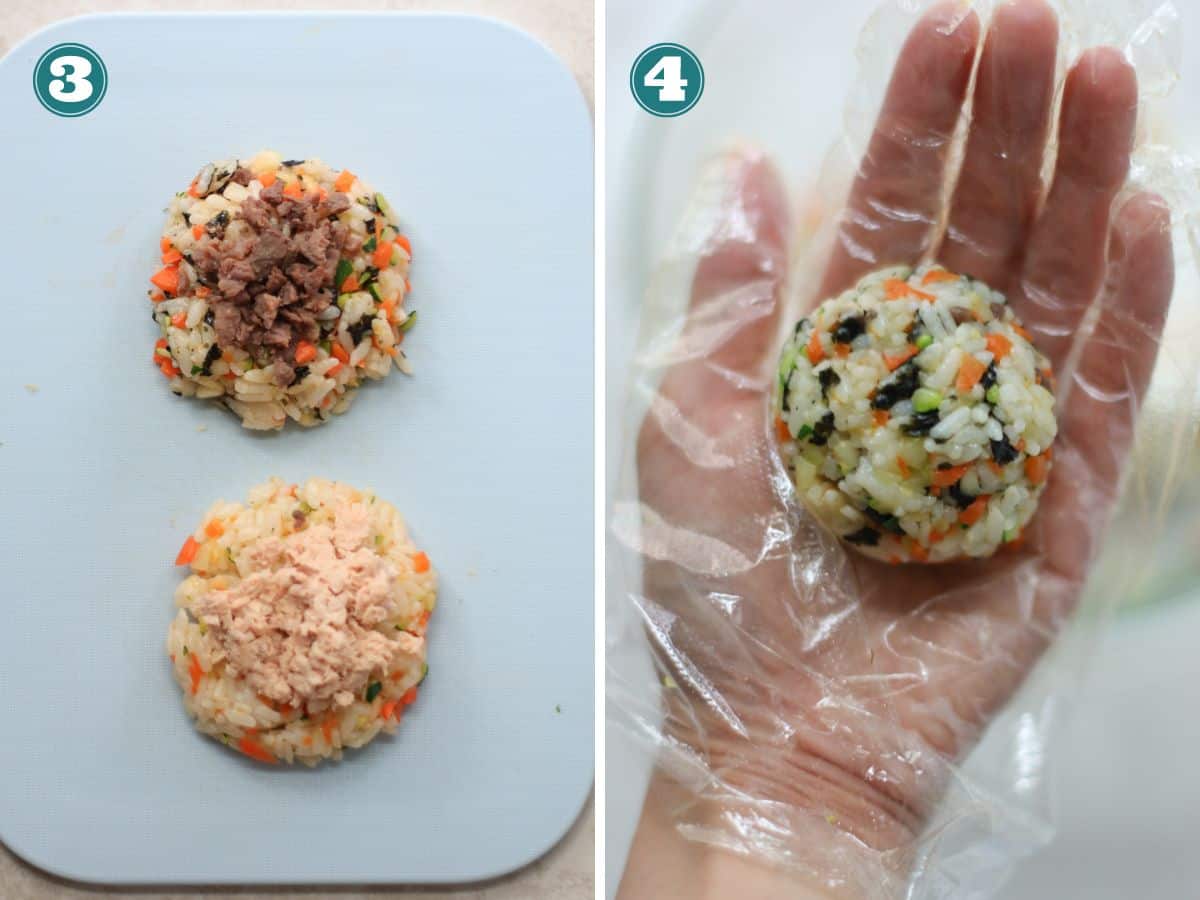
Step 3: Scoop about 2 tablespoons of the rice mixture and flatten it. Add your filling (don’t overstuff), top with a little more rice and shape into a compact ball. To make the process go faster and easier, use food-safe gloves (these are a must-have!) coated with a little bit of sesame oil to prevent sticking.
Step 4: Repeat until all the rice mixture is used up.
Expert Tips
- Be sure to wash your rice until the water runs clear. This will ensure the rice will have just the right amount of stickiness.
- If using leftover rice, cover with a damp paper towel and microwave until it’s sticky again
- While jumeokbap are meant to be large balls, you can certainly shape them into smaller balls for babies and toddlers.
- For the seaweed sheets, you can crush with your hands, finely chop using a mini chopper, or cut into thin strips or pieces with kitchen shears. Or simply sprinkle some furikake seasoning.
- It is best to use gloves as rice is quite sticky. If you don’t have any, you will need to work with slightly wet hands.
- Season gradually. Start with less salt and sesame oil, then adjust, especially if your mix-ins are already seasoned.
- Finely chop add-ins. Smaller pieces help the rice balls hold together and ensure even flavor in every bite.
Variations
As mentioned, there are endless ways to customize these Korean rice balls!
Here are some suggestions:
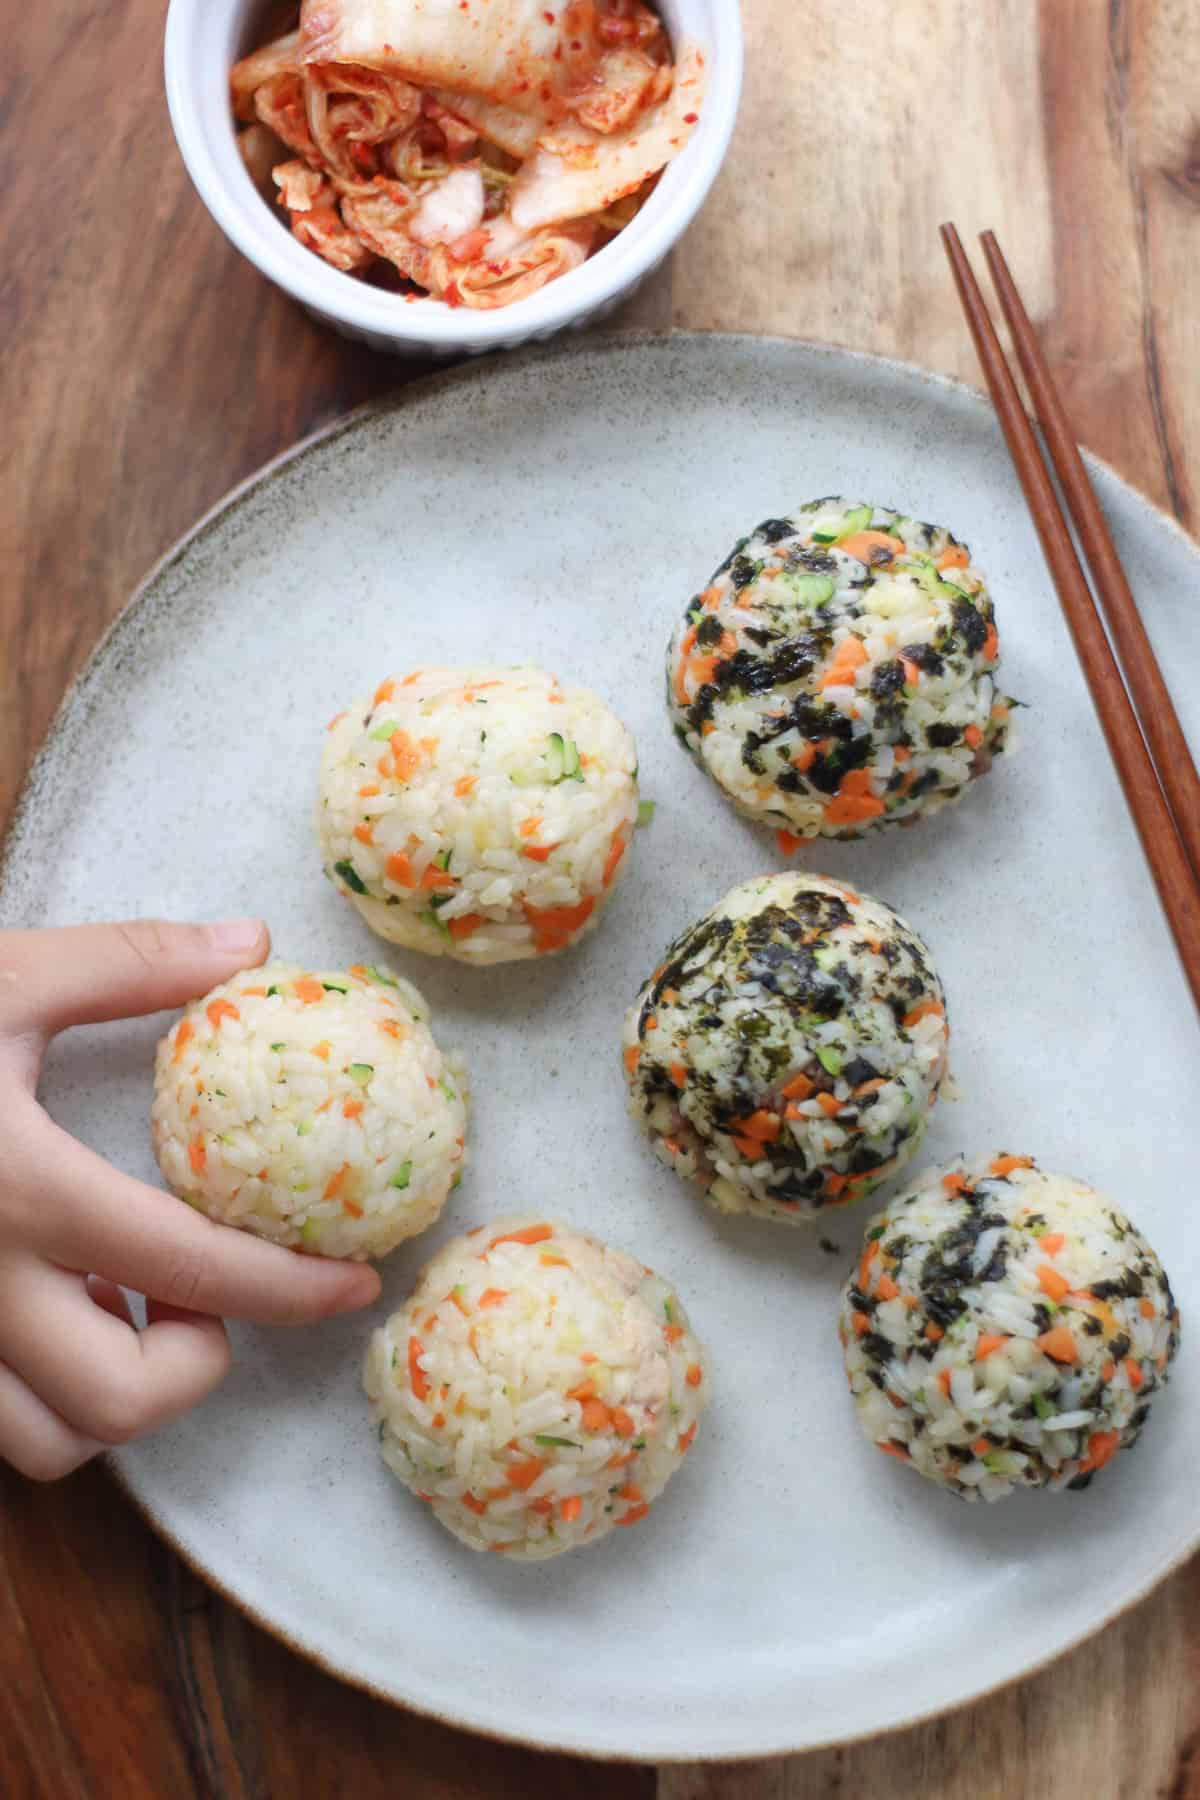
- Classic Jumeokbap – Seasoned rice with sesame oil, salt, and seaweed. Simple and traditional.
- Bulgogi Jumeokbap – Mix finely chopped bulgogi directly into the rice for a savory, protein-rich option. Try this easy Korean chicken bulgogi.
- Salmon Mayo Jumeokbap – Combine flaked salmon with a small amount of mayo, then fold into the rice or use as a center filling.
- Kimchi Jumeokbap – Finely chop well-fermented kimchi and mix it into the rice for bold flavor. A drizzle of sesame oil pairs well here.
Ooh! And here’s a super fun idea! Use the rice mixture to turn them into the most yummiest savory rice pancakes!
And if you’re looking for another handheld rice creation, you’ve gotta try this delicious and easy rice burger recipe!
Serving Suggestions
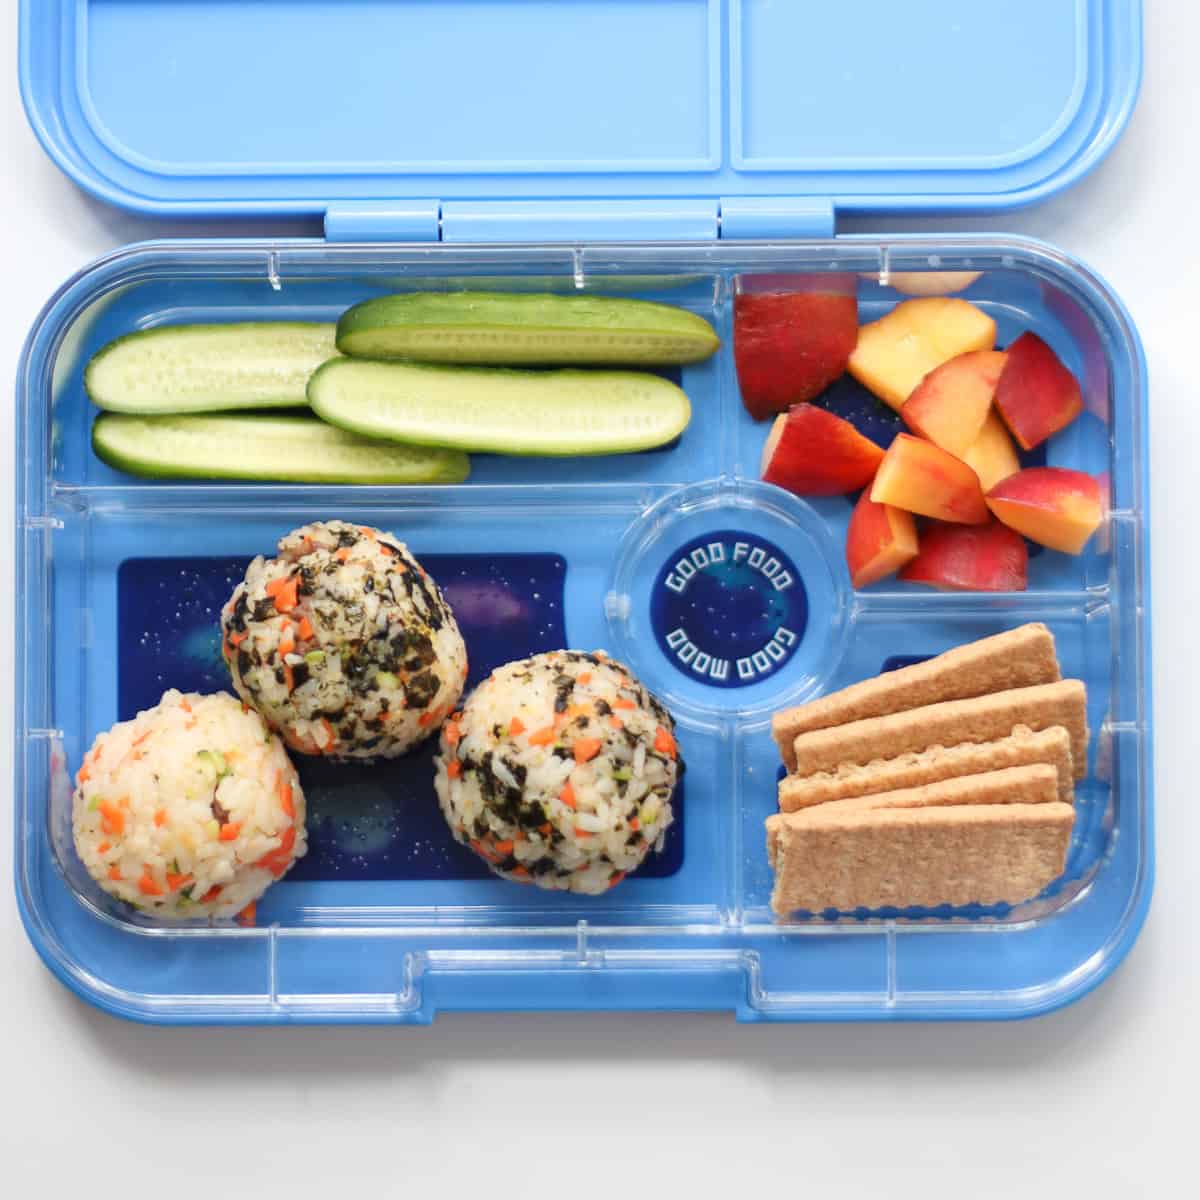
Enjoy these hand-shaped rice balls as a snack (they’re an awesome toddler snack), side dish, or pack for school lunch boxes, picnics, road trips, or any outing.
If recommend wrapping them individually in plastic wrap so they won’t dry out.
Jumeokbap (Korean rice balls) FAQs
Short- or medium-grain rice works best because it’s slightly sticky and holds together easily.
Yes. Seaweed adds flavor, but jumeokbap can still be made with just sesame oil and salt.
Jumeokbap is shaped by hand and mixed with seasonings, while kimbap is rolled in seaweed with structured fillings.
Store cooled jumeokbap in an airtight container in the refrigerator for up to 3 days. You can also turn leftovers into healthy fried rice.
Yes. Jumeokbap can be made a few hours in advance and stored in the refrigerator. For best texture, let them sit at room temperature briefly before serving.
To reheat, microwave with a damp paper towel.
To freeze, wrap each rice ball in plastic wrap and store in freezer-safe bag or container. Freeze for up to 1 month.
Allow them to cool completely, then pack in a tightly sealed container. They’re best enjoyed the same day they’re made.
More Rice Recipes


Did you make this recipe? Leave a rating below and let me know how you liked the recipe! Your feedback means so much to me!

Jumeokbap (Korean Rice Balls)
Equipment
Ingredients
For the Rice
- 2 cups cooked warm rice, short or medium grain rice
- 1 cup finely chopped zucchini and carrots, see note
- 3 teaspoons toasted sesame oil, divided
- 1-2 teaspoons seasoned rice vinegar
- 1/4 cup crushed seaweed sheets (optional), see note
Beef filling
- 1/2-3/4 cup bulgogi OR
Salmon filling
- 4 ounces canned salmon with
- 1 tablespoon Japanese or Korean mayo
Instructions
- Heat skillet over medium high heat. Add 1 teaspoon of sesame oil and all the vegetables. Cook until softened, about 3-4 minutes.
- In a mixing bowl, combine rice with vegetables, sesame oil, and rice vinegar.
- Scoop about 2 tablespoons of the rice mixture and flatten it. Add your filling (don't overstuff), top with a little more rice and shape into a compact ball. To make the process go faster and easier, use food-safe gloves coated with a little bit of sesame oil to prevent sticking.
- Repeat until all the rice mixture is used up.


This looks so yummy! I’m trying to figure out which lunchbox you have in the post, the blue one that says Good Food Good Mood inside the round compartment. Is it the Yumbox Tapas? It looks here like a perfect size for what I’m looking for, but the Tapas says it’s for adults and I’m looking for a box for my 3 year old who is starting preschool. Someone gave us a little Bentgo but it’s tiny though!
Hi! It is the Yumbox tapas but for 3 year old, you may like their original or panino. Check out my blog post “Best lunch box for toddlers and kids” for our favorites!
My 3 year old could easily eat the lunch you show above in the Tapas, or 1-2 full-size sandwiches, so I’ve been really worrying about a too-small lunchbox that won’t send enough food to school with him! On other days he lives on air, but there’s no way to predict which day will be which.
I can totally relate! Their unpredictable appetites and preferences can make lunch box packing so challenging. I do believe once you start packing lunches you will start to see a pattern. I would err on the safe side and pack more the first several days and depending on how much food comes back eaten or not, you can adjust accordingly. Most kids tend to eat less at school but again every child is different so follow your child’s lead :).
Are these lunchbox friendly at room temperature or would you recommend using an icepack or keeping it warm in a thermos? Thanks!
Hi! I would pack it with an icepack no need to warm in thermos
oh my gawd, I love joomuk bap!! love your spin on it. . looks so good!!
Looks amazing and so delicious, Min! I just want to reach and grab it…
Hi, i’m going to try this recipe out soon and i’m nervous! Just one 1 question – the amount of water to be used to cook the glutinous rice in is intentionally one cup right?
Thank you…
Hi! Oh my goodness I’d completely forgotten about this recipe I definitely need to update to include more info. But yes 1 cup!
These look so tasty and healthy! What an interesting snack!
xxo,
Kelly
https://asideofsweet.com
Wow – these look so tasty and unique, Min! I’m a huge fan of black sticky rice, so I’m pretty confident that I would LOVE these. I hope you had a wonderful holiday with your family!
Min these rice balls look perfect for entertaining! So pretty!
These look absolutely addictive!! Happy holidays Min, it’s been great getting to know you the last few months. I’m not sure if you know this, but I owe a lot to you. Not only did you motivate me to buy my 50mm lens, you’re the reason I applied to the Recipe Redux. Thanks for being such an inspiration!
I truly enjoyed getting to know you as well, Sonali, and am excited to see what 2015 holds for the both of us ;). I had absolutely NO idea and am grateful for you sharing. Love recipe reduxing with you! And I don’t know about you, but as I’m going through all my photos from this year, all I have are food shots!! I want some photos of faces in the new year…
I love rice balls, but for whatever reason have never tried sweet ones with fruit and nuts. I’d love these for a snack or side, and they are so pretty too!
These look fantastic Min! They sound great for Christmas too 🙂