This post may contain affiliate links. Please see our disclosure policy for more details.

This Healthy Orange Chicken recipe delivers all that we all love about Asian takeout. Ready in 30 minutes, it’s perfect for busy weeknights when you need a quick, nutritious meal the whole family will love!

Why You’ll Love This Healthy Orange Chicken
Craving that classic Chinese Orange Chicken taste but want something healthier and family-friendly? You’re in the right place. Trust me, you’ll want to keep this one handy in your recipe collection!
Making this Orange Chicken at home is great because you know exactly what’s in it. No mysterious additives or preservatives here—just wholesome ingredients you can feel good about feeding to your family.
I love the fact that you can create restaurant-quality Orange Chicken at home for way less than takeout! This recipe lets you enjoy all that delicious flavor without breaking the bank.
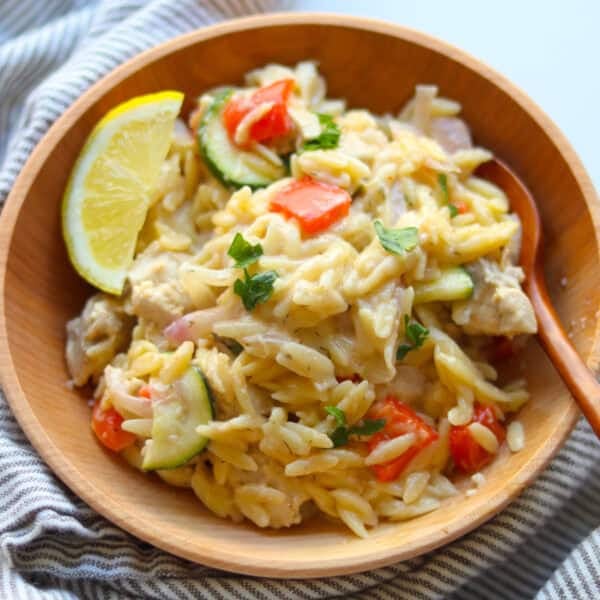
For more healthier versions of your favorite Asian takeout meals, you don’t want to miss this Slow Cooker Sesame Chicken, sheet pan teriyaki chicken, and Low-Sodium Moo Goo Gai Pan.
And if you love sweet and savory combos, try my Sheet Pan Honey Sesame Chicken with Vegetables—it’s an easy, balanced meal with that takeout-inspired flavor, all made in your oven.
Related: Healthy Chicken Recipes for Toddlers and Kids
Table of Contents
Ingredients

I am highlighting just the ones that need further explanation. The complete list is in the recipe card below.
- Chicken – Whether you choose boneless, skinless chicken breast or thighs, they’re the protein-packed base that gives our dish its hearty goodness.
- Cornstarch – Coats the chicken pieces to create a crispy exterior when cooked, and it also serves as a thickening agent for the sauce.
- Orange Juice – brings a burst of fresh, tangy flavor to our sauce, giving it that unmistakable orange chicken taste we all love.
- Chicken Broth – Adds depth and richness to the sauce.
- Soy Sauce – Adds that special umami kick and depth to the sauce.
- Rice Vinegar – Balances out the sweetness with a subtle tang, adds a touch of acidity that brightens up the sauce and keeps it from tasting too heavy.
- Ginger – Adds so much flavor and complements the orange juice and zest.
- Orange Zest – Don’t leave this out!
Step-by-Step Instructions

Step 1: In a small bowl, combine 1 tbsp cornstarch, 1 tbsp water, salt, and pepper. Stir until smooth. In a large bowl or ziploc bag, add the chicken and pour in the cornstarch mixture. Toss to coat evenly. Let it sit for at least 15 minutes at room temperature, or up to an hour in the refrigerator if you have time.

Step 2: Make the sauce: In a bowl or liquid measuring cup, combine all the ingredients minus the cornstarch.

Step 3: Cook the Chicken: In a large skillet or wok, heat a tablespoon of avocado oil or vegetable oil over medium-high heat. Add the marinated chicken pieces, spreading them out into a single layer. Let them sear without moving them for about 4-5 minutes, flip and cook for another 4-5 minutes until cooked through. Remove the chicken from the skillet and set aside.

Step 4: Add sauce to the same pan and bring to a simmer (NOT boil). Pour in the cornstarch slurry and stir constantly as the sauce thickens and becomes glossy. This should take about 1-2 minutes. Add the chicken back in and stir to coat all the pieces in the sauce.
Recipe Tips
- Adding cornstarch to chicken marinade tenderizes the chicken while helping to create a crispy, golden exterior on the chicken when cooked.
- Don’t overcrowd the pan when cooking chicken to ensure each piece cooks evenly and gets a good sear.
- If the sauce is too thick, you can thin it with a little more chicken broth or water. If it’s too thin, let it simmer a few more minutes until reduced to your liking.
Serving Suggestions

Wondering how to serve up this mouthwatering Healthy Orange Chicken? Here are some tasty suggestions to make it a complete meal:
- With Rice or Noodles – Whether you prefer classic white rice, hearty brown rice, or flavorful lo mein noodles (check out this vegetable stir fry noodles), they all make a perfect base for your Orange Chicken.
- Cauliflower Rice — If you’re looking for a lighter option, try serving your Orange Chicken over a bed of cauliflower rice. It’s a tasty and nutritious alternative that pairs perfectly with the bold flavors of the dish.
- Side of Veggies – Broccoli, bell peppers, snap peas, and carrots are all great options that complement the flavors of the dish.
- Garnishes – Sprinkle with chopped green onions and sesame seeds for a pop of color and texture.
Storage
Transfer it to an airtight container and pop it in the fridge. It’ll stay fresh for up to 3-4 days. When you’re ready to enjoy it again, just reheat it in the microwave or on the stovetop until heated through.
Once cooled, transfer your leftover orange chicken to an airtight container or freezer bag and freeze for up to 2-3 months. To reheat, thaw it overnight in the fridge and then reheat it in the microwave or on the stovetop until heated through.
Recipe FAQs
Absolutely! While fresh orange juice adds a vibrant flavor, bottled orange juice works just fine if that’s what you have available. Just make sure it’s 100% pure juice without any added sugars or flavors.
Simply swap out the low sodium soy sauce for tamari, liquid aminos, or gluten-free soy sauce to make this recipe gluten-free. Check the labels to ensure they’re certified gluten-free if you have celiac disease or a gluten sensitivity.
If you prefer a spicier sauce, feel free to add a pinch of red pepper flakes or a dash of your favorite hot sauce to amp up the heat. Adjust to your taste preferences!
More Asian Recipes


Did you make this recipe? Leave a rating below and let me know how you liked the recipe! Your feedback means so much to me!

Healthy Orange Chicken
Video
Equipment
Ingredients
Marinade
- 1 pound boneless, skinless chicken breast or thighs, cut into 1 inch pieces
- 1 tablespoon cornstarch
- 1 tablespoon water
- 1/2 teaspoon salt and pepper (optional)
Sauce
- 1/2 cup orange juice
- 1/4 cup chicken broth
- 2 tablespoons low sodium soy sauce
- 1 tablespoon rice vinegar
- 1 tablespoon honey or maple syrup
- 3 garlic cloves, minced
- 1 teaspoon grated ginger
- 2 teaspoons grated orange zest
- 2 teaspoons cornstarch (fully dissolved in 1 tablespoon water)
To serve
- chopped green onions, sesame seeds
- Rice or noodles
Instructions
- Prepare the Marinade: In a small bowl, combine 1 tbsp cornstarch, 1 tbsp water, salt, and pepper. Stir until smooth. In a large bowl or ziploc bag, add the chicken and pour in the cornstarch mixture. Toss to coat evenly. Let it sit for at least 15 minutes at room temperature, or up to an hour in the refrigerator if you have time.
- Make the sauce: In a bowl or liquid measuring cup, combine all the ingredients minus the cornstarch.
- Cook the Chicken: In a large skillet or wok, heat a tablespoon of avocado oil or vegetable oil over medium-high heat. Add the marinated chicken pieces, spreading them out into a single layer. Let them sear without moving them for about 4-5 minutes, flip and cook for another 4-5 minutes until cooked through. Remove the chicken from the skillet and set aside.
- Cook the sauce: add sauce to the same pan and bring to a simmer (NOT boil). Pour in the cornstarch slurry and stir constantly as the sauce thickens and becomes glossy. This should take about 1-2 minutes. If the sauce is too thick, you can thin it with a little more chicken broth or water. If it’s too thin, let it simmer a few more minutes until reduced to your liking.
- Coat with chicken: add chicken back into the pot and stir until all the pieces are nicely coated in the sauce.
- Garnish with sesame oil and green onions and serve with rice or noodles.
Notes
- Adding cornstarch to chicken marinade tenderizes the chicken while helping to create a crispy, golden exterior on the chicken when cooked.
- Don’t overcrowd the pan when cooking chicken to ensure each piece cooks evenly and gets a good sear.
- If the sauce is too thick, you can thin it with a little more chicken broth or water.
- If it’s too thin, let it simmer a few more minutes until reduced to your liking.


So delicious after the first time I made it that I had to put it in my meal planner to make sure we had it again very soon! So easy, and so delicious. I’ve made it with both freshly squeezed OJ and bottled OJ (pure; no sugar) and found the sweetness level to be best with bottled juice. So, going forward that is what I will always do! Great meal with rice and a veg side. Yum! 3 year old approved.
Thanks so much for sharing, Jenny!
the sauce is super delicious and so simple to make!
So glad you enjoyed this!!