This post may contain affiliate links. Please see our disclosure policy for more details.
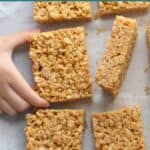
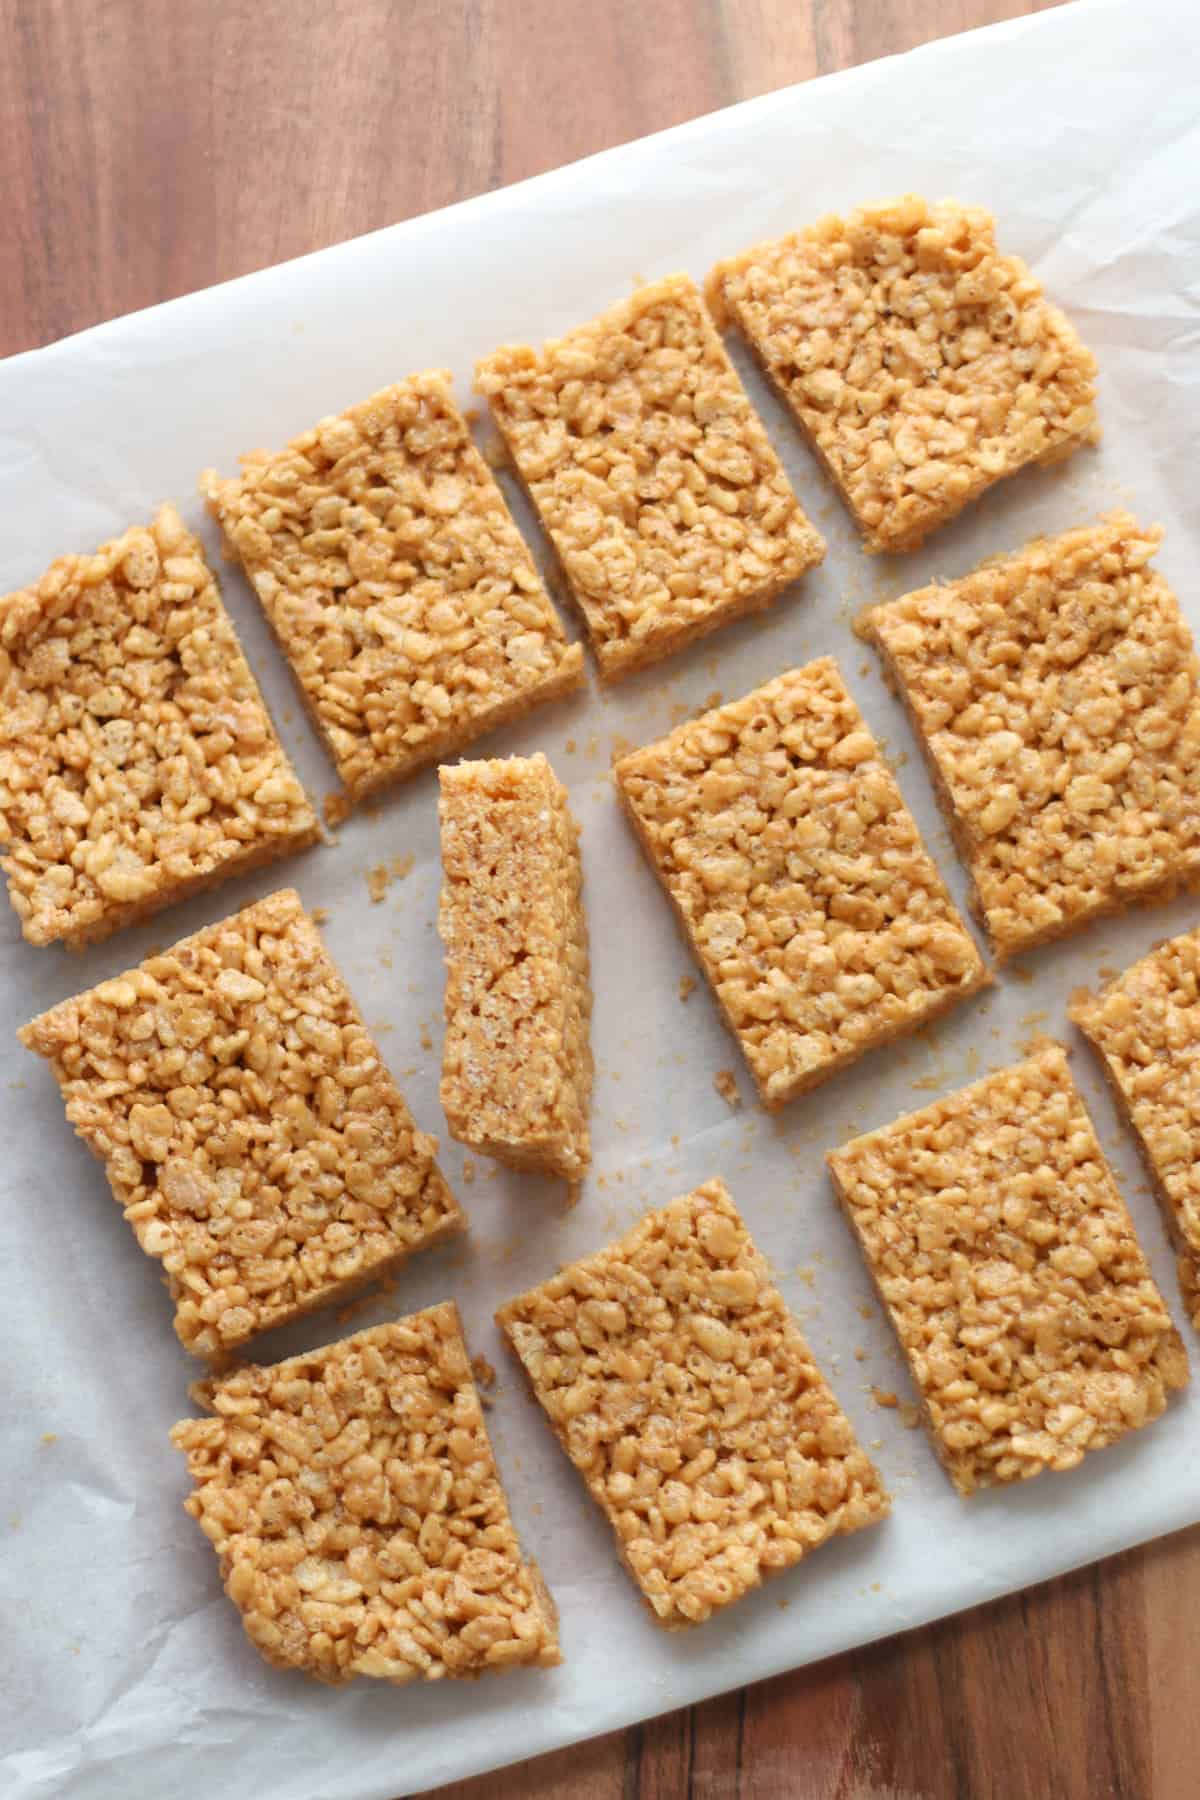
These healthy Rice Krispie treats are a no-marshmallow twist on the classic snack, made with peanut butter and honey for a naturally sweet, chewy, crunchy bar the whole family will love. They come together quickly, hold their shape beautifully, and deliver that nostalgic treat feel with a more nourishing twist.
Why This Recipe Works
- Peanut butter + honey naturally bind the cereal without marshmallows
- Smooth mixture coats every crisp for even texture and no dry spots
- Balanced ratio keeps bars chewy, not sticky or hard
- No baking required – just mix, press, and chill
- Works with multiple cereal types for flexibility and fiber boosts
- Stores well for grab-and-go snacks all week
“Kids love them and I like giving them wholesome real food instead of packaged junk. Thanks Min! I always look forward to your recipes.” – Jane
“So soft and delicious! Better than regular rice crispies” – Daryl
After many rounds of testing, this version finally hit the mark. It keeps that nostalgic flavor and texture you expect, but with honey and peanut butter doing all the work behind the scenes.
For more easy cereal bar ideas, you’ll also love these peanut butter Cheerio cereal bars.
And if you’re looking for more simple, wholesome treats, check out these reader-favorite no-bake snacks that even picky eaters will love for any time of day.
They are perfect for school snacks and road trips snacks for kids.
Table of Contents
Key Ingredients

- Crispy rice cereal – The base of the bars. Choose a variety with no artificial colors or flavors. Regular or brown rice cereal both work.
- Peanut butter – Binds the bars and adds protein, healthy fats, and flavor. Use smooth, natural peanut butter for best results.
- Honey – Naturally sweetens and helps “glue” the bars together without refined marshmallows.
Substitutions
- Rice cereal – brown rice cereal or gluten-free crispy rice cereal
- Peanut butter – almond butter, cashew butter, or homemade sunflower seed butter can be used for an allergy-friendly option.
- Honey – You can also use brown rice syrup. I haven’t tried this with maple syrup, but please let me know if you do!
- Vanilla extract – omit if needed, but flavor will be flatter
- Add-ins – See the full list below!
The Key to Making Rice Crispy Treats without marshmallows
Traditional rice krispie treats rely on marshmallows for sweetness and stickiness, but you can achieve a similar chewy-crispy texture using a simple blend of peanut butter and honey.
The key is fully combining the peanut butter and honey until smooth. This ensures the mixture evenly coats the cereal and helps the bars hold together properly.
You can do this three ways, depending on your preference and time:
- Room temperature method (easiest) -Stir room temperature peanut butter and honey together in a large bowl until completely smooth and pourable.
- Microwave method – Heat peanut butter and honey in a microwave-safe bowl in 20-second intervals, stirring each time, until smooth (about 40–60 seconds total).
- Stovetop method – Gently warm peanut butter and honey in a saucepan over low to medium heat, stirring frequently until fully melted and smooth. Avoid high heat, which can cause the mixture to seize or harden.
Step-by-Step Instructions

Step 1: In a large mixing bowl, stir together the peanut butter and honey.

Step 2: Pour the peanut butter mixture over rice cereal.

Step 3: Stir until well-coated. Press the bars into a parchment-lined pan.

Step 4: Chill! Refrigerate for at least 4 hours, preferably overnight or freeze for at least an hour. Slice into 16 squares.
Expert Tips
- Use room temperature peanut butter so it mixes smoothly and evenly. If refrigerated, let it sit out for about 1 hour before using.
- Use an 8×8-inch pan for the perfect thickness. A larger pan will make the bars too thin.
- Line your pan with parchment paper for easy removal and quick cleanup.
- Press the mixture firmly and evenly into the pan so the bars hold together well. I like to use a piece of parchment paper to prevent sticking to my hands.
- Use a sharp serrated knife for clean cuts without crumbling.
- Chill for Best Texture. Refrigerating or freezing the bars ensures they set properly and slice cleanly.
Mix-in Options
While delicious as is, here are some delicious add-in suggestions:
- Nuts – finely chopped or ground. See The Ultimate Guide to Nuts for Babies (and Seeds) for safe introduction tips for little ones.
- Hemp seeds
- Chia seeds – here’s a brain-boosting rice crispy treats recipe that I contributed for the Food Network Blog!
- Freeze-dried fruits – crushed strawberries, raspberries, or blueberries
- Chopped dried fruit – finely chopped cranberries, cherries, or raisins
- Unsweetened coconut – shredded or flaked
- Mini chocolate chips – stir in after the mixture cools slightly so they don’t melt
- Sprinkles
- Sea salt – a light sprinkle for a sweet-salty combo
- Melted dark chocolate drizzle – drizzle over the top for a richer finish
Healthy Rice Krispie Treats FAQs
Any crispy rice cereal will work! You can use the classic rice Krispies cereal, which is most budget-friendly, or other alternatives, like sprouted brown rice crisps. And here’s a list of best healthy cereals for kids.
Store in the refrigerator for up to 1 week. They’re best enjoyed cold. Do NOT store at room temperature as the bars will soften.
I recommend wrapping each piece in cling wrap storing in a freezer safe bag or container. You can also lay them flat in a freezer bag as shown here. They will stay good for 3 months. Thaw at room temperature before you eat.
Make sure the peanut butter and honey are fully smooth and evenly mixed before adding cereal, and press the mixture firmly into the pan.
More No Bake Snacks


Did you make this recipe? Leave a rating below and let me know how you liked the recipe! Your feedback means so much to me!

Healthy Rice Krispie Treats
Equipment
Ingredients
- 4 cups crispy rice
- 1/2 cup smooth peanut butter
- 1/2 cup honey
- 1 teaspoon vanilla extract (optional)
Instructions
- In a large mixing bowl, stir together the peanut butter and honey (see note).
- Pour the peanut butter mixture over rice cereal and stir until well-coated. Press the bars into a parchment-lined 8×8 inch pan. Press the mixture FRIMLY into the pan. Refrigerate for at least 4 hours, preferably overnight or freeze for at least an hour.
- Slice into 16 squares using a sharp knife (a serrated knife works really well) and enjoy!
- Store leftovers in the fridge or the freezer if you're not planning to eat them right away.
Notes
- You want to make sure the peanut butter and honey is well combined and smooth. Here are 3 ways:
- The easiest way: In a large bowl, combine ROOM temperature peanut butter and honey. The mixture needs to be completely smooth and runny.
- Microwave: Heat in a large microwave-safe bowl in 20 second increments, stirring between each, until smooth. Should take about 40-60 seconds
- On the stove: heat in a small saucepan over low-medium heat, stirring frequently until the mixture is smooth. Don’t raise the heat or the mixture will burn or overharden.


These look awesome! Could I sub almond butter for the pb? Thank you!
You can!
Great healthy version of everyone’s favourite snack!
For convenience:
1/2 cup of hone is about 170-175g
1/2 cup of peanut butter is about 135-140g
And I definitely added over 5 cups of crispy rice and still turned out perfect 😂🙏🫶
Thank you for including these measurements!
Yum yum yum. Both kids and parents loved these. I chose to make them during nap for an after dinner treat so I went with the freeze option. Added some dye-free sprinkles to one side before freezing and pushed those firmly onto the top. It’s a 5STAR from us! <3 OurDahlHaus
Yay!!!! SOOO happy to hear this!!