This post may contain affiliate links. Please see our disclosure policy for more details.

These Cheese Waffles aren’t just tasty, they’re also the simplest waffles you’ll ever make! With just two ingredients and a waffle maker, you’re all set to enjoy them on their own or even as the perfect sandwich base.

Homemade Cheese Waffles
Cheese Waffles, aka Chaffles, are taking over the breakfast scene. With just two simple ingredients – eggs and cheese – you can create a breakfast masterpiece that will impress even the pickiest eater of the family. Don’t let their fancy look fool you; they are SO easy to whip up.
Here’s where the fun really begins. While the base recipe is as straightforward as it gets, the customization options are endless. Throw in some finely chopped veggies like broccoli or carrots for an extra burst of flavor and nutrition.
Prefer a different cheese? No problem! Whether you’re a cheddar fan or fancy something a bit more exotic like Gouda, the choice is yours.
These cheese Waffles aren’t just for breakfast. These are perfect for any mealtime occasion.
If you love the savory, cheesy flavor of chaffles but want something even simpler, these savory cheese pancakes are a must-try. No waffle iron required.
For those who prefer sweet waffles over the savory kind, these strawberry waffles or croffles (croissant waffles) are amazing! Sweet potato waffles are another great option—they have a natural, mild sweetness and a soft, fluffy texture that works beautifully with both sweet and savory toppings.
And if you’re looking for something high in protein but still light and kid-friendly, give these Cottage Cheese Waffles a try—they blend up in seconds and make a perfect addition to your freezer breakfast rotation.
Table of Contents
Ingredients
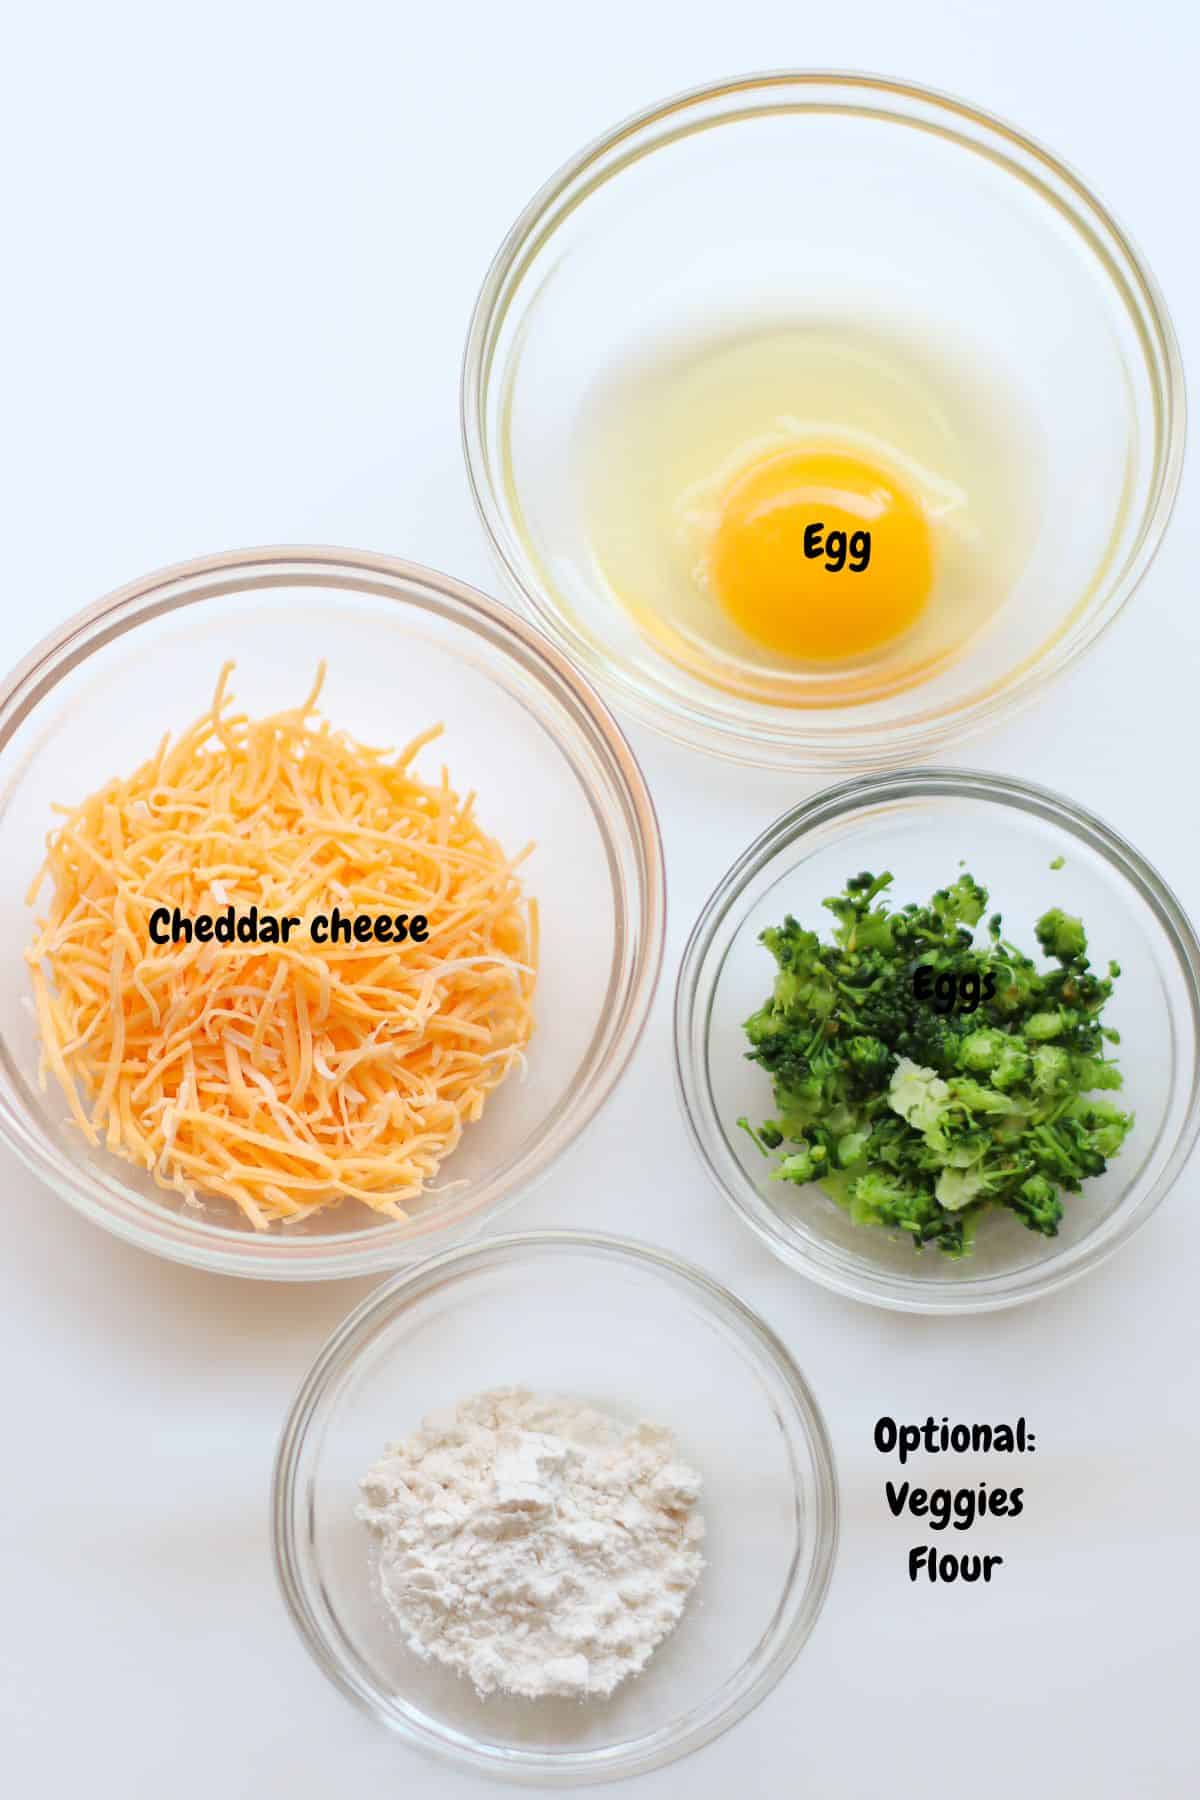
- Egg – provides structure and richness to the waffle batter
- Cheese – I personally love to use sharp cheddar cheese, feel free to experiment with different types like Gouda, Monterey Jack, or mozzarella. Spice it up a little with Pepper Jack.
- Flour – this is optional if you want your waffles to have a more traditional waffle texture. Any flour will work – regular flour, or gluten free flour like almond flour or oat flour.
- Add-ins – also optional but will take your cheese waffles to the next level. Refer to the “variations” section below.
Step-by-Step Instructions

Step 1: Preheat your waffle maker. In a small bowl, beat the egg. Mix in cheese and any seasonings you’re using until everything is well combined. You can also add flour at this time, if desired.

Step 2: Spray waffle iron with cooking spray or butter. Pour half the batter (about 1/4 cup) onto the waffle maker until it covers the surface evenly. Cook it until it turns brown and crispy, about 3 to 4 minutes.
Recipe Tips
- Make sure waffle iron is nice and hot, so that as soon as the batter hits the pan, it begins cooking immediately, resulting in a crispy crust.
- Use freshly shredded cheese for best results.
- Allow for the waffles to cool before enjoying.
- Desire a more crispy waffle? Sprinkle some shredded cheese onto the waffle maker before adding the filling and top with more cheese.
Variations
To this basic recipe, feel free to experiment with all kinds of add-ins. Here are some of our favorites:
- Vegetables – Incorporate finely chopped broccoli, shredded carrots for added nutrition and flavor.
- Shredded apples – Infuse a hint of sweetness
- Pizza cheese waffles – Add 1 tablespoon of pizza sauce. You must add flour with this version
- Pumpkin – Add 1-2 tablespoons of pumpkin puree (or mashed sweet potatoes) as well as flour.
- Meat – Add some small cooked chicken or bacon pieces either into the batter or as a topping.
Equipment

While you can use any waffle maker, this mini waffle maker is a game-changer for making perfectly rounded 4 inch cheese waffles. They are also inexpensive and takes up hardly any space.
There’s also a light that will turn off when it’s done.
For special occasions, you can also find this mini waffle maker in a variety of shapes, such as a heart for Valentine’s Day or a pumpkin for Fall or Halloween themed meals.
Serving Suggestions

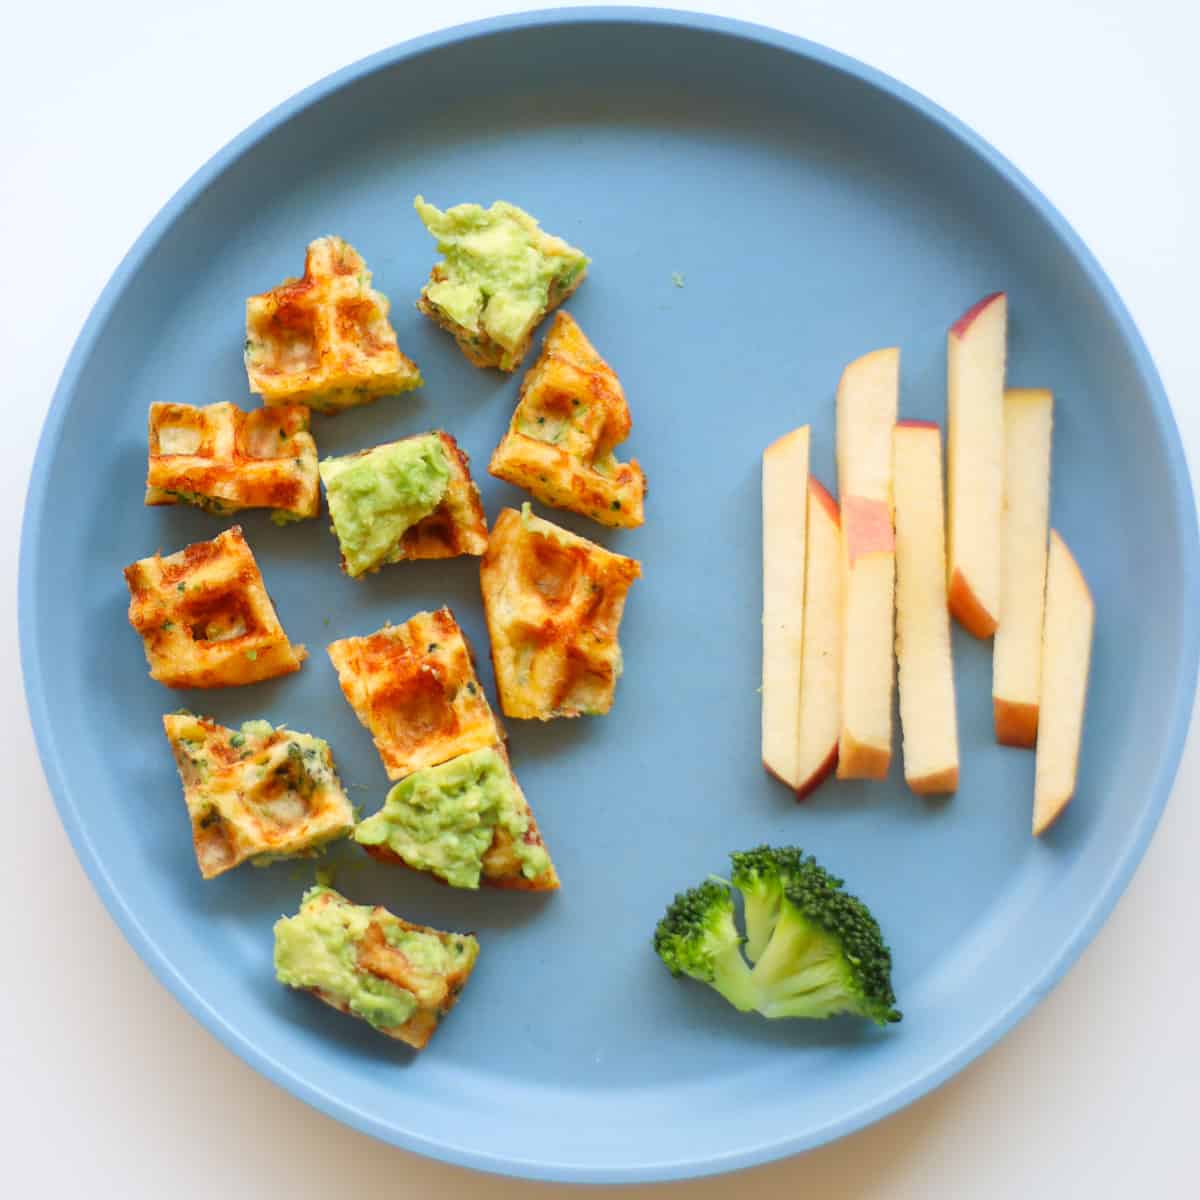
Enjoy your cheese waffle plain or with your favorite toppings – my kids love them with mashed avocado, pizza sauce (try this sugar free pizza sauce!), or yogurt. You can also use as bread for sandwiches! Here are more easy sandwich ideas for toddlers and kids.
They make the perfect base for all sorts of mouthwatering creations.
Try a tasty twist on a classic favorite with a BLT Waffle Sandwich. Stack crispy bacon, lettuce, and juicy tomato slices between two cheese waffles and avocado spread. You won’t even miss the bread!
Pile pulled pork onto one cheese waffle and top with coleslaw for a delicious open faced barbecue-inspired sandwich. Serve with pickles on the side for extra flavor.
Give this Hummus Grilled Cheese a delicious twist by swapping out the bread for these cheese waffles?
Feel free to let your imagination run wild and experiment with different combinations!
Storage
Transfer leftover cheese waffles into an airtight container and refrigerate for 2-3 days. You can also freeze for up to 3 months.
Reheat in a toaster or toaster oven at 350°F for 10 minutes, or until crispy and warm.
FAQ
Yes, but not all cheeses work well. You can use any type of shreddable cheese, depending on your preference. Sharp cheddar is a popular choice, but you can experiment with Gouda, Mozzarella, or any other cheese that melts well.
The basic cheese waffle recipe, which consists of cheese and eggs, is naturally gluten-free. However, if you choose to add flour to the recipe for a more traditional waffle texture, be sure to use a gluten-free flour alternative like almond flour or oat flour.
Cheese waffles can easily be adapted to accommodate various dietary preferences and restrictions. For example, you can use dairy-free cheese alternatives for a vegan version, or substitute almond flour for a gluten-free option.
More Savory Breakfast Ideas


Did you make this recipe? Leave a rating below and let me know how you liked the recipe! Your feedback means so much to me!

Cheese Waffles
Equipment
Ingredients
- 1 egg
- 1/2 cup finely shredded cheese
Optional
- 1 tablespoon flour of choice
- 3-4 tablespoons finely chopped vegetables (broccoli, carrots, bell peppers) or grated apple
Instructions
- Preheat your waffle iron until hot. Whisk together the eggs and cheese (and optional ingredients) in a medium bowl.
- Spray your waffle iron with cooking spray. Pour half of the batter into the waffle iron and cook for 2-3 minutes, until steam stops escaping and the waffles are golden brown and crisp. Repeat for the remaining batter.
Notes
- Make sure waffle iron is nice and hot, so that as soon as the batter hits the pan, it begins cooking immediately, resulting in a crispy crust.
- Use freshly shredded cheese! Pre-shredded cheese doesn’t quite melt right.
- Sprinkle some shredded cheese onto the waffle maker before adding the filling and top with more cheese for a crispier waffle.
- Don’t be afraid to experiment with these cheese waffles. Enjoy them with mashed avocado or use them as bread for sandwiches.


Thank you Min! So easy to make and toddler loved it. This will be in my forever rotation. I did reduce the cheese to 1/4 cup and it turned out great. Added a bit extra before adding batter to crisp it per your suggestion. 10/10.
Amazing!! Thank you for sharing!
Can you freeze these and pull them out for lunches? We do this with the spinach pancakes!
You sure can!
So easy and delicious!
I used a small handful of chopped baby spinach and it was yummo!! My 2 yr old loved it too 🙂
Turned out great! Made one with shredded carrots and the other with zucchini. My daughter and spouse loved it.
Doubled it to make sandwiches- awesome!
I made these this morning for my 15 month old and she loved them! Breakfast can be a hard meal to keep interesting while also efficient and easy, so I really appreciate Min! We made ours with broccoli, carrots, sharp cheddar and Parmesan cheese. Crisping the cheese before cooking the rest was also a great tip! Thank you so much for this recipe and sharing all your knowledge. You are a valuable resource!