This post may contain affiliate links. Please see our disclosure policy for more details.

These healthy chicken nuggets prove you don’t need a deep fryer to make something crispy, juicy, and totally delicious. Made with real ingredients and a good dose of veggies, they’re the kind of meal that makes both kids and parents happy.
As a pediatric dietitian and mom, I’ve seen firsthand that kids eat best when food feels fun, familiar, and flavorful. That’s exactly what these baked chicken nuggets deliver. They’re baked, not fried, so you still get that crispy texture.
The blended vegetables keep the nuggets tender and juicy, while adding a little extra fiber, color, and nutrition to every bite. And because they reheat beautifully, you can make a big batch and have quick, healthy protein ready for school lunches or busy weeknights.
You’ll also love these baked veggie nuggets too!
What others are saying:
“I can’t believe it’s so easy to make delicious and healthy chicken nuggets at home without the all preservatives/processed meats! I made these for baby but ended up eating a lot of them myself because they are that good. 🙂 Easy to freeze and reheat for meal prep too. Highly recommend!” – Amy
“Huge hit with my 6 and 3 year olds! Finished in 2 days! Next time have to double the recipe! Thank you!” – Samantha
Table of Contents
Ingredients
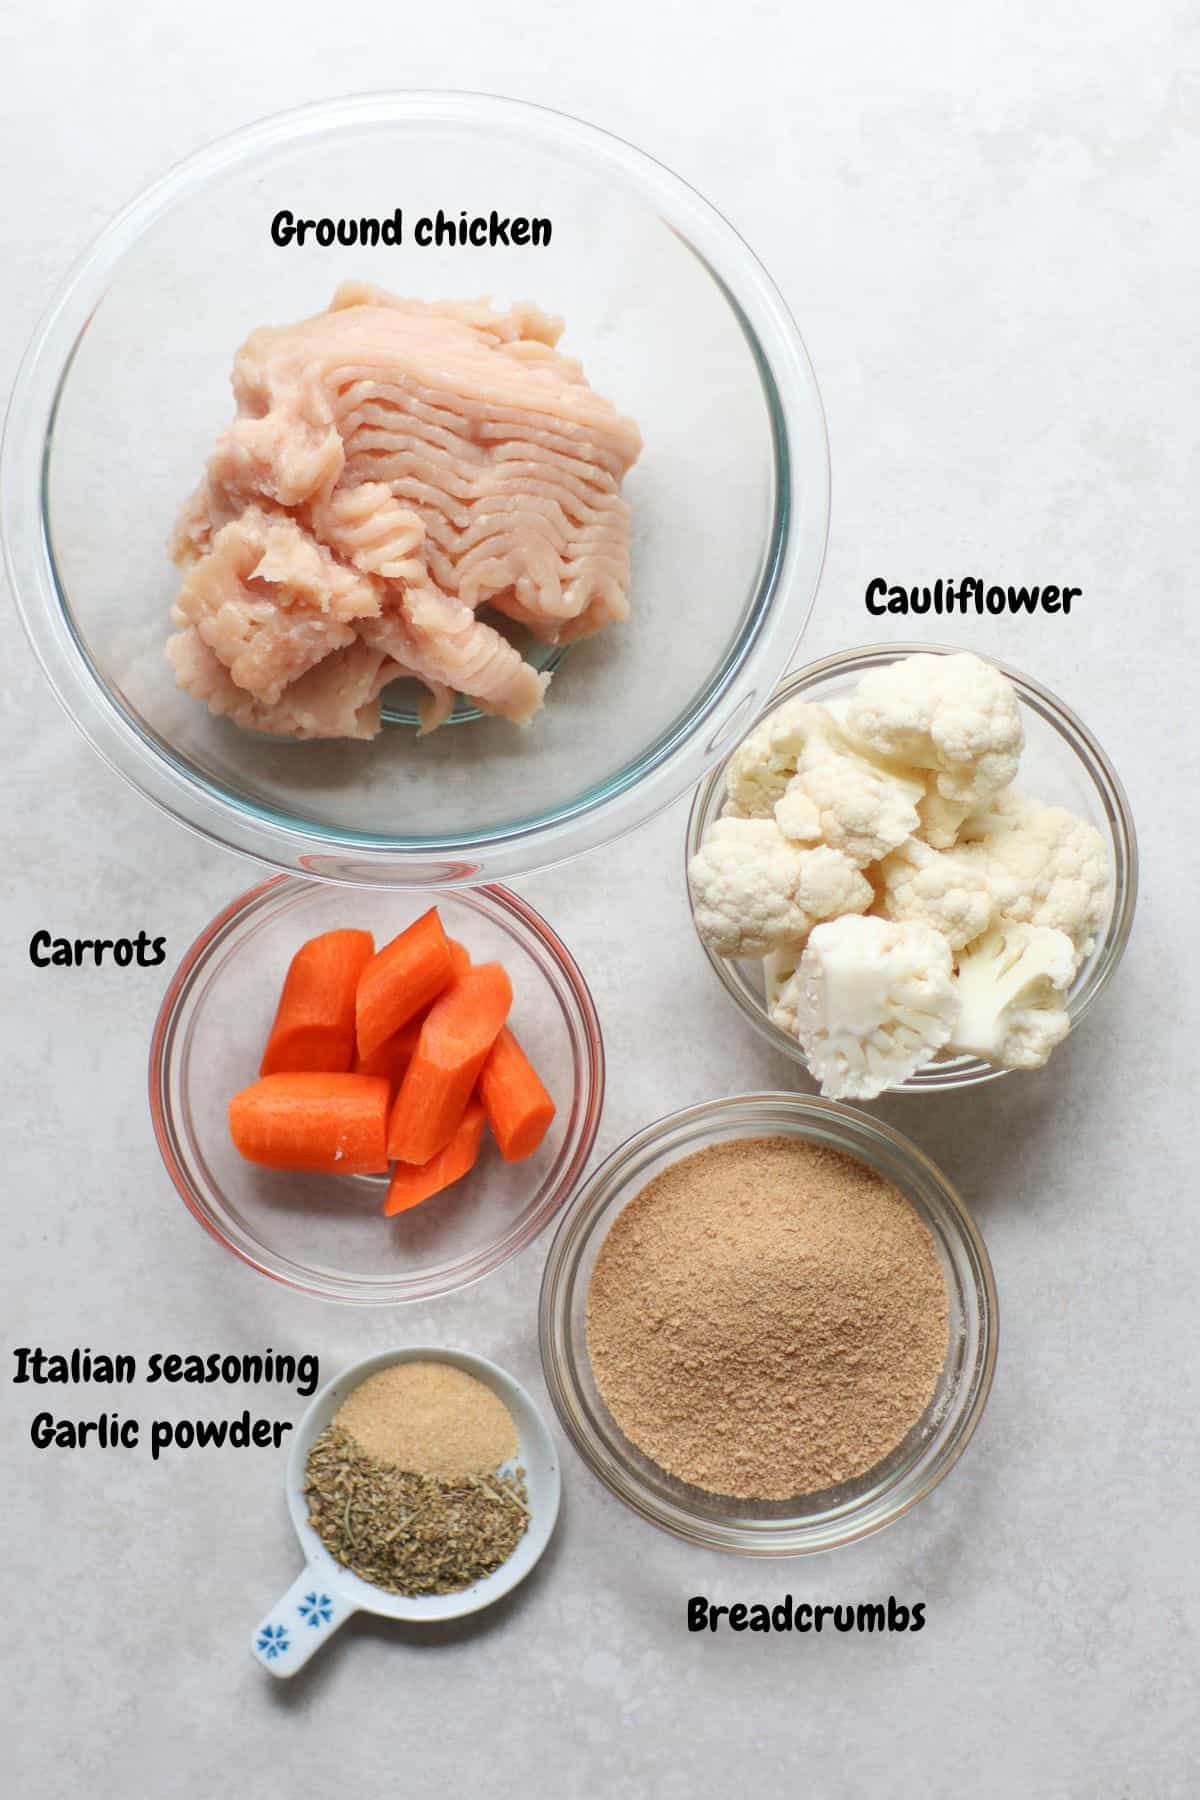
- Ground chicken – much easier to work with than chicken breast or thigh. It also makes the nuggets easier for babies and toddlers to chew. You can also use ground turkey, if preferred.
- Carrots – adds a touch of natural sweetness.
- Cauliflower – adds great texture and helps stretch a pound of chicken. You will be able to get at least 30 nuggets out of the mixture! It also blends in really well with chicken.
- Bread crumbs – you can use regular or panko bread crumbs depending on how crispy you want the nuggets to be. I like to use whole wheat regular breadcrumbs for babies.
- Seasonings – I like to use Italian seasoning and garlic powder. Feel free to experiment with your favorites. Here are some great herbs and spices for babies and toddlers.
- Parmesan cheese (optional) – use grated parmesan rather than shredded. It blends better into the mixture.
Step-by-Step Instructions

Step 1: Add cauliflower and carrots to a food processor and process until finely chopped.

Step 2: In a large bowl, add all the ingredients. Mix until combined. Scoop about 1 tablespoon of the mixture and using your hands, form into balls.

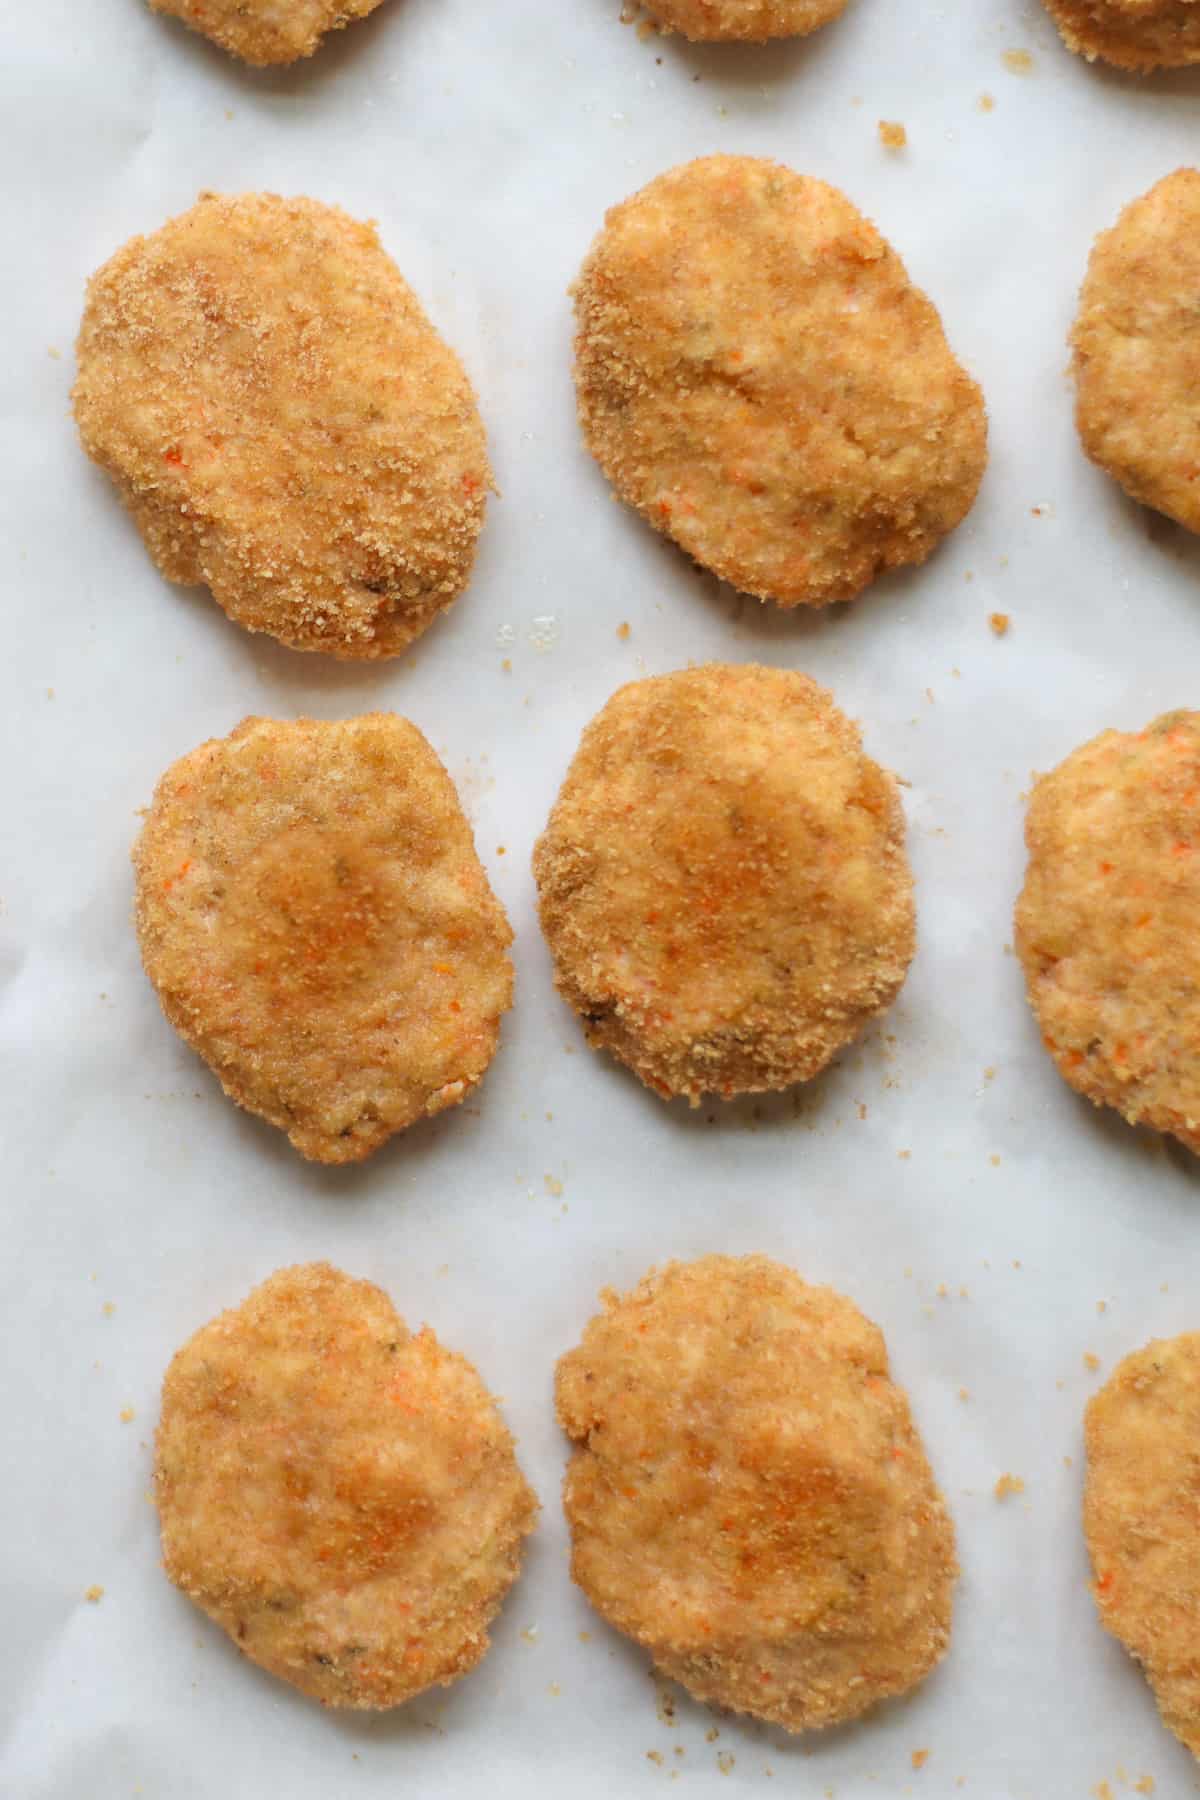
Step 3: Add breadcrumbs to a large raised plate or bowl. Roll in breadcrumbs. Flatten slightly into a nugget shape. Dino nuggets are super fun for the kids too.

Step 4: Place on a parchment paper lined baking tray. Spray the top with oil spray to make the nuggets crispier (optional). Bake for 20-25 minutes, flipping halfway through.

Expert Tips
- Feel free to swap with whatever vegetables you’d like. Broccoli, sweet potatoes, spinach, zucchini, all will work!
- You can add some grated cheese for extra flavor, like parmesan or cheddar cheese.
- If you desire crunchier nuggets, then use panko breadcrumbs. Note that pre-baking panko before coating will help achieve a nice golden color for your nuggets. Personally, I can do without the extra step and my kids never seem to mind.
- Flip halfway to ensure both sides are cooked evenly.
Serving Suggestions
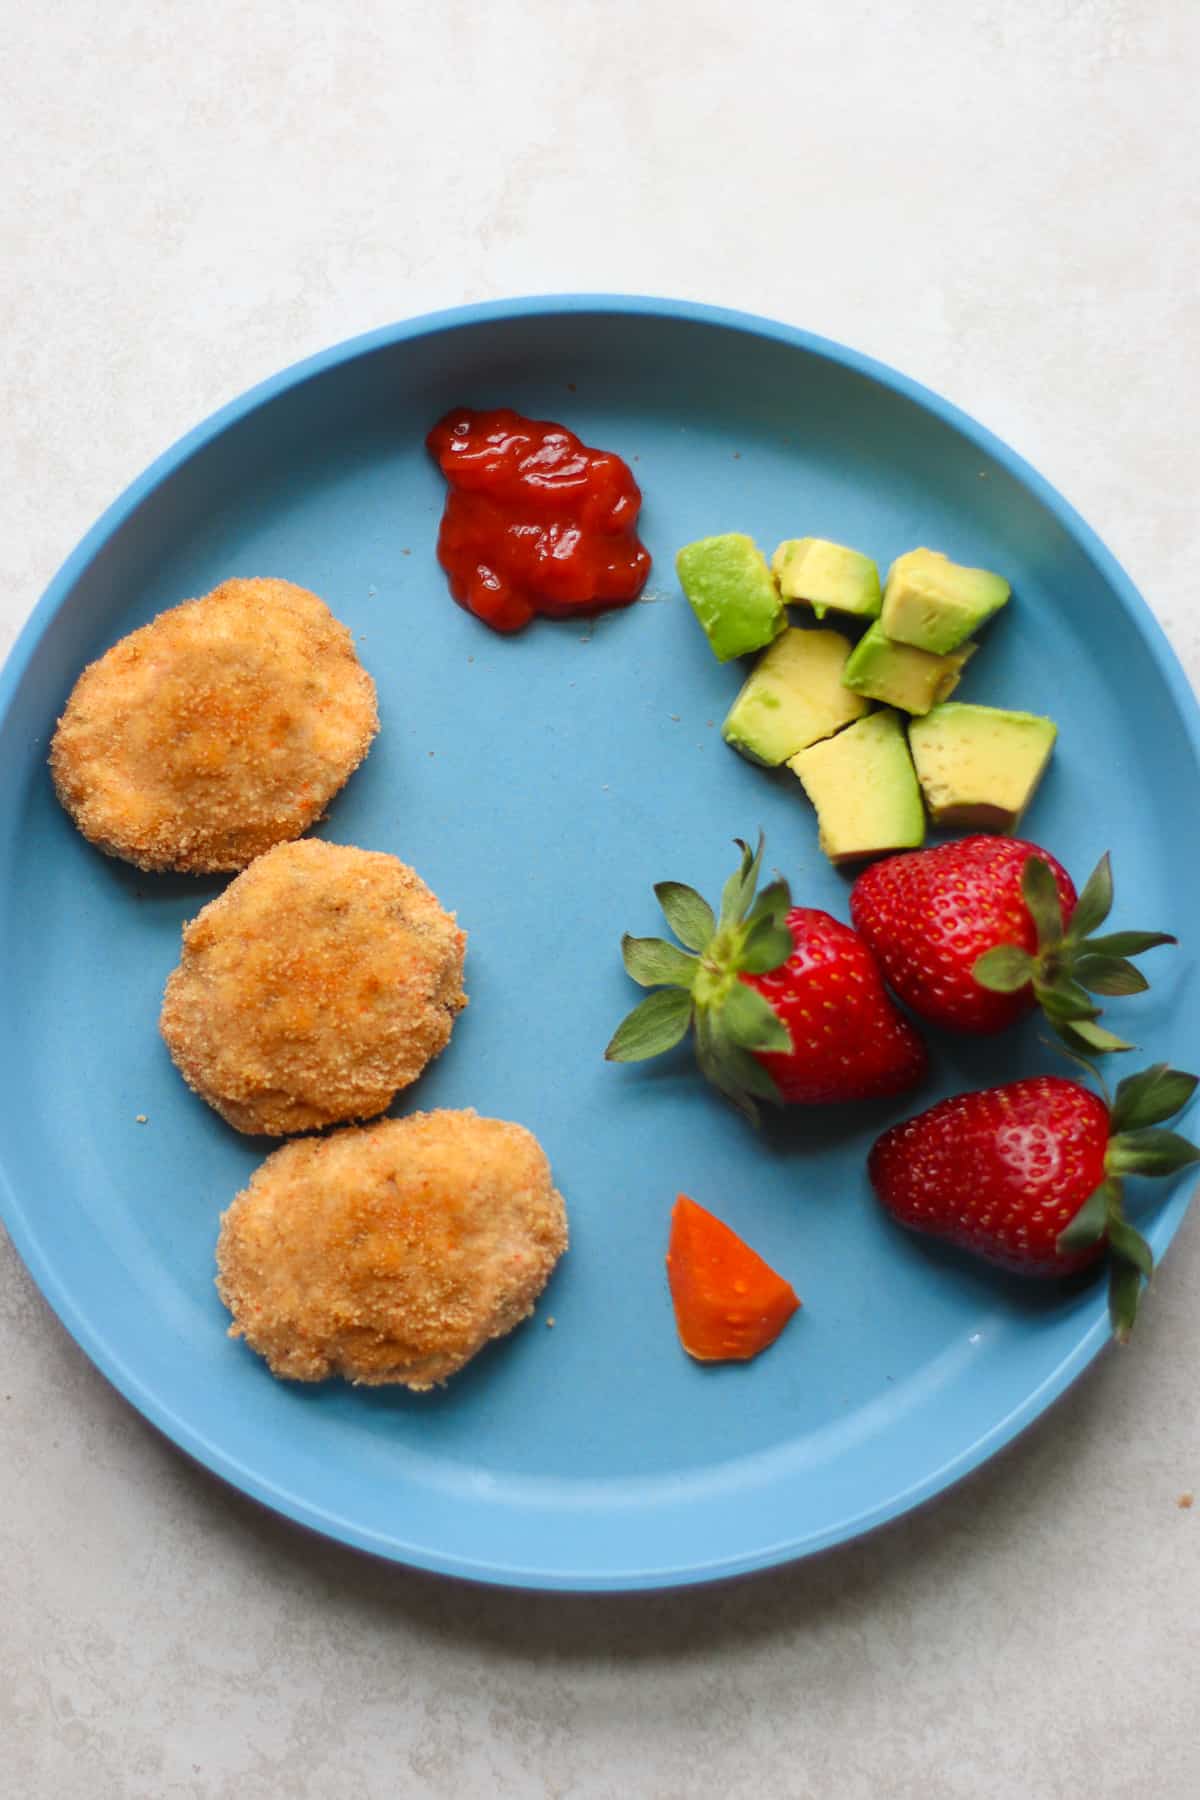
These healthy chicken nuggets are delicious on their own. But since most kids love to dip, you can serve with their favorite condiment, like ketchup, ranch dressing, healthy BBQ sauce, etc.
If you want to boost nutrition, try some of these veggie-loaded dips!
Struggling with Decision Fatigue?
Go ad-free and unlock all my recipes, EXCLUSIVE favorites, and weekly meal plans made just for you!
Chicken Nuggets for babies and toddlers
To achieve a soft, moist texture, skip the breadcrumbs or use regular breadcrumbs instead of panko for a less crispy exterior.
For 6-8 month olds, you can offer the whole nugget to gnaw on and suck the juices. Once they are able to break off a large chunk, cut in half width-wise so it’s thin, or into bite-sized pieces.
Related: Healthy finger foods for babies
As for toddlers, this stage is all about independence and wanting to make choices so let’s give it to them. Serve the chicken nuggets along with fruits, veggies, or any of these finger foods.
And don’t forget to continue offering foods your toddler doesn’t like (yet!). Currently, my toddler has been refusing carrots (which she loved just a week ago), so I included a small piece for exposure.
This may seem silly, BUT it’s presence is powerful! Even though your child may not eat it today, the more they see the food in question, the more they will fell safe around it. And one day, they will surprise you!

Is your toddler becoming picky?
Arm yourself with these strategies that will transform your mealtimes!
Storage
Transfer homemade nuggets to an airtight container and keep in the refrigerator for 3-4 days.
To freeze, I recommend flash freezing. This is how I like to freeze muffins too. Transfer to a freezer-safe bag or container and store in the freezer for up to 3 months.
Frequently Asked Questions
Fast food or store-bought nuggets are not recommended until after one year of age because they are highly processed and contains a lot of sodium and other additives.
They are also a choking hazard as they tend to be rubbery in texture.
Instead, here are some easy and safe ways to serve chicken to your baby along with recipes.
These homemade chicken nuggets are suitable for babies because they’re made with simple, nutritious ingredients. They are also juicy and tender. Refer to the serving suggestions above.
To maintain their crispy texture, reheat chicken nuggets in the oven or air fryer at 350-375°F for 5-10 minutes, until heated through and crispy.
You can also microwave at 30-second intervals until heated through. Note that the nuggets will be soft, which is a good thing if serving to babies.
More Chicken Recipes


Did you make this recipe? Leave a rating below and let me know how you liked the recipe! Your feedback means so much to me!

Healthy chicken nuggets with veggies
Video
Equipment
Ingredients
- 1 medium carrot (80g, weighed after peeled)
- 2 cups cauliflower (200g)
- 1 pound ground chicken
- 2 teaspoons Italian seasoning
- 1 teaspoon garlic powder
- 2/3 cup breadcrumbs (80g)
Instructions
- Preheat oven to 375 degrees Fahrenheit. Add cauliflower and carrots to a food processor and process until finely chopped.
- In a large bowl, add all the ingredients, minus the breadcrumbs. Mix until combined. Scoop about 1 tablespoon of the mixture and using your hands, form into balls.
- Add breadcrumbs to a large raised plate or bowl. Roll in breadcrumbs. Flatten slightly into a nugget shape.
- Place on a parchment paper lined baking tray. Spray the top with oil spray to make the nuggets crispier (optional).
- Bake for 20-25 minutes, flipping halfway through.


Delicious
Love the recipe and the simplicity of the instructions. Thank you so much for sharing this!!❤️
This has become a favorite lunchbox recipe for my 18 month old. I used broccoli instead of cauliflower because that’s all I had, but my son loved it anyway. Not a morsel left! Next time I’ll make a batch with cauliflower for an even yummier result. Thank you for sharing this wonderful recipe.
Delicious recipe to sneak veggies into my toddler’s diet. We’ve made multiple versions of this with ground chicken, ground turkey, garlic and onion powder with salt and pepper. All fantastic. Thanks for this healthy alternative!
Do I cook the carrot and cauliflower before adding it?
No need!
These were wonderful! 1y and 4y both loved them, and I ate at least 10 of them myself 😂 we’ll be keeping and recommending this one to friends!!!
I made these for my family this week and it was such a big hit! My 9 mo. old LOVES them and I can’t tell you how much joy it brings me to see him eating a whole nugget when he merely picks at other food. My toddler also loved them which is rare because she never likes store bought or fast food chicken nuggets. My husband and zi had to stop ourselves from eating the rest because I primarily meal-prepped this for the children. Thank you, Min!!
Wow!! oh I love this so much! Thanks for sharing!
So simple yet flavorful and nutritious. Kids loved them, thanks for the recipe!
You’re welcome!!
These were soo good! I tweaked the proportions a bit to please my sensory and extremely picky toddler but once she had a taste she grabbed and went for it! And husband and I loved them too! I could have eaten the whole batch. Delicious!
Yay!! SO happy to hear that! Thanks for sharing!
Do you cook before freezing them?
Yes!