This post may contain affiliate links. Please see our disclosure policy for more details.

Introducing finger foods to your baby can be exciting and overwhelming! Here is everything you need to know about serving them to babies 6 months and older so that they are safe and delicious!
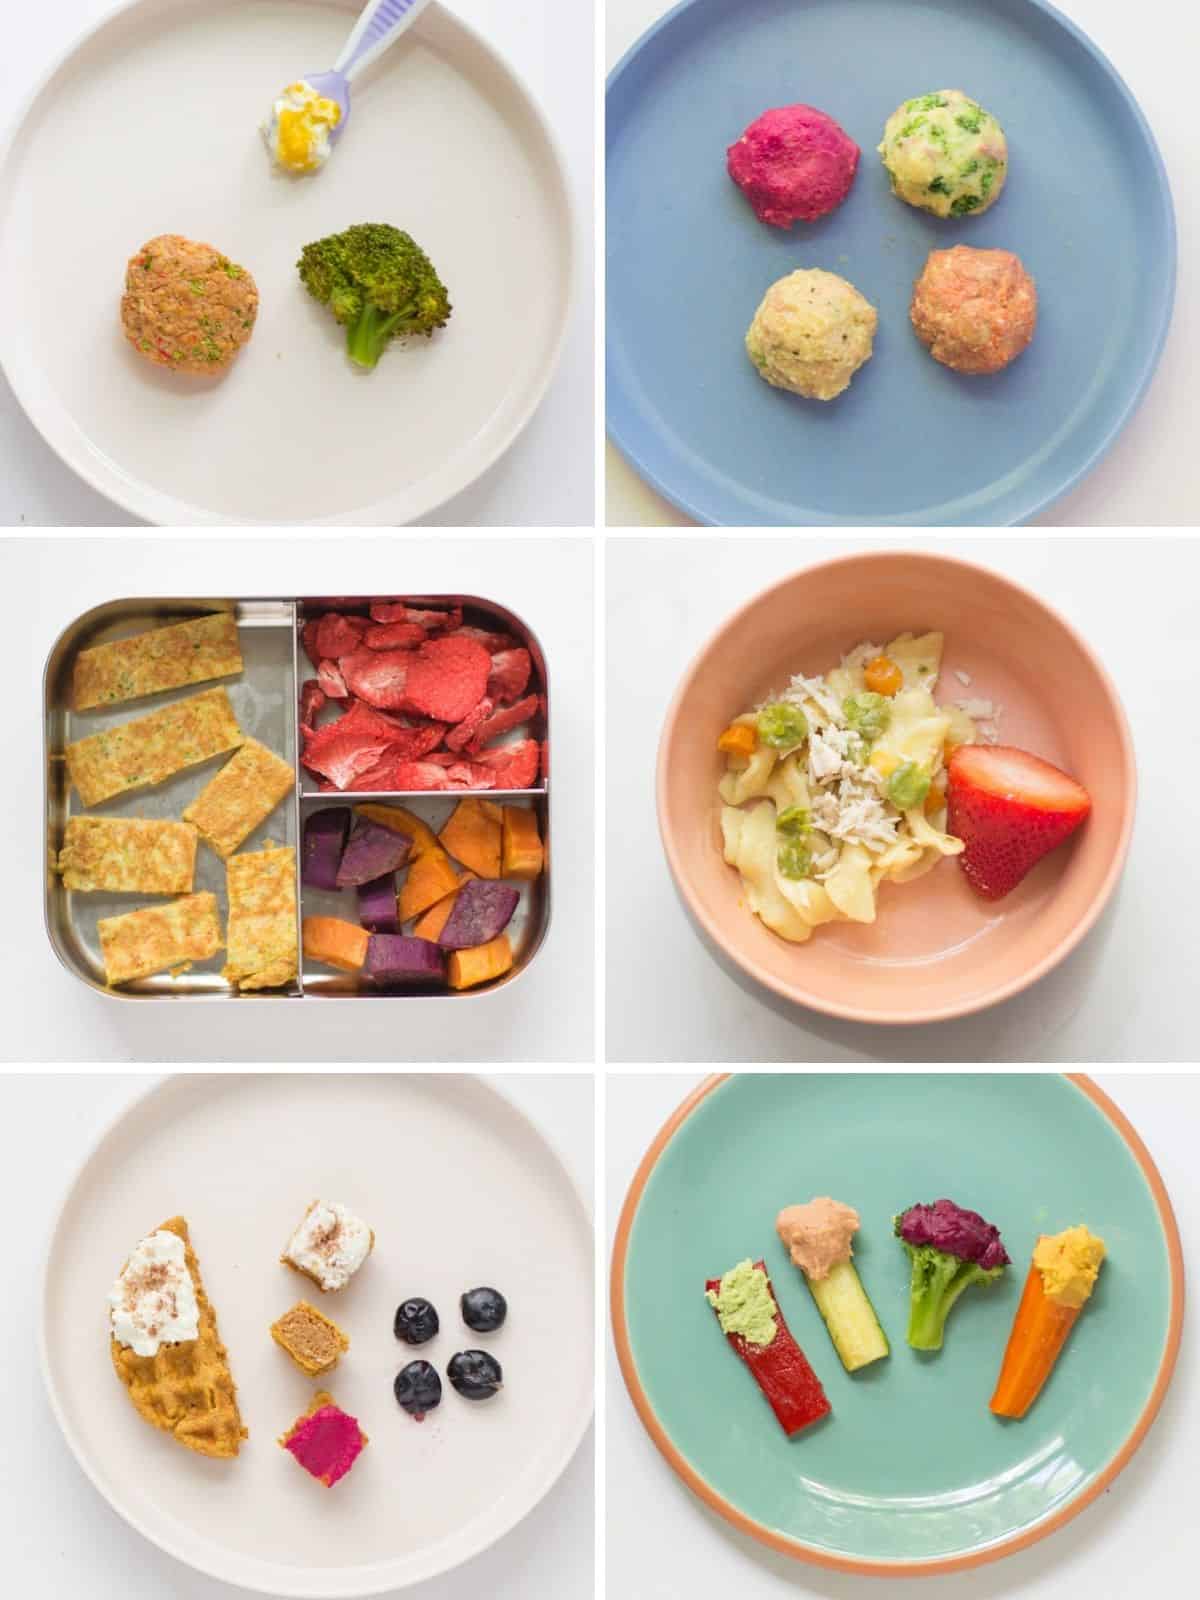
Table of Contents
- Finger Foods for Baby
- Is your baby 6 months old and up?
- Can Babies eat Finger Foods without Teeth?
- Choking vs. Gagging
- Easy Baby Finger Food Ideas
- Finger Foods – Protein
- Soft Finger Foods for Baby – Vegetables
- Baby Finger Foods – Fruits
- How to Prepare and Serve Finger Foods
- 6-8 Month Old Baby
- 9-11 Month Old Baby
- Finger Foods for 12+ Months
- Baby Meal Plan
- Best Finger Foods for Baby Recipe
Finger Foods for Baby
If you’ve decided to start solid foods by taking the baby led weaning approach, you will be introducing big, soft-cooked finger foods from the start.
If you are taking the traditional weaning approach of starting with purees, you will most likely start offering finger foods around 8-9 months of age when you and your baby feel ready to move forward with texture.
Regardless of which method you choose, the goal is to offer finger foods by 9 months at the latest.
That’s because familiarity is a BIG part of taste and acceptance, and the earlier the exposure to all the different flavors and textures, the greater their acceptance.
If your baby stays on pureed textures for too long, it may be much more difficult to get them to accept different textures later.
If you’re feeling anxious about offering textured foods from the start and want to take the traditional weaning route where babies are spoon-fed purees or the combination approach (you do you!), here’s how to safely move forward from purees to textured foods.

Is your baby 6 months old and up?
Learn all the secrets to starting solids safely while optimizing nutrition!
Can Babies eat Finger Foods without Teeth?
While you might think babies can’t eat foods that aren’t pureed until they have teeth, the reality is they don’t need teeth to enjoy table or finger foods.
Did you know that we actually chew with our molars, not the front teeth? And if you wait until the molars come in (normally around 12-18 months) to move on to table foods, you would totally miss that critical “window of opportunity” for developing food preferences.
Not to mention, failure to move from purees to textured foods by 9 months may lead to increased risk for feeding difficulties later in life.
So how are they able to handle table foods without the molars? With their strong gums! And it is our responsibility as parents to make sure that the foods are appropriately cooked and served, and that’s what I want to share with you!
Do keep in mind, I’m sharing general timelines & guidelines here. What’s most important is to follow your baby’s lead as every child is so different and they develop at their own pace.
Choking vs. Gagging
Research actually shows that there’s no greater risk of choking with baby led weaning in comparison to the traditional feeding practices.
What’s most important is to avoid these top choking hazards:
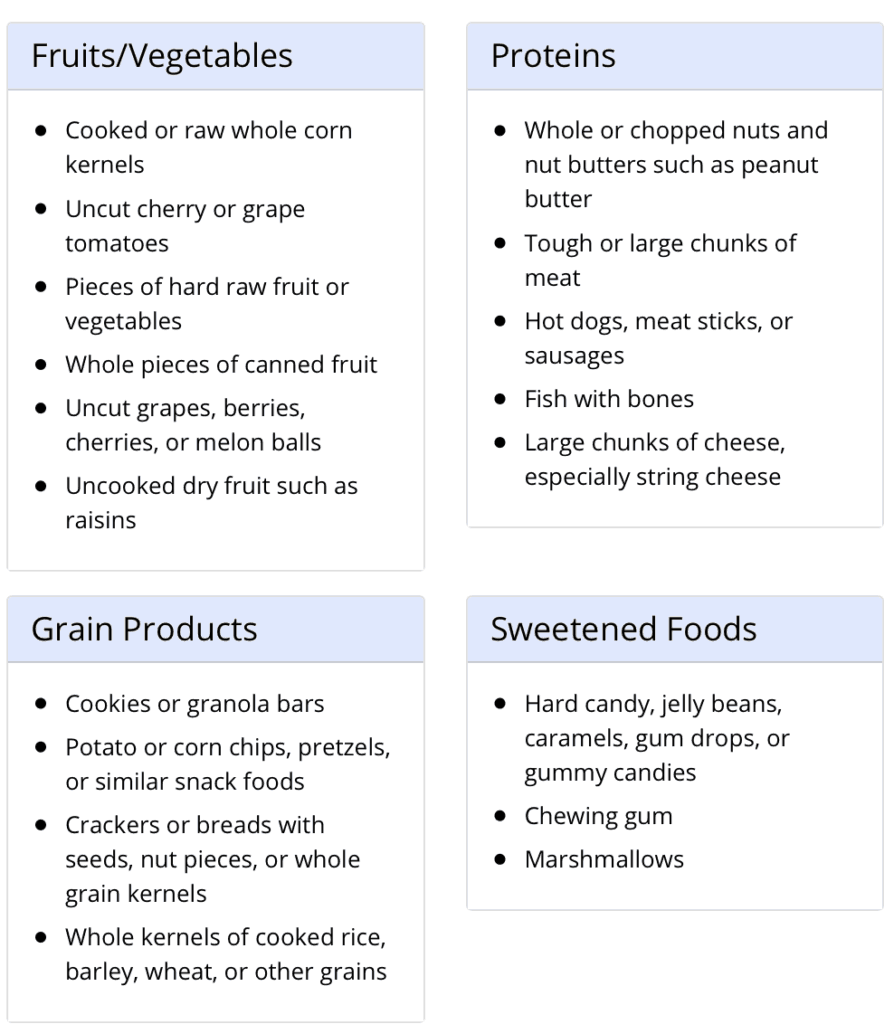
Choking is different from gagging, which is very common and to be expected. Gagging is a safety mechanism to prevent choking and contrary to how it appears, it doesn’t really bother the babies.
Sit on your hands, remain calm, and let them work through it. Do NOT try to fish out the food from their mouth. Here are some additional tips on how to get through the first month of baby led weaning.
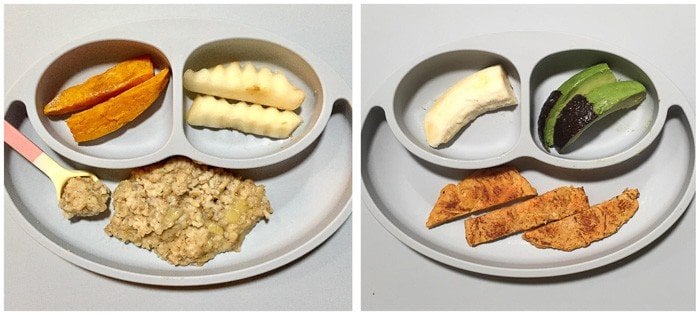
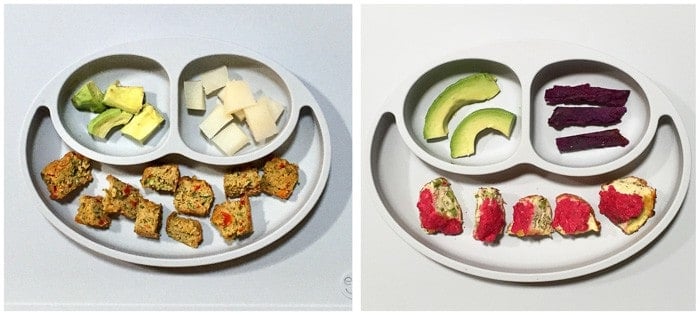
Easy Baby Finger Food Ideas
- Soft-cooked carrot sticks
- Avocado slices rolled in hemp seeds
- Small pieces of soft fruit
- Healthy pancakes for babies
- Teething Biscuits
- Baby meatballs
- Soft Muffins for babies
- Puffs and Dry Cereal
- Steamed sweet potato cubes
- Soft scrambled egg
- Rice cakes: Light and airy, topped with mashed avocado or nut butter.
- Whole grain toast strips: Lightly toasted with avocado or a thin spread of nut butter. Here’s a guide to choosing the best bread for babies as well as topping ideas.
- Cucumber sticks: Peeled and softened for easy chewing.
Finger Foods – Protein
Be sure to click on the links for more details on each of the specific foods.
Soft Finger Foods for Baby – Vegetables
- Asparagus
- Beets
- Bell peppers
- Broccoli
- Butternut Squash
- Cabbage
- Carrots
- Cauliflower
- Parsnips
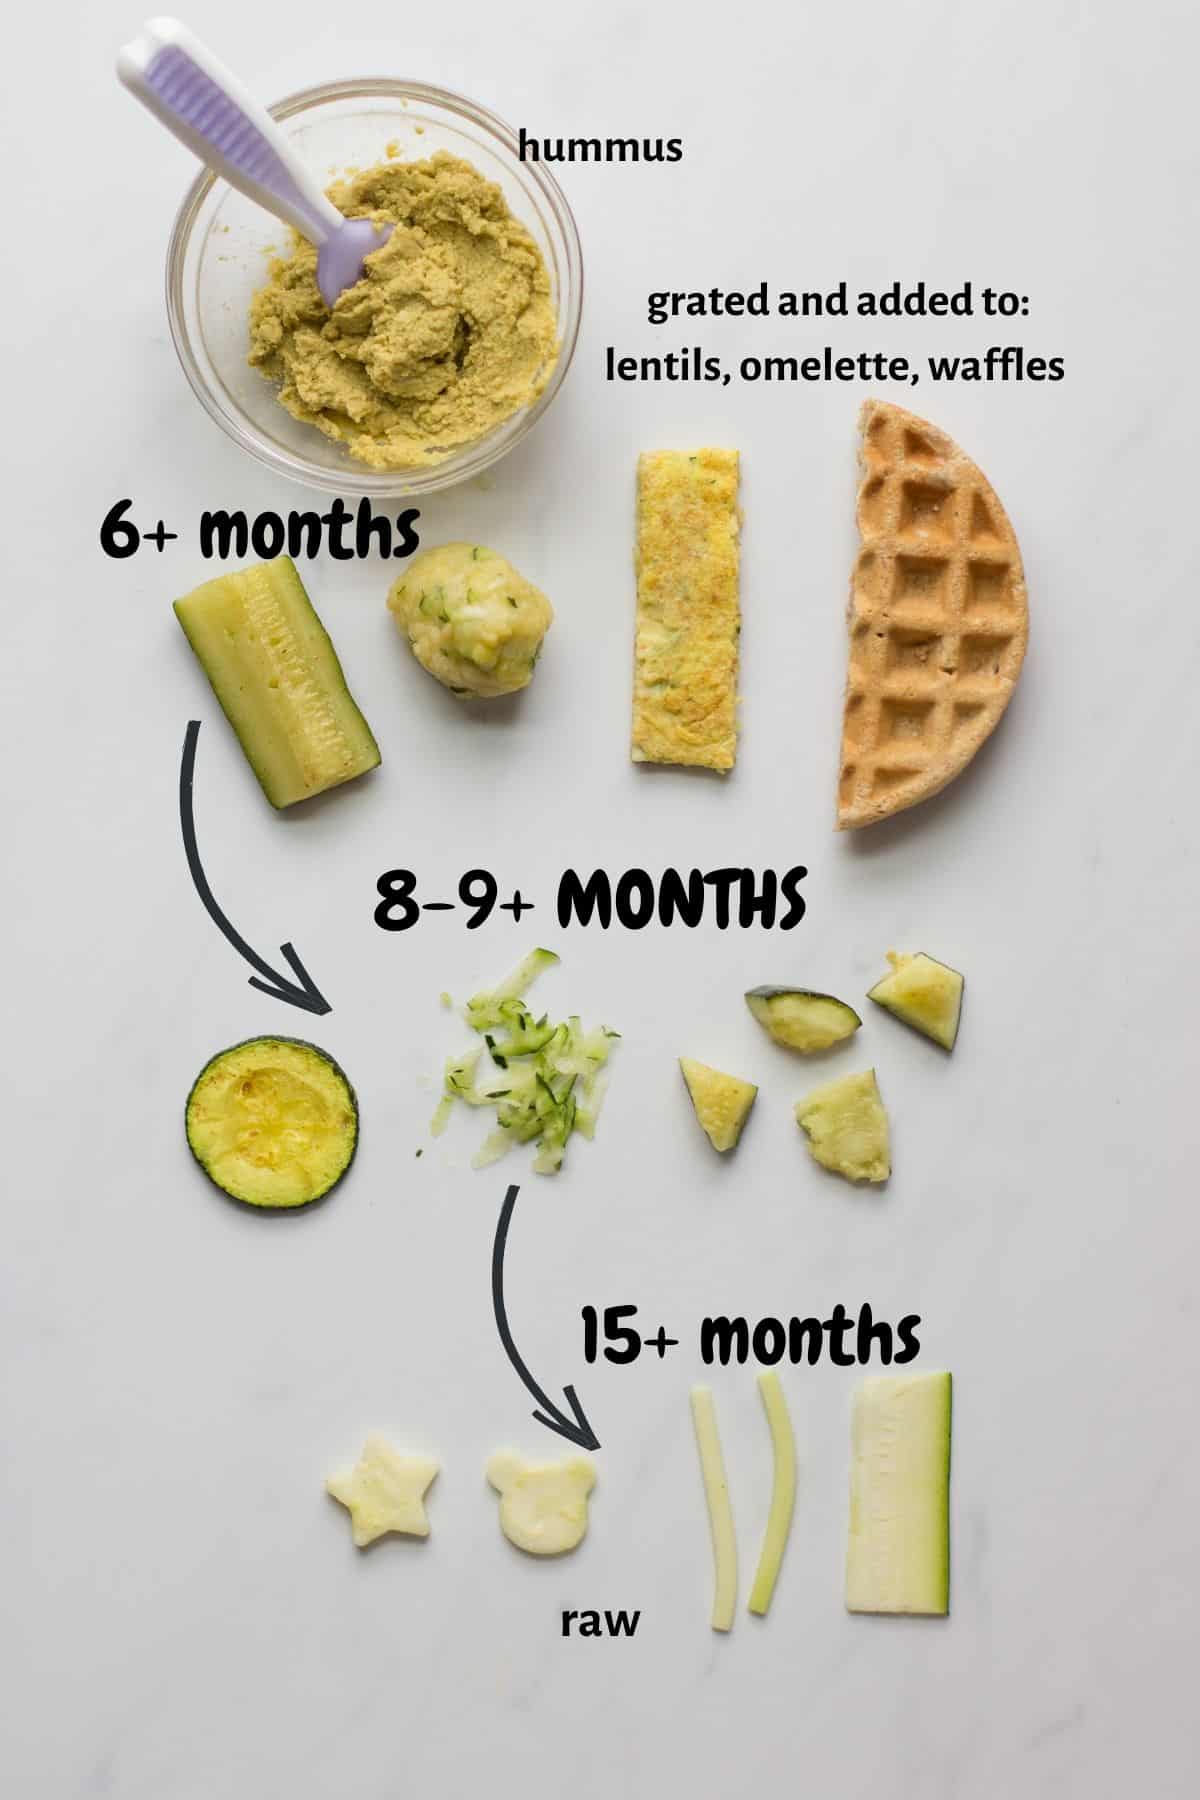
- Sweet potato – these sweet potato slices are so fun!
- Zucchini
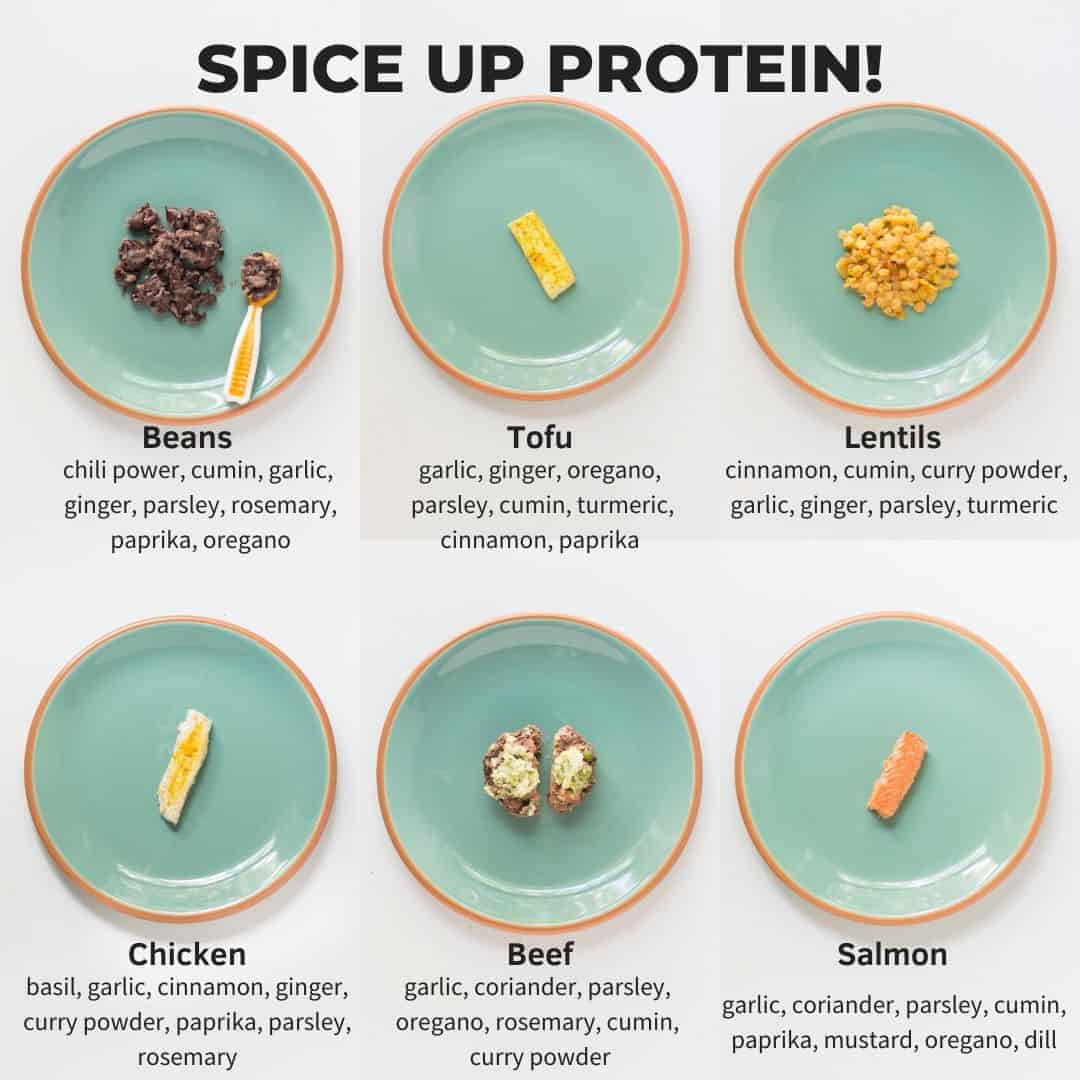
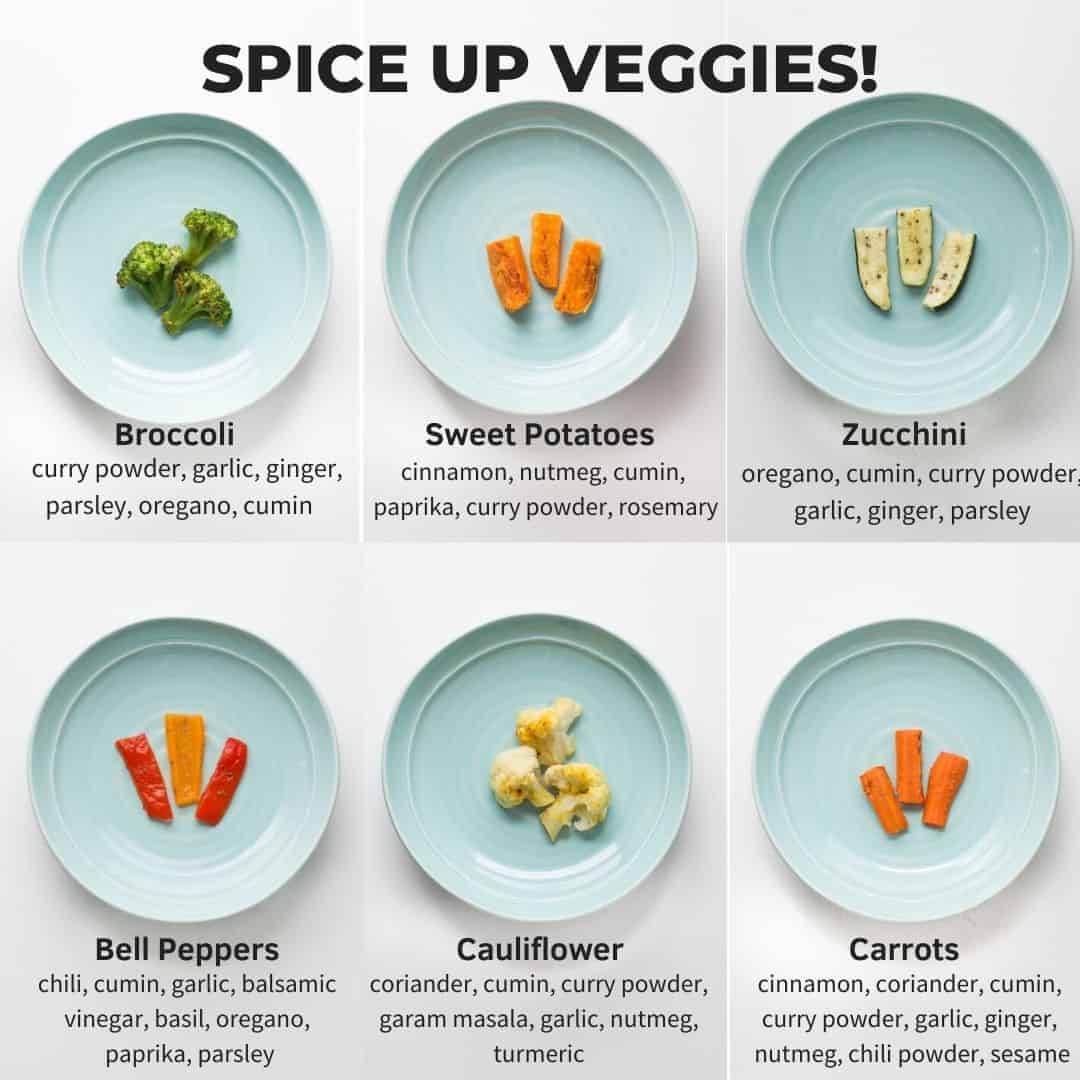
And as you see in the image above, do not be afraid to season your baby’s food from the start!
Also check out: Vegetables for babies (with 30+ recipes)
Baby Finger Foods – Fruits
- Avocado – sliced into wedges or bite-sized pieces. See avocado for babies for serving tips.
- Apples – serve similar to pears. For more information on how to safely serve, check out this guide to apples for babies.
- Ripe banana – try soaking in peanut butter. Be sure to thin it out as globs of peanut butter or any nut butter is a choking hazard
- Blueberries
- Grapes – hold off until 9 months and be sure to serve quartered.
- Kiwi – Halves, quarters, bite-sized
- Mangoes
- Melons – large thin rectangles
- Pears
- Peaches
- Strawberries
For more, check out this master list of Baby Led Weaning Recipes
How to Prepare and Serve Finger Foods
In this section, you will learn how to cut and cook the finger foods so they are the appropriate shape and texture according to age.
6-8 Month Old Baby
Food shape
Cut so that the food is about the size of 1-2 adult fingers pressed together widthwise and the length of an adult pinky finger (or longer).
Contrary to what you might think, serving big pieces of food will actually minimize choking risk and make it easier for your baby to grab with their fist (referred to as the palmar grasp). Initially, everything will likely get demolished, but with practice, your baby will learn to have better control of hand force.
Try this: Healthy chicken nuggets are a great option for this stage. They’re soft enough for babies to mash with their gums but still easy to hold. Cut them into finger-length pieces before serving, and you’ve got a protein-rich food that helps your little one practice self-feeding.
Texture
Foods should be firm enough to grasp but soft enough to easily smoosh between two fingers or mash with the tongue on the roof of the mouth.
Roll slippery foods in ground nuts, seeds, flour, etc to make it easier for your baby to pick up. Crinkle cutters can also be very helpful (this tool is great!).
9-11 Month Old Baby
By this age, babies are learning to move food side to side within their mouths as well as forward and backward. They are also starting to learn the concept of biting (hopefully anyways).
Shape
Your baby is mastering their pincer grasp and able to pick up small pieces of food between the thumb and index finger. Therefore, you can begin to cut food into small bite-sized pieces.
But do continue offering larger pieces of food so they can learn to take bites.
Texture
You can start serving slightly firmer foods by shortening the cooking time for veggies, roasting more often rather than just steaming, etc. Depending on the number of teeth your baby has, chewing ability, and your comfort level, you can start offering finely grated raw fruits and veggies.
If your baby constantly turns into a competitive food eater (like mine did), here are some things you can do to help slow them down:
- Help set pace by placing small amounts of food in front of her at a time either directly on the table/tray or a plate. I personally just took the plate away every time his mouth was full and encouraged him to finish chewing before offering his plate again. It was tedious but worked well for us.
- Offer utensils (here are our favorites). Using it requires fine motor skills which will help slow down pace.
You may also be interested in: healthy baby snacks
Finger Foods for 12+ Months

Shape
Again, try to encourage your child to learn to take bites by not cutting up the food as much. As always, role modeling can do wonders in helping them to learn this new skill.
If your child is continuing to shove food, learn how to teach them to take bites.
Texture
You’ve done the hard work! At this point your child should be able to handle almost all textures and eating like the rest of the family. Can you start offering crunchy vegetables? Yes! Here’s a guide on how to introduce raw vegetables to your little one in a safe and fun way.
Baby Meal Plan

Do you want to minimize picky eating and set a solid foundation for a lifetime of healthy eating habits?
Check out this 3 month mastering self-feeding program! It’s the closest thing to me being in your kitchen
If you are feeling confused and overwhelmed by what foods to serve, how to prepare foods so they are safe, how to introduce allergens and a wide variety of foods, how to adapt family meals so you don’t spend hours slaving away in the kitchen making two separate meals every.single.day, and on and on…
My 3-month baby led feeding course will save you time, energy, money, and sanity!
I’ve done all the hard work for you so all you need to do is follow the daily and weekly game plan and watch the cooking demos for EVERY.SINGLE.MEAL you will make for 3 months. By doing so you’ll be able to serve all the meals you see here plus 130+ effortlessly!
I’ve also heard from so many parents that an unexpected benefit to following this program for their baby was that it encouraged their older fussy eater(s) to start trying new foods and expanding their food choices.
And be sure to follow me on Instagram for more helpful videos!

Best Finger Foods for Baby
Ingredients
Choose (1-3 items per meal or snack)
- 1/2 scrambled egg
- 1 salmon strip
- 1 chicken strip
- 1 meatball
- 3 tablespoons cooked beans, smashed
- 1 tofu strip
- 1 sweet potato strip
- 1 banana strip
- 1 avocado wedge
- 1 zucchini strip
- 1 broccoli floret
- 1 toast
- 1 mango strip
- 3 tablespoons berries, flattened
- 1/4 cup baby oatmeal
Instructions
- cook and cut the finger foods so they are the appropriate shape and texture according to age as described here.


What’s. Great website for info! How do I introduce beef(not just minced beef), what cuts are the best? I’m truly struggling tomfond the correct order in which to give baby the food. We’ve already done may veggies. And I also have an isssue with carrot. I’ve steamed them, grilled them, boiled and baked them yet they still
Don’t mush between my fingers. Anyway, is there a guide you’d suggest for weekly meal plans??? Thanks 🙏❤️
Hi Mia! I’m so glad you’re here! With beef, it really depends on your baby’s age. For younger babies, you can offer larger, soft strips (like a well-cooked steak cut into finger-length pieces) so they can suck and gnaw—they’ll still get plenty of iron even if they’re not eating much of it. As they get more comfortable, slow-cooked cuts like chuck roast, brisket, or short ribs work really well since they become super tender and easy to shred and mix into foods. As for carrots, search for “Carrots for babies” on my site and you’ll find all the different ways you can cook them. I personally love to steam roast. As for weekly meal plan I do have a 3 month meal plan program that walks you through exactly what and how to serve baby foods while introducing the top allergens, iron-rich foods, and 100+ new foods in a doable way through daily videos (you’ll see how I cook beef, carrots, etc. as well as my baby eating everything). You can find more info here if this sounds like something that will support you!
hi is my 1yr old required to finish everyting thats put in front of her? she tends to sample as opposed to consume all her food and i worry about lack of satiety.
Not at all! It is your baby’s job to decide what and how much to eat so fully allow her to listen to her hunger and fullness cues.