This post may contain affiliate links. Please see our disclosure policy for more details.
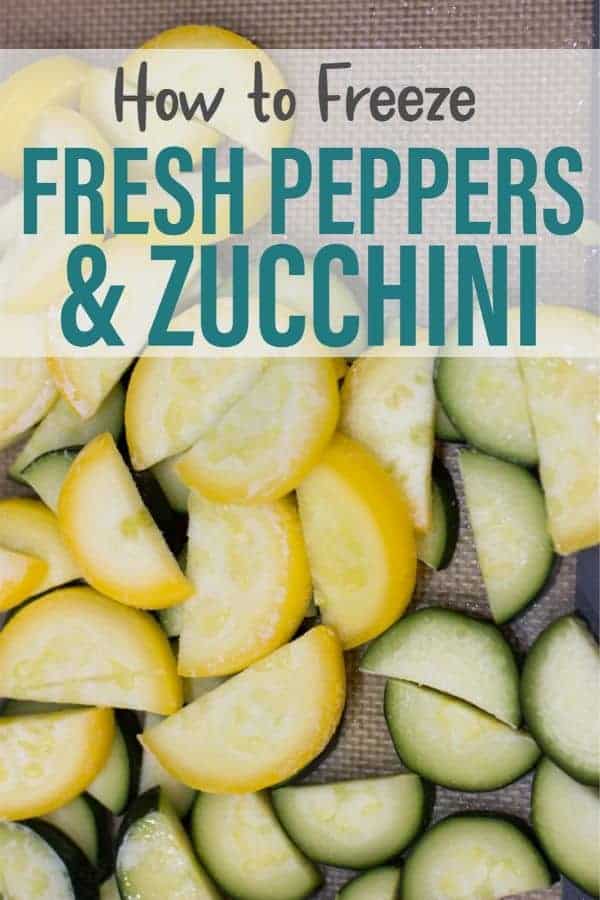
Do you have an abundance of fresh bell peppers or zucchini? Here are step by step instructions with pictures to show you how to freeze them so they retain their flavor, texture, and nutrients!
My Motivation for Freezing Vegetables
Perhaps you have a thriving garden (teach me your ways!) or you like to purchase in season produce in bulk when they’re the cheapest. Or perhaps you’re limiting your grocery visits in light of what’s happening in the world right now.
Yup. That’s me!
I’ve actually never frozen fresh vegetables before this because there really was no need to. If I needed to stock up my freezer, then I simply purchased already frozen ones.
However, the frozen produce seem to be the hottest commodity right now (along with toilet paper and flour), so I’ve decided to roll up my sleeves and get to work.
We’re also trying to limit our grocery runs to once a month. And Costco has been working out really well for us. Besides the fact that you can purchase in bulk and it’s more cost-effective, I absolutely love that most of the products come in outer packaging, including the vegetables.
Since there’s no way we can finish 5 pounds of zucchini and bell peppers before they spoil, I’ve turned to freezing as the answer to ensuring we will have veggies to last us for a month.
The Benefits
Freezing is a great way to preserve fresh produce. Although you lose some of the crunch, this allows for quick, healthy, and nutritious meals at ANY time.
Here are some specific benefits:
- Prevents the growth of microorganisms that can cause food spoilage and foodborne illness.
- Preserves nutrients, flavor, and texture: it’s best to freeze sooner rather than later as produce start to lose all three over time.
- Slows down the enzyme activity, which can affect food quality, but do keep in mind that it doesn’t stop them. You don’t have to worry about this with meats, seafood, or fruits (thanks to its high acid content). But most vegetables contain low acid and require brief, partial cooking (blanching) to prevent deterioration.
Fresh vs. Frozen
Which ones are more nutritious? There are so many factors involved in answering this question, but one of the most important ones is time. Fruits and vegetables contain the most nutrients when they’re fully ripe.
Fresh:
- Oftentimes, produce is picked early so that it arrives at the store overripe. This means less nutrients compared to those that are picked at the peak of ripeness.
- They’re often transported great distances after harvest, which means more nutrient loss. This is why purchasing from your local farmer’s market, if able, is the best option!
- A helpful tip I learned is to find out when your local stores get their fresh shipment and restock. That is the best time to go and replenish your produce.
Frozen
- Unlike fresh produce, they are picked at the peak of ripeness and quickly frozen. However, some nutrients, like the water-soluble vitamins, are lost in the blanching process.
- Convenient, affordable, nutritious, versatile, and it cuts down food waste.
- They’re not inferior to fresh produce. In fact, studies show that frozen produce are just as rich in nutrients as fresh (here’s one of the studies)
So let’s change this to say Fresh and Frozen (and canned). They don’t need to be stacked up against each other as they all have a place in helping us meet our goal of eating more fruits and vegetables.
What we know for certain is that nutrient retention is so highly variable, and the best thing we can do is to enjoy a wide variety of foods!
Blanching
To blanch or not to blanch? That’s what I spent the majority of my time researching as I prepared to dive into this unknown territory of freezing fresh vegetables.
Fresh veggies contain chemical compounds called enzymes, which over time cause the loss of nutrients, color, flavor, and texture. And to stop this process, the experts recommend blanching before freezing.
Blanching is a cooking technique that involves briefly submerging food in a pot of boiling water and then plunging into a a bowl of ice water to quickly stop the cooking process.
Here’s a helpful chart on blanching times for different vegetables.
How to Freeze Zucchini – Step by step instructions
The first vegetable I tried my hand at freezing was zucchini. Here are the exact steps I followed:
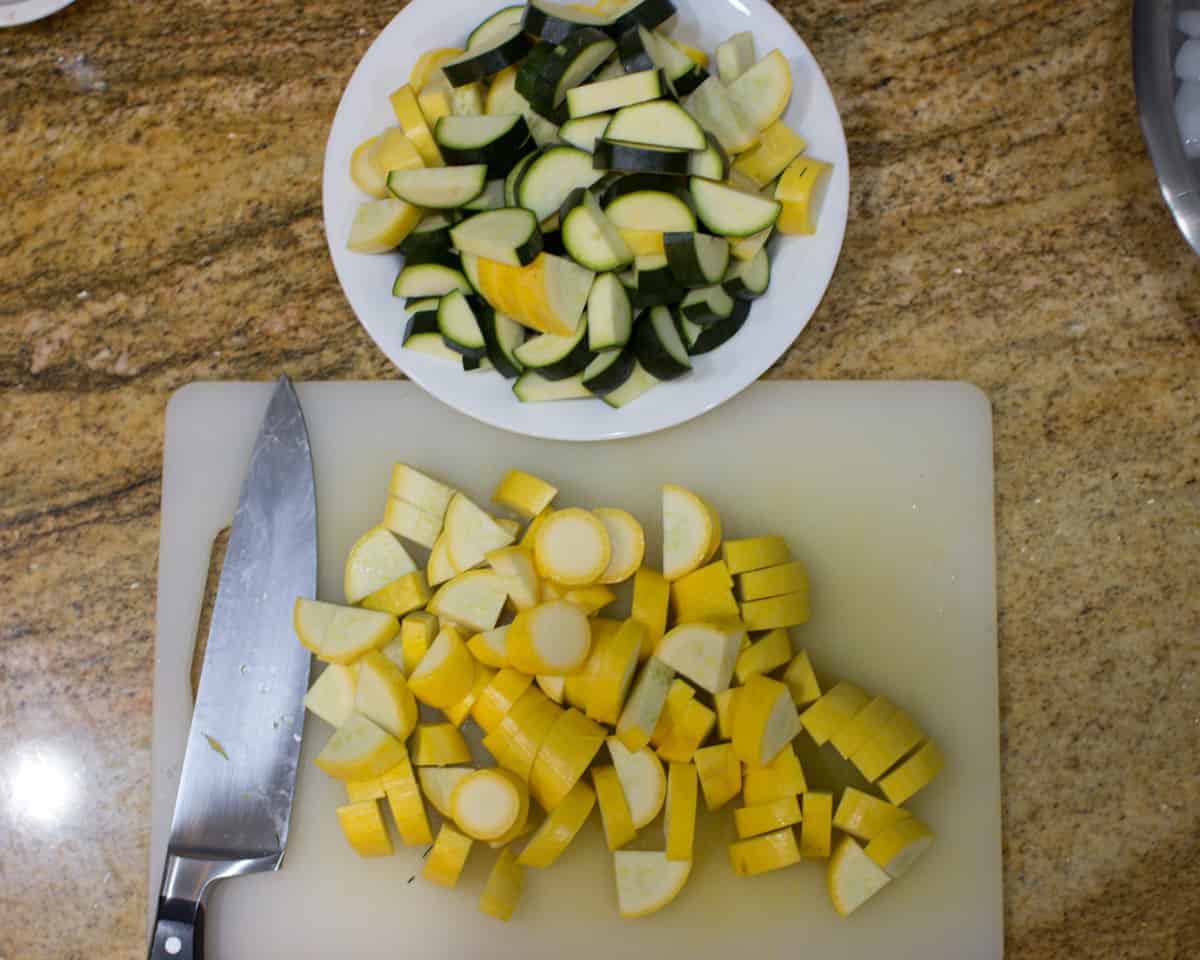
1. Wash and dry your vegetable. Cut to desired size and set aside.
2. Fill a large pot with water and bring to a boil. Also have a large bowl filled with water and ice.
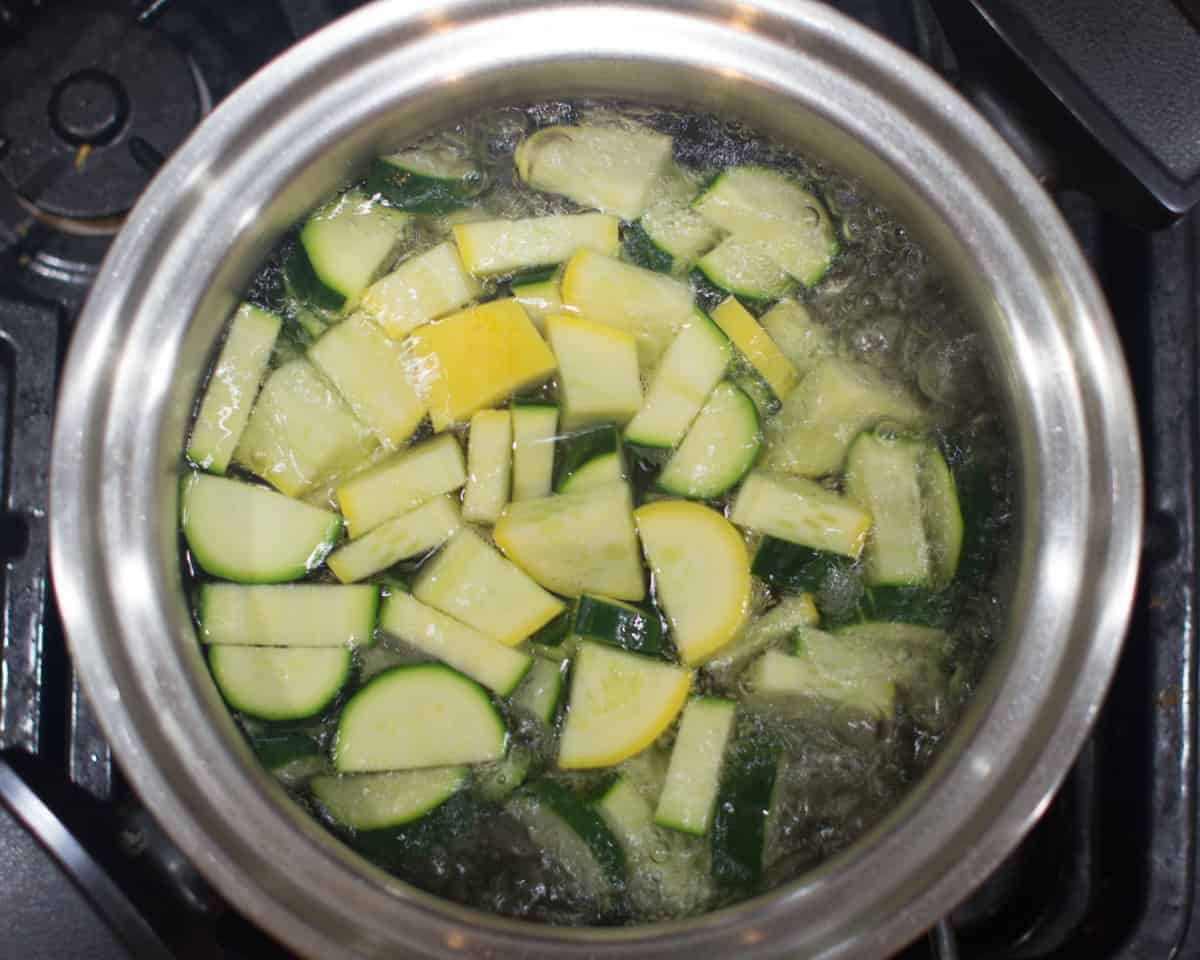
3. Once water comes to a boil, add the veggies for 1-2 minutes. Some may need to boil for longer. Don’t add too much at once as it will over cool the water. The blanching time starts when the water returns to a boil after adding the veggies. If it takes more than a minute for the water to return to boiling, add less at a time.
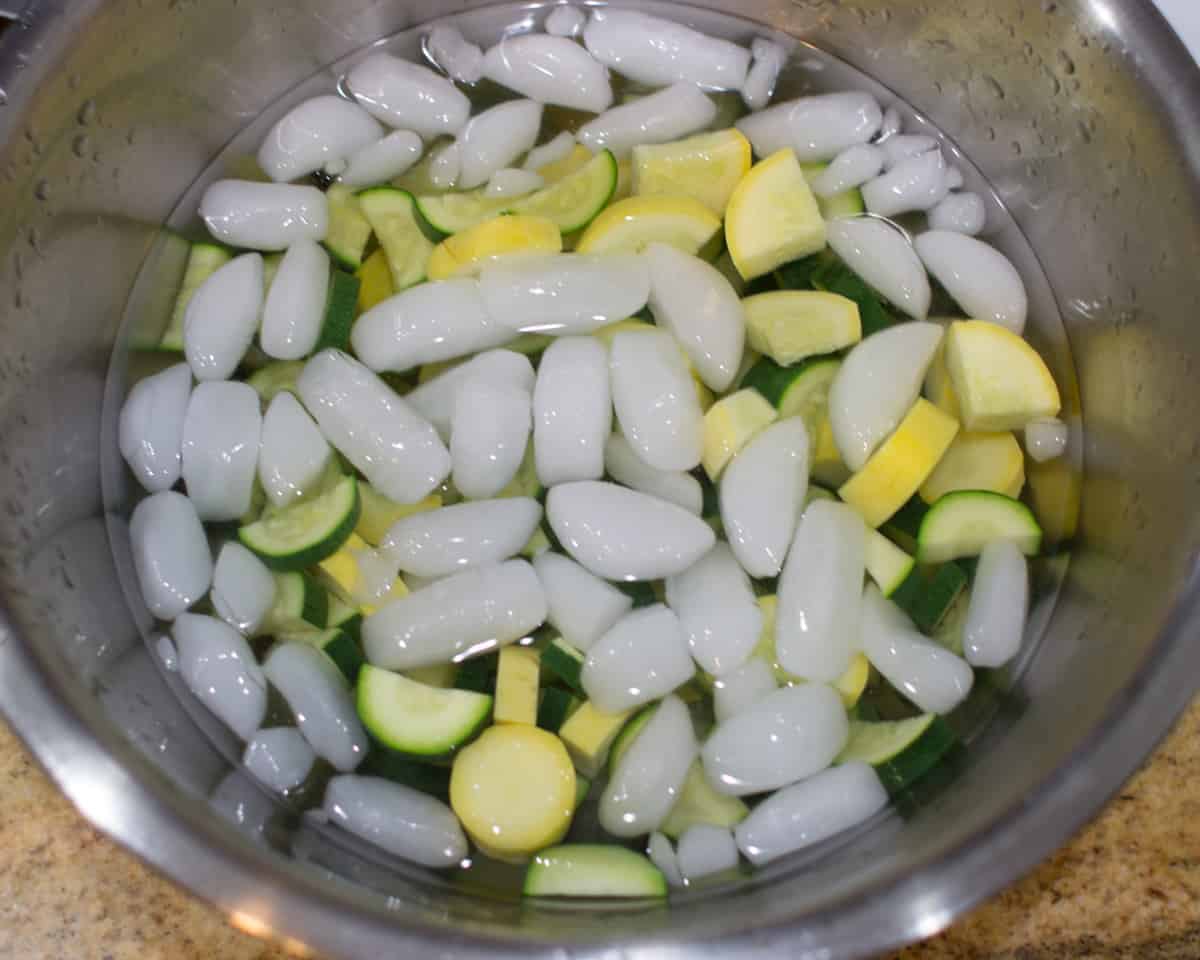
4. Immediately transfer to the ice bath using a slotted spoon to stop the cooking process.
5. Once cooled, dry the veggies.
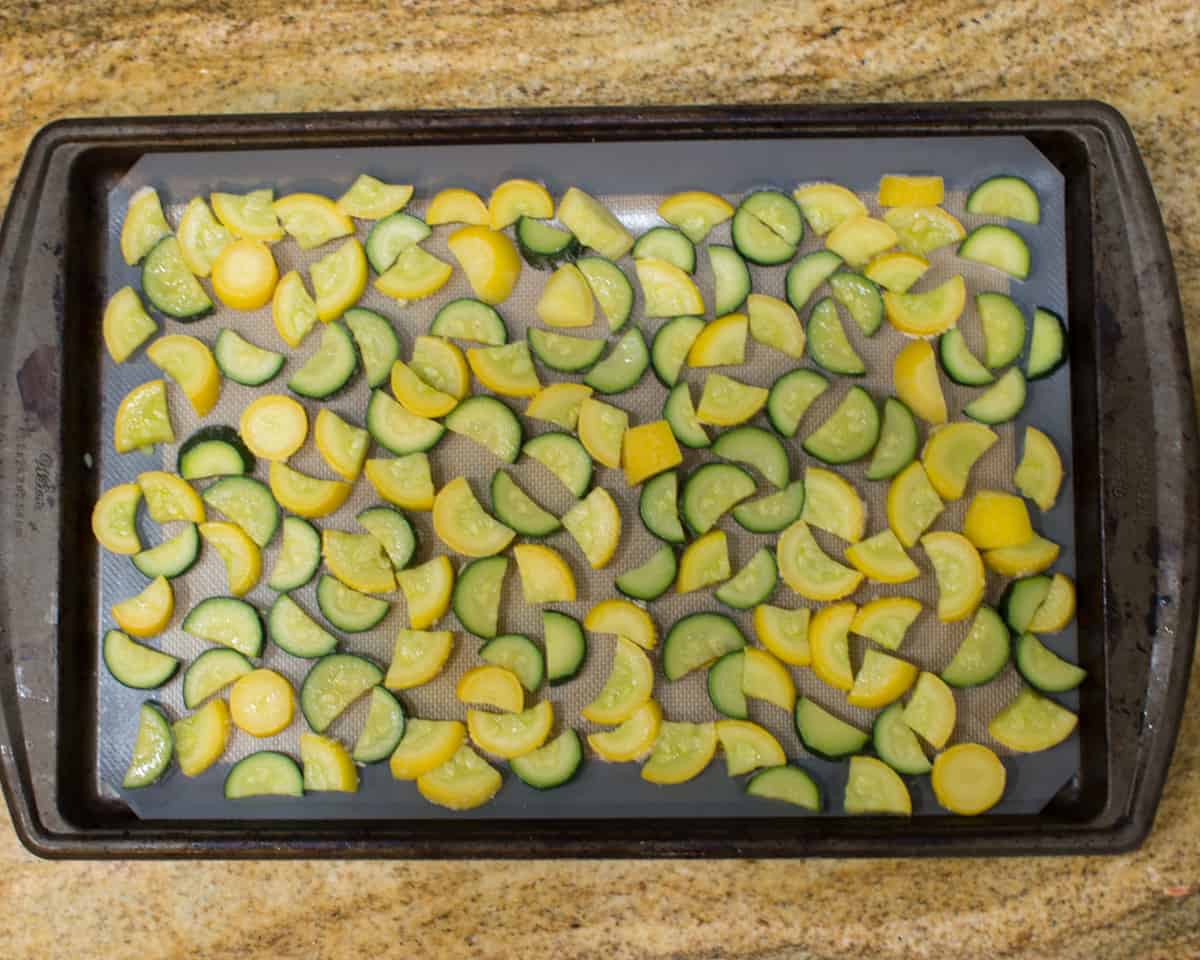
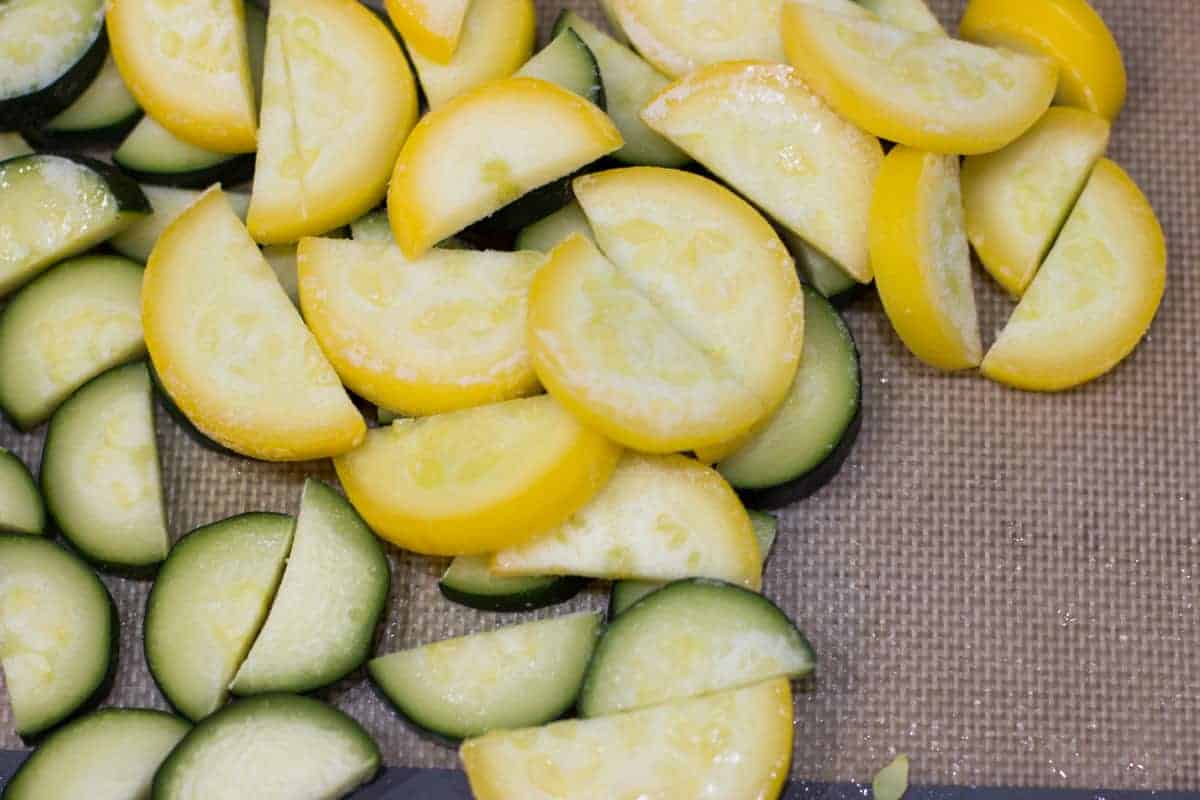
6. Spread in a single layer on a large lined baking sheet to prevent the veggies from sticking to each other and the pan (I had to learn this the hard way). I like to use a silicone baking mat or parchment paper. Then give the veggies another pat with a towel. This will help limit the amount of ice crystals that form.
7. Place in the freezer for several hours until solid. They should be hard and separate easily from each other.
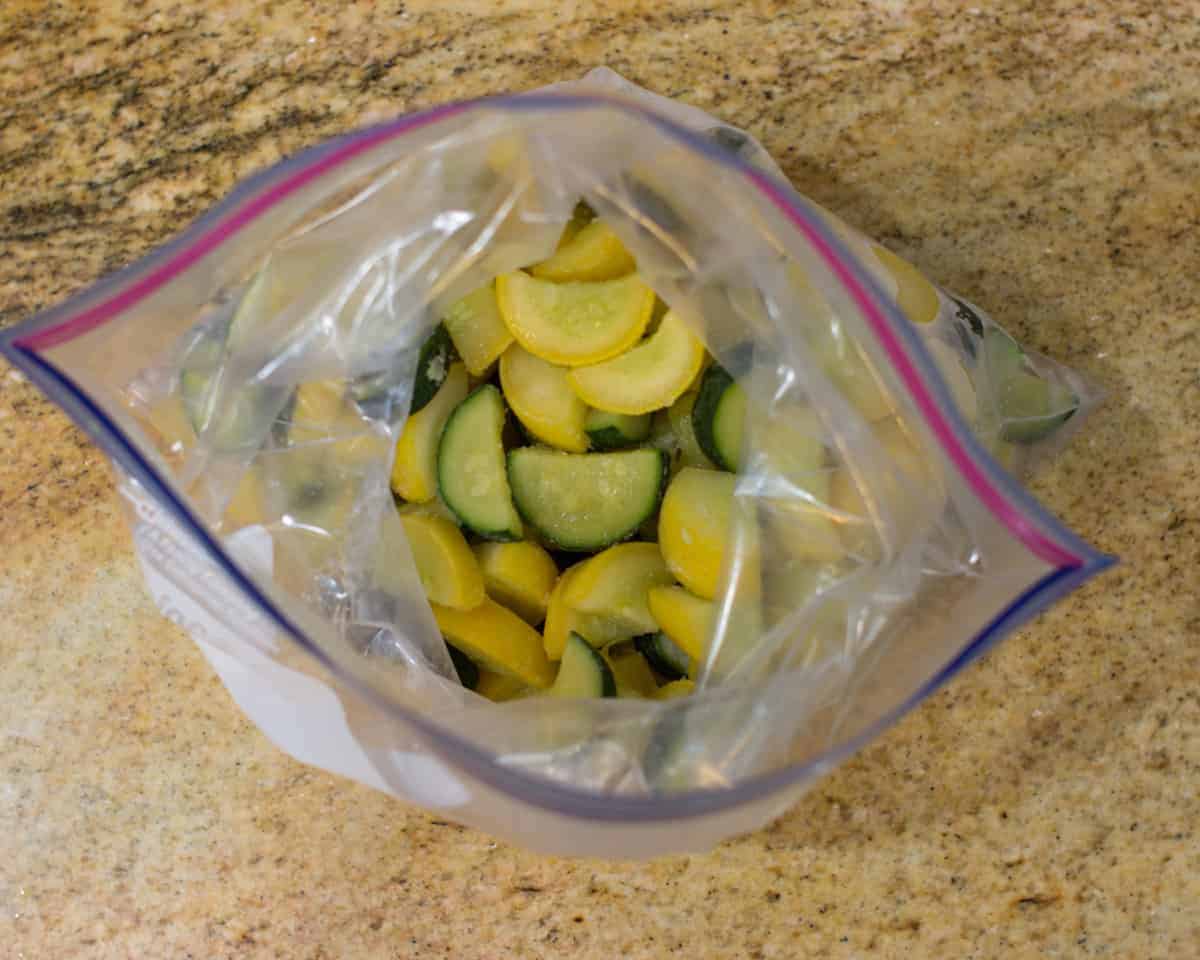
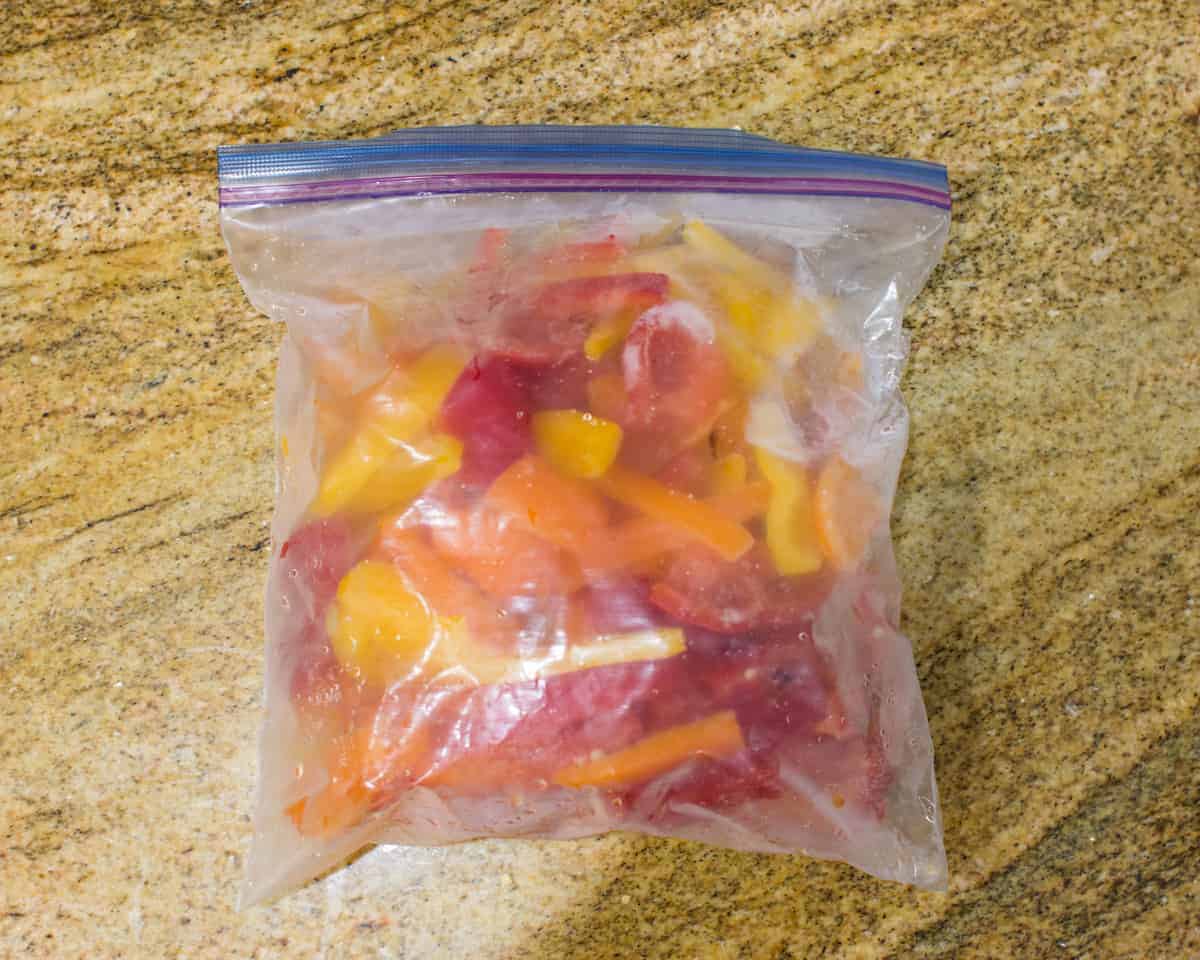
8. Transfer to a labeled freezer-safe bag(s). Be sure to remove as much excess air as possible.
My Thoughts
Simple they said. Won’t take that long they said. Granted this is only the beginning of becoming the vegetable freezing queen, but I found this process to be super tedious.
I’m sure the more I do it, the more efficient I’ll become, but let me tell ya – This mama was exhausted after freezing 6 zucchini!
So then I wondered how it would be if I didn’t blanch. Thus, I froze a couple of zucchini without all the extra steps – I went from step 1 to step 6 (listed above).
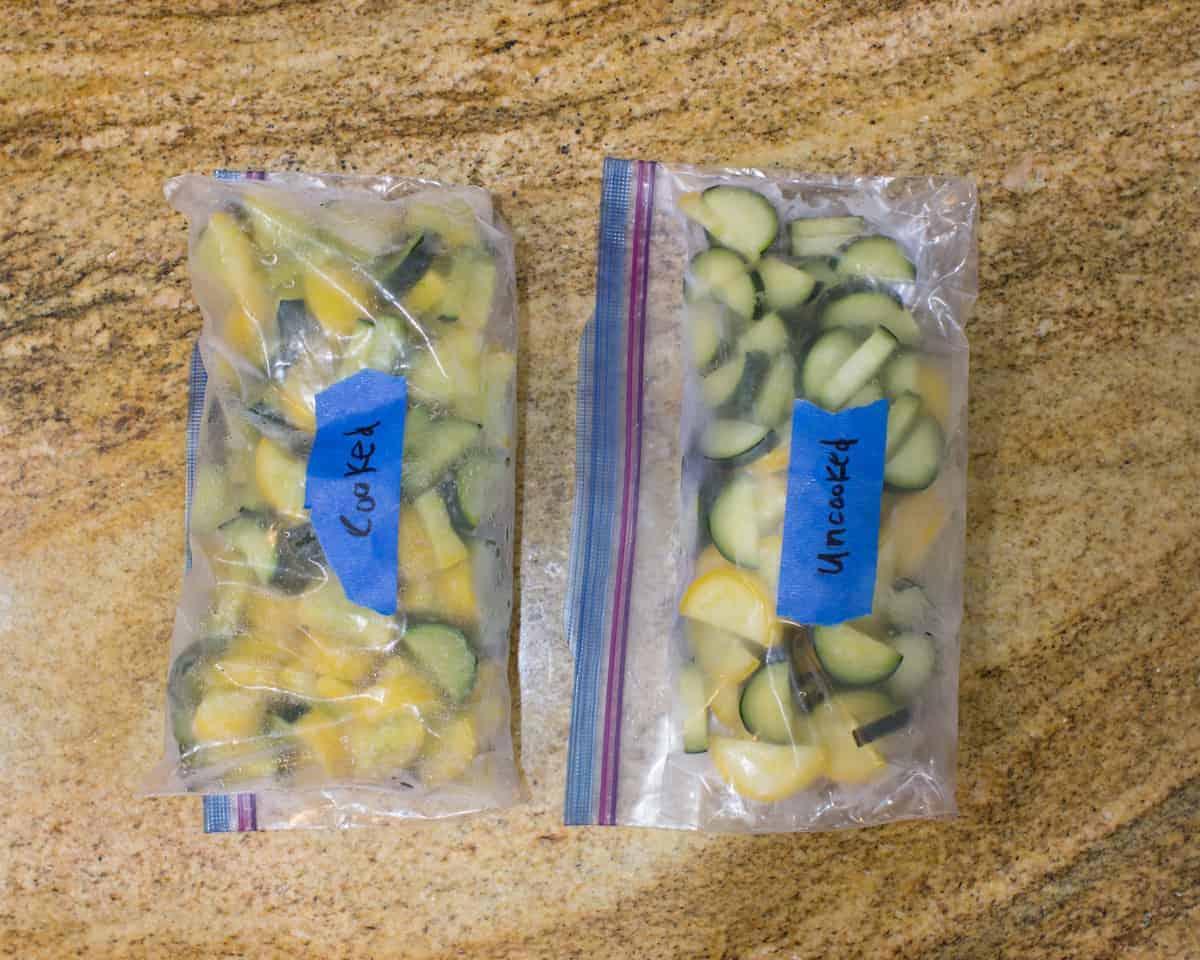
Yup. Saved me a lot of time. But how did they turn out?
Just fine! I do think if I were to freeze them for a prolonged amount of time, say several months, it might’ve made a big difference.
But since I’m just freezing some to limit my grocery visits to once a month, I think skipping the blanching part will work just fine! They weren’t mushy or discolored.
How to Freeze Fresh Bell Peppers
You know what other vegetable turned out well without blanching? Bell peppers! I know some would argue that you must blanch, but I’m team no-blanch all the way with this one.
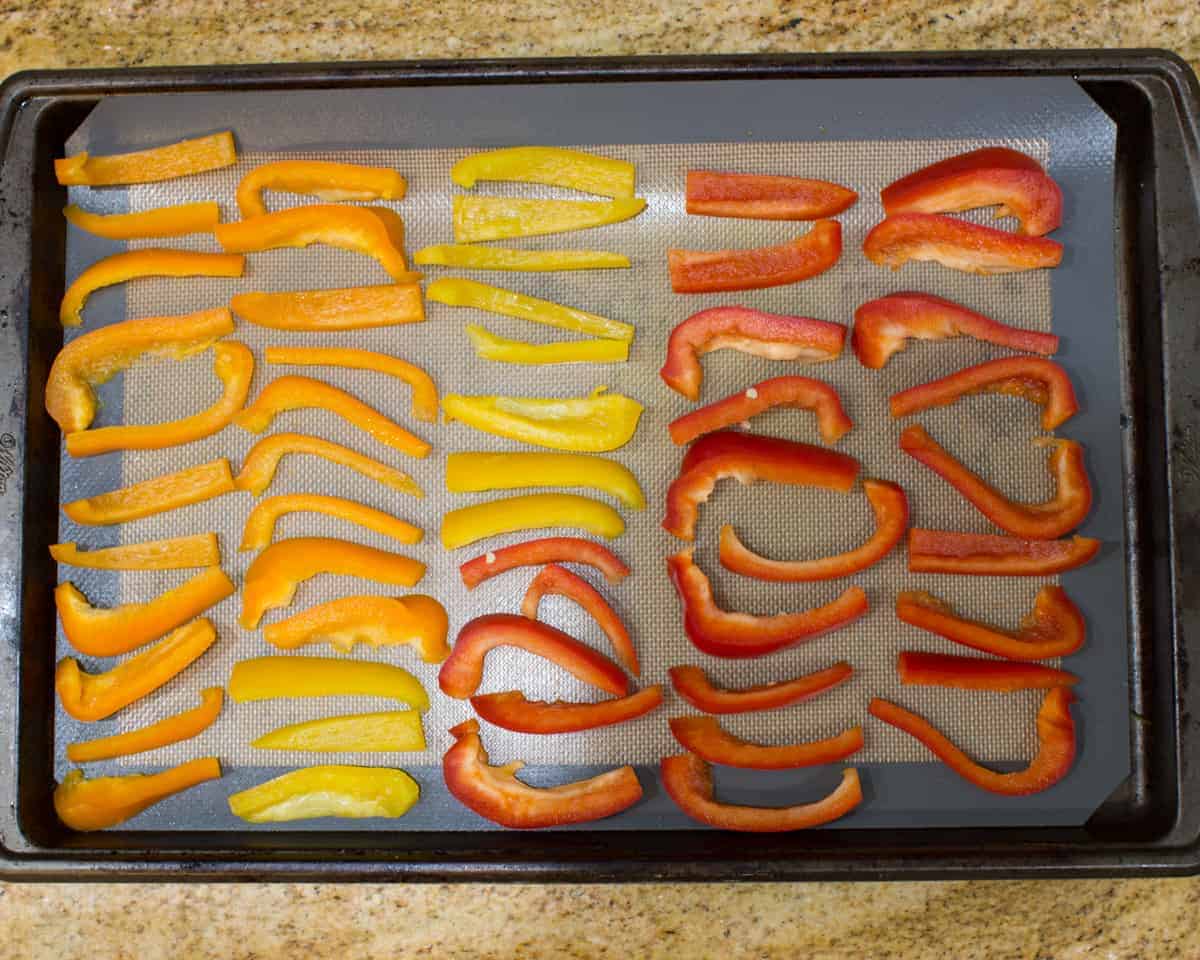
Slice and place in the freezer for several hours.
How to freeze baby spinach
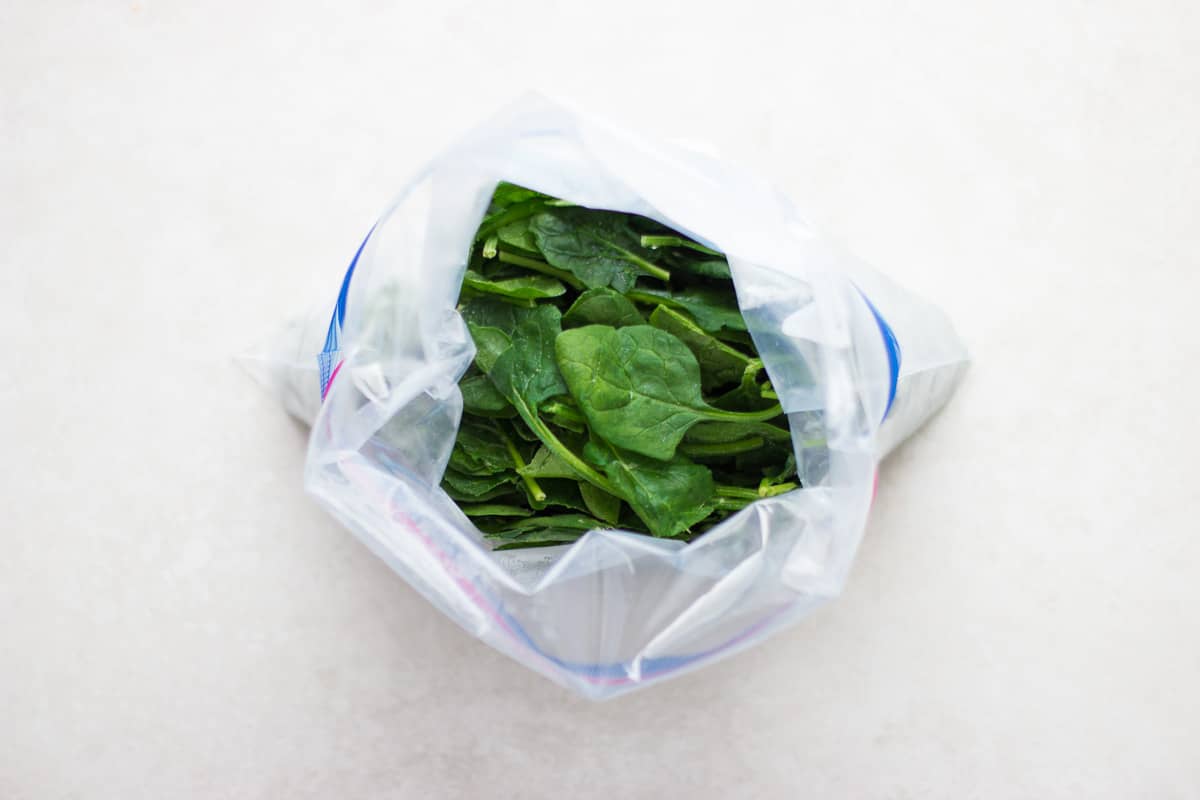
I normally grab a big tub of spinach at Costco. I love how affordable it is, but it also puts pressure on me to finish it before it wilts. Until I discovered that it freezes beautifully!
There’s no need to blanch for this one either! Simply wash and dry completely. Then place in a freezer-safe bag, squeeze out as much air as possible, and stick it in the freezer!
Throw into smoothies, pancakes, muffins, pasta, soups, casseroles…endless possibilities!
How to freeze fresh fruits
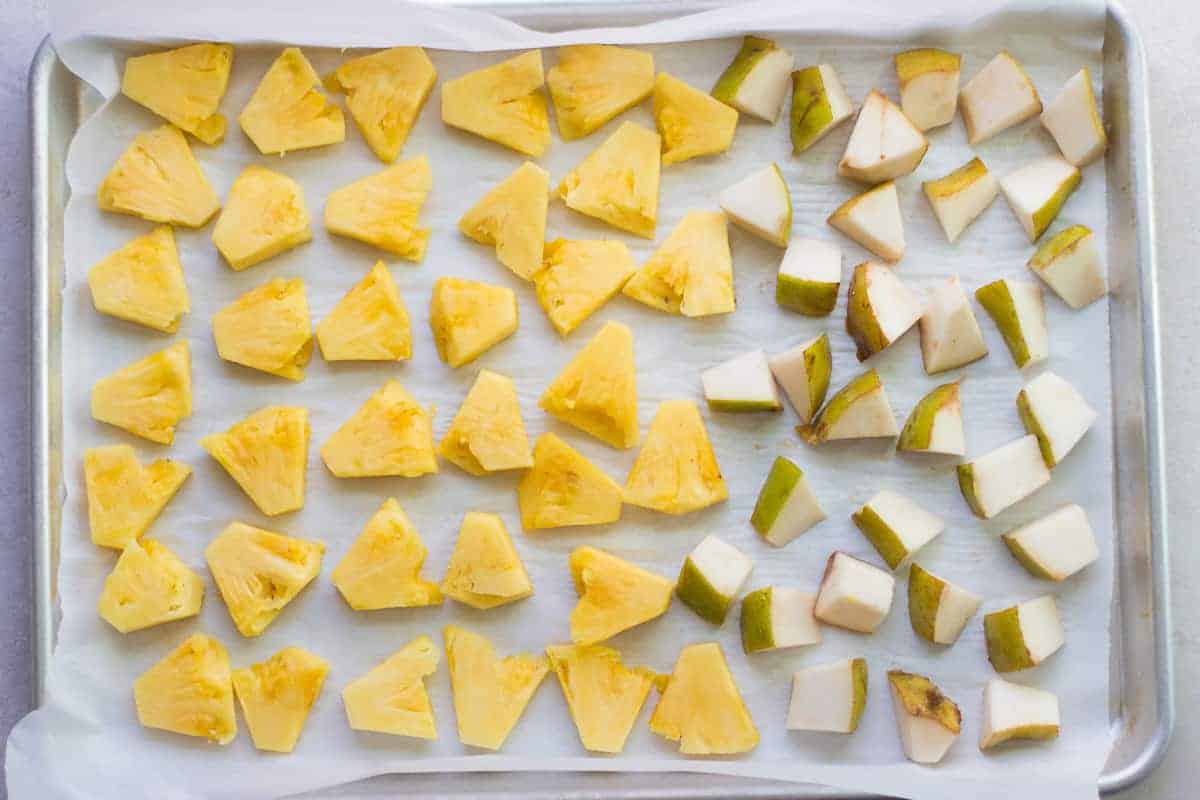
I know we’re focusing on vegetables, but I wanted to share that fresh fruits also freeze so well! It’s a great way to save those super ripe fruits (ahem hello banana!).
- First wash and dry the fruits. Make sure it’s fully dry otherwise it will develop freezer burn pretty quickly.
- Core and chop the fruits into bite-sized pieces
- Place in a single layer on a lined baking sheet. Make sure they’re not overlapping to ensure they will freeze individually. I know it’s an extra step but it’s well worth the effort! You will easily be able to pull out exactly how much you need.
- Freeze until the fruits are solid, takes about 3-4 hours.
- Transfer to a freezer-safe bag, removing as much air as possible.
- Will keep for at least 3 months
I especially love to add these frozen fruits o our smoothies or school lunch box! Simply add straight from the freezer. They will help keep food cold and will thaw by lunchtime.
Additional Resources
- For tips on how to store the vegetables (and other foods) in the freezer properly, check out how to safely store leftovers!
- Tips on how to cook vegetables vegetables for babies and toddlers. You’ll find different cooking methods, general cooking times, and flavoring suggestions!
- Here are some easy ways to add vegetables to meals for babies 6 months and up
- If you’d like to see what my quick and easy pantry meals my family has been enjoying lately, follow along here! Bookmark the page as I will continue to update ;).


Love this! Question- how do you cook with your frozen zucchini and peppers? Can you just throw them onto a sheet pan and roast from frozen?
Yes! That’s what I do! I’ve found thawing makes them too mushy once cooked.
Hello! When freezing baby spinach in a bag like this, do the leaves stick together? Or do they separate easily enough that you can take just a portion out of the bag when needed, without having to use it all? And how will the spinach keep in the freezer?
You actually can separate/break them off easily! Good for up to 3 months.
Oh my gosh I can’t thank you enough for this post! I’ve been going down a blanching rabbit hole myself and I love how you laid out all the information in one place and did an experiment to see if blanching was really necessary. Thank you!!!!!
You’re welcome! I’m new to all this as well so I’ll continue updating as I venture onto trying other veggies. But definitely with zucchini and bell peppers, I’ve found that it’s ok not to blanch..Now I haven’t stored it for more than a month, but I really am doing this so we can stretch getting groceries to once a month ;).