This post may contain affiliate links. Please see our disclosure policy for more details.
With just 4 days until Christmas, I hope you all have your presents wrapped up and ready to go! If not, perhaps you are scrambling for some last minute gift ideas. How about some kitchen appliances and gadgets? Look no further because The Recipe Reduxers have got you covered ;). This month’s theme is to feature our favorite kitchen appliance/gadget and a delicious recipe to go with it.
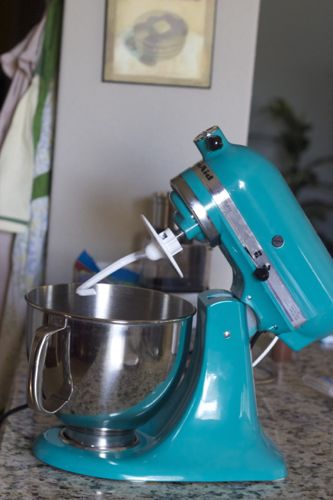
Here’s an appliance that I CANNOT live without – my KitchenAid stand mixer. I included it in my wedding registry just in case someone wanted to become my best friend and buy it for me, and when I saw that it was “fulfilled,” I couldn’t have been more thrilled! I thought it was just for baking, but boy was I naive. It has endless applications, such as making pasta, grinding meat, kneading dough, making mashed potatoes…
Right now, I want to share with you one of my childhood favorites – red bean paste steamed buns, known as 찜빵 (pronounced “Jjimbbang”). During the brutally cold winter months in Korea, these warm, white as snow, balls of goodness take center stage out in the streets. The dough is soft, chewy, light, and the filling is sweet, smooth, and rich. You can easily purchase pre-made ones in the freezer section of the Asian grocery store, but where’s the fun in that? Personally, I’m more of a get my hands dirty kind of a gal ;).
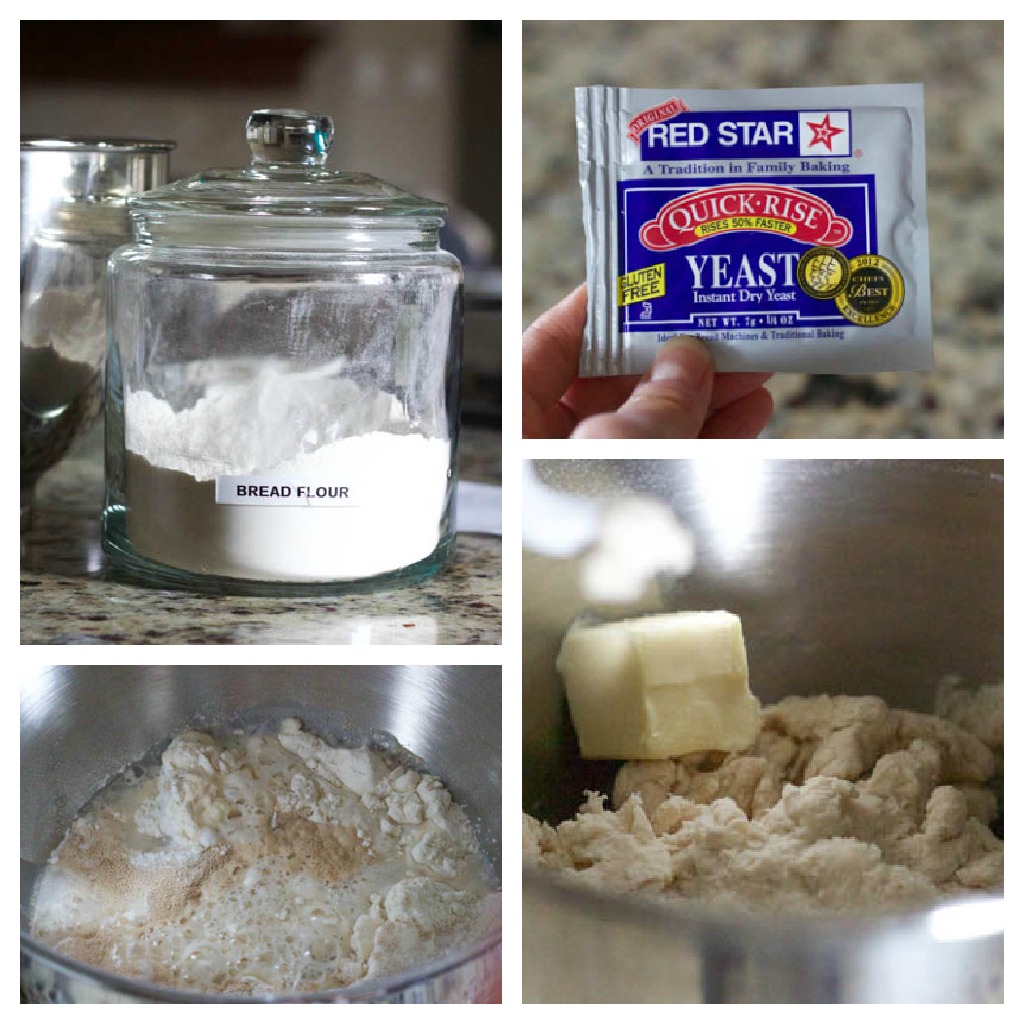
When I set out to make this at home from scratch, I didn’t realize it was going to be so difficult. After experimenting with whole wheat flour, all purpose flour, self-rising flour, bread flour, the last had the most similar consistency and texture to what I’m used to eating.
More than 10 batches of these buns made and consuming at least 2 of them everyday this past week, let’s just say that Tim and I have had our share of them. I can taste them in my sleep. Now it’s your turn ;). Although the directions may seem difficult, they are fairly easy to make and don’t require many ingredients.
Red Bean Paste Steamed Buns
Makes 11 buns
Ingredients
- 3 cups bread flour
- 1 cup warm water
- 3 Tbs granulated sugar
- 1 packet of instant dry yeast
- 3/4 tsp baking powder
- 3/4 tsp salt
- 1 Tbs butter, softened
- 1 can red bean paste (ajuki bean paste), widely available at Asian groceries
Directions
- Combine all the ingredients except butter. Mix using a stand or hand held mixer. Add butter. Beat for 10 minutes.
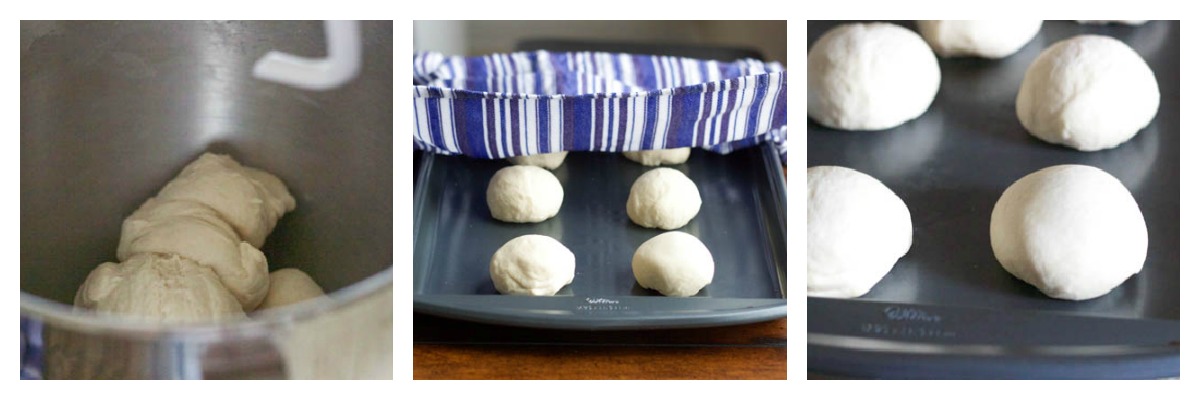
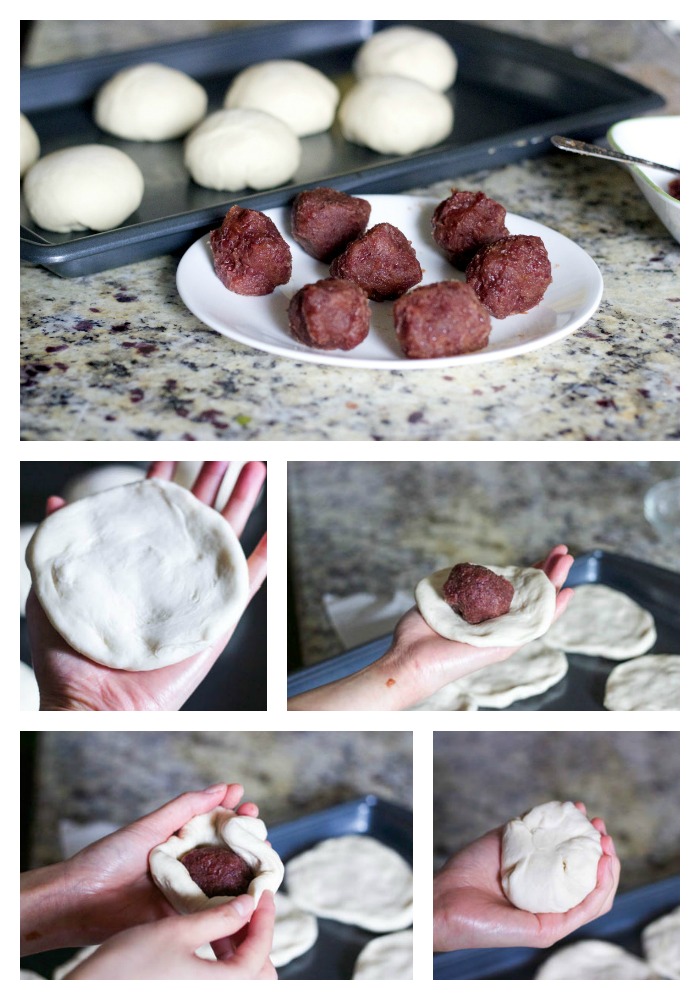
- Divide the dough into 11 balls. Cover using a damp towel. Set aside for 10 minutes.
- Meanwhile, roll 11 balls ( 1.5 Tbs/ball) of red bean paste.
- Roll out the dough and place the ball of red bean paste in the center. Wrap the dough around, making sure the paste doesn’t come out.
- Cut 11 square pieces of parchment paper. Place the dough on top with the seam facing downward.
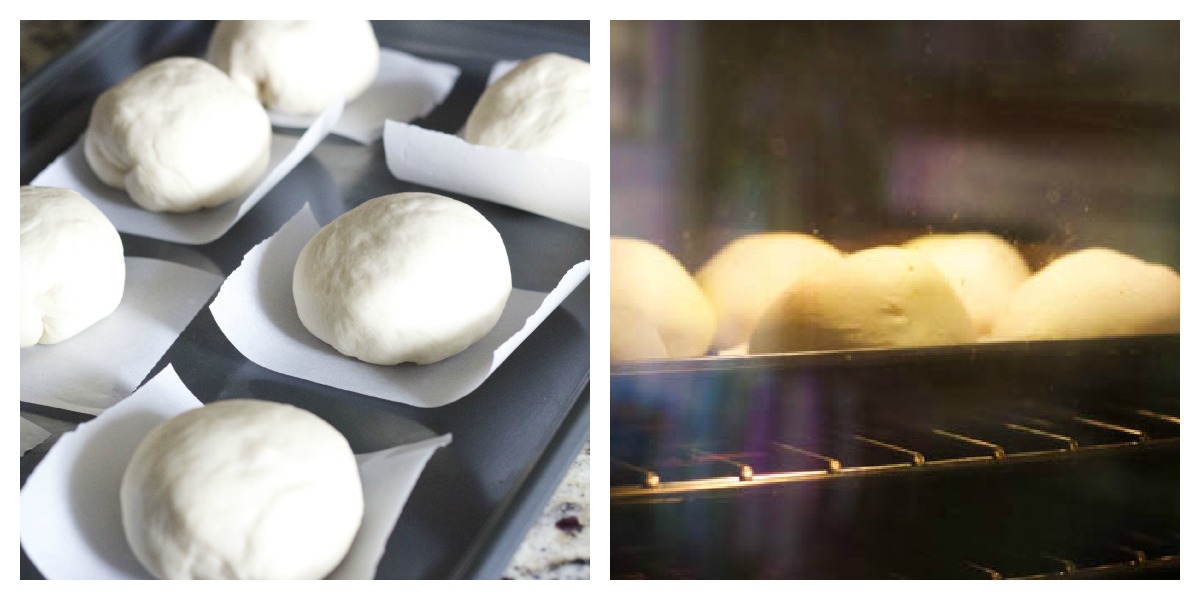
- Heat the oven to 200F. Once the temp is reached, turn it off immediately and place the dough in the oven to proof. Turn the oven light on and leave in the oven for 30 min.
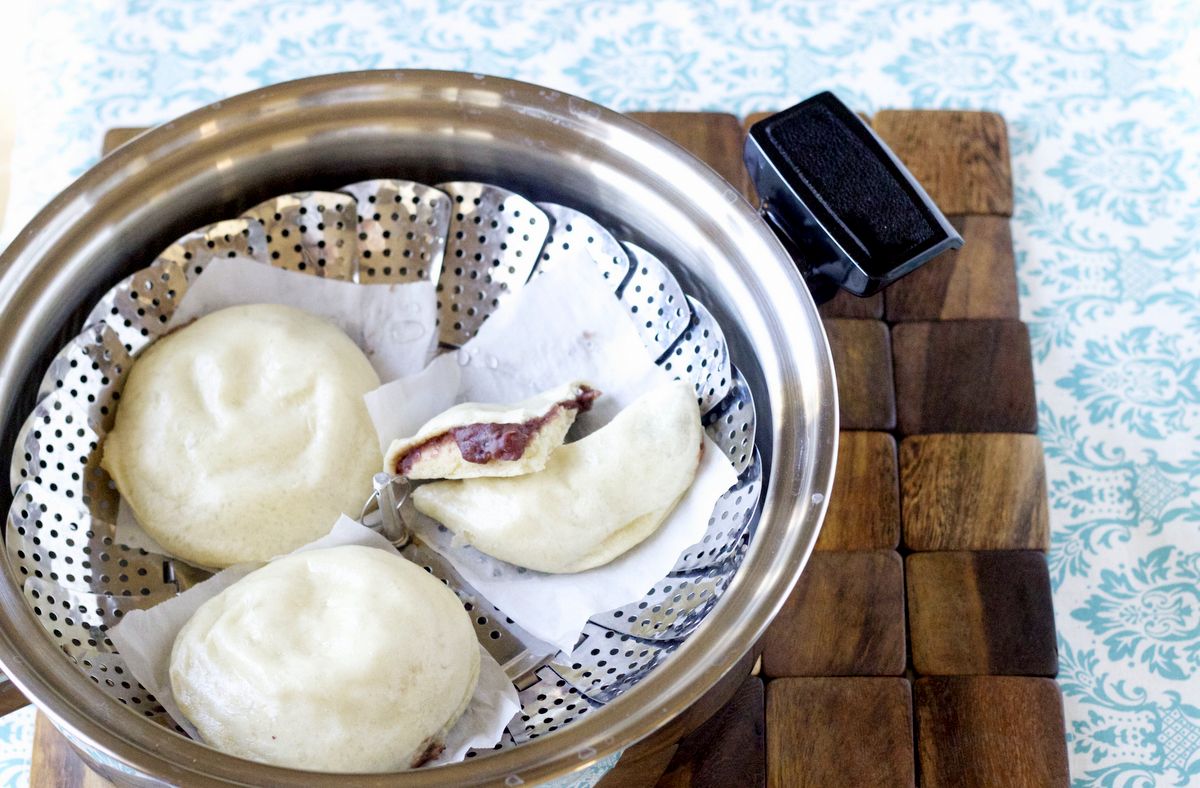
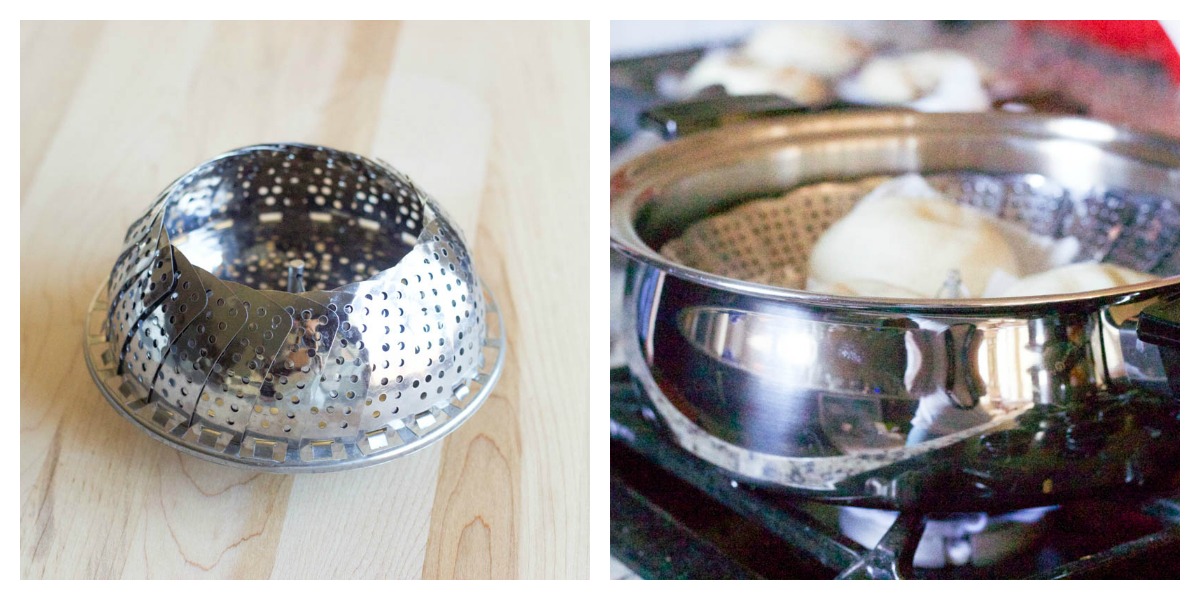
- In a wide pot, pour water and place a steaming rack (be sure the water level is below the rack). Bring the water to a rolling boil then lower the heat to med-high. Place the buns, close the lid, and steam for approx 10-15 min.
Hope these pictures help you better understand the directions. Take note that these balls of dough are a lot bigger than what yours will look like. I didn’t realize that the they would rise so ginormously as you can see below. I remember peeking in the oven and yelling “stop rising, stop rising!” Therefore, as a result, I changed the recipe from 7 buns to 11.
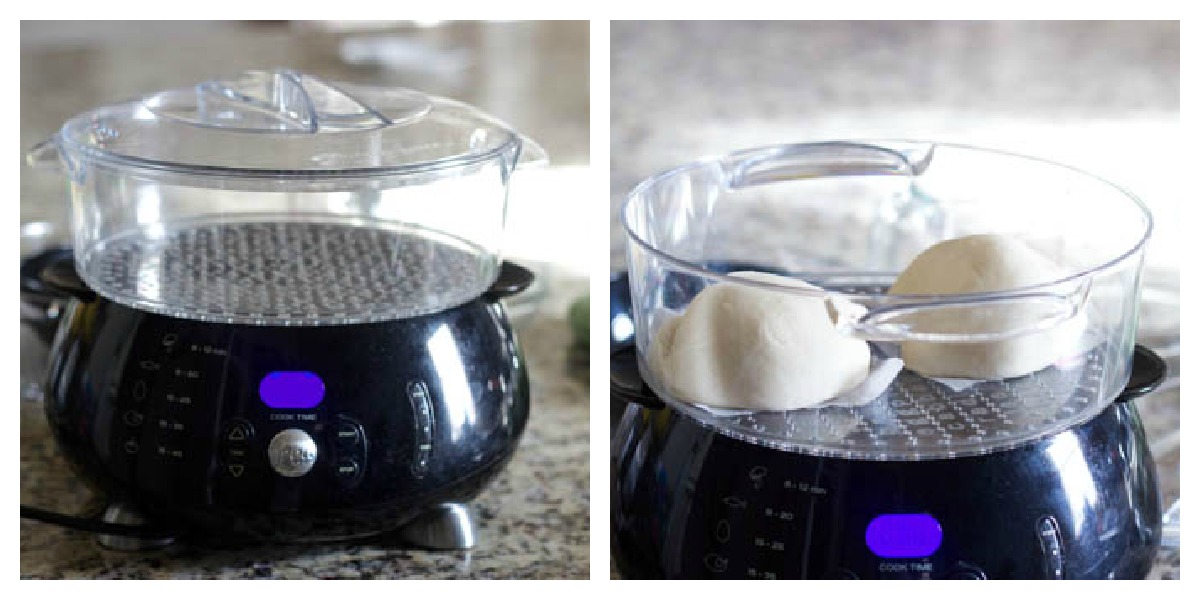
This is another one of my favorite, must-have kitchen appliances – electric steamer. I purchased mine from Kohl’s. While I really like using this for steaming food at lightning speeds, one drawback is that I can’t control the intensity at which the water boils (it gets extremely hot). Therefore, it wasn’t suitable for this recipe as I felt the buns became too soft for my liking.
So what’s the solution? Steaming rack! It’s perfect bc you can control how much you want the water to boil. It’s also super portable, doesn’t take up much space, and isn’t expensive.

They are so so good! If it’s colder where you live, grab one as soon as it’s done, and eat it outside ;). For some reason, they taste so much better this way. For those of you who live in the warmer parts, no worries! They’ll still taste good. I live in Texas. I should know. If you don’t eat them immediately (for reasons I would not understand) then microwave for about 30 sec before devouring. Hope you give this recipe a try and if you do, please let me know how they turn out!
So I gave you 3 gift ideas. Need more inspiration? Click on the link below and see what other reduxers recommend!
I’m going to my parents’ house for about a week, and I cannot wait to celebrate Christmas and bring in the New Year with all the beautiful people God has blessed me with. To all of you traveling, I wish you safe travels! I’ll try to post whenever I can..but no guarantees ;). Until then, be merry!!


Did you mean 1/8 stick of butter (1 Tbsp)?
Oh my goodness! Thank you for catching that!! Yes, you’ll need 1 Tbsp.
Going to try this now. So glad I found your recipe! I have been experimenting with Korean cooking (as I hope to move soon to teach English for a few years) and this was on my list! Now off to the kitchen! Can’t wait to try them! Thank you!
Oh yay! I can’t wait for you to try it. Let me know how it turns out! 😉 If you have any questions along the way, please let me know! I’ll do my best to assist you.
First off, I adore the color of your KitchenAid mixer – I use mine almost daily, too! Secondly, I always look forward to your recipe posts especially when they are some of your Korean specialties. I had these in Japan years ago and they were so unique and so good.
I’ve read about these before! They look and sound yummy! Merry Christmas Eve, Min! 🙂 xoxo
One of my favorites!! Just had these a few months ago in Japan. Can’t wait to try this recipe!! 🙂
Oh my!! I want these!! do you think you could use GF flour??
Hmm…that’s one type of flour I didn’t experiment with. I’m thinking no bc whenever I tried substituting with GF products, the recipe just didn’t turn out the same. I liked the bread flour out of all the others bc it develops a lot of gluten and made the dough really chewy. I really should experiment more with GF flour. My classmate has celiac disease, and he bakes everything from scratch! I need to have a talk with him ;).
We are honored to behold the recipe you ‘slaved’ over for so long! (: And i simply cant wait to try this recipe with my girls! Last week, we just move away from Chicago (home to the best Chinatown bakeries) to the country…right in the middle of soybean fields in southern Illinois! My girls and i will miss the bakeries…but at least we can still have red bean buns thanks to you!